Certificates Support

In the upcoming 5.5 version of Cerbero Suite and the 2.5 version of Cerbero Engine we support certificate formats. While Cerbero Suite already lets you inspect certificates inside binaries, now it can load them directly from disk and also lets you inspect each individual ASN1 object.

Both DER and PEM encodings for certificates are supported.

You can inspect all types of certificates, including X509, PKCS7 and PKCS12.

We have also exposed the code to our Python SDK in order to make the programmatic parsing of certificates a simple task.

For example, enumerating every ASN1 object in a certificate takes just a few lines of code:

from Pro.Core import *
from Pro.Certificates import *

def main():
    obj = proCoreContext().currentScanProvider().getObject()
    class Visitor(DERObjectVisitor):
        def Visit(self, obj, oi):
            print(oi.offset, oi.content_size)
            return 0
    v = Visitor()
    obj.VisitObjects(v)

main()

We’ll be fully documenting the Pro.Certificates module this year.

Cerbero Engine Editions

Cerbero Engine already supports various platforms and architectures. Now, it comes in two different editions: Classic and Metal.

While in the Classic edition all UI functions are available, the Metal edition comes without UI dependencies.

The Metal edition is designed to be run in cloud and server environments which may lack a graphical interface.

We took great care in preserving plugin compatibility.

Plugins which import graphical functions are compatible with the Metal edition: all UI functions are available, though they are provided only as stubs. A few graphical methods like msgBox fall back to console I/O.

Providing two editions of Cerbero Engine allows us to offer the perfect fit for organizations which need a powerful and flexible back-end for their services.

Suite 5.4 and Engine 2.4 are out!

Here summarized are the main news of this release of Cerbero Suite 5.4 and Cerbero Engine 2.4.

.NET ReadyToRun Format Support

Thanks to one of our customers who reported it to us we have introduced support for the .NET ReadyToRun format.

We already support NGen generated native images and our support for the ReadyToRun format makes sure that it is not mistaken for an NGen generated image.

Hex Editing Processes on Linux

This release of Cerbero Suite introduces the capability to open processes in the hex editor on Linux. Windows has already supported this feature since the introduction of our hex workspace.

You can read more about the topic in our dedicated post.

We have also exposed our process API in the Core module to Python and documented it.

API Solver Package

We have released our API Solver package on Cerbero Store for all commercial licenses of Cerbero Suite Advanced. This package is especially useful when analyzing shellcode.

You can read more about the topic in our dedicated post.

Common Passwords Package

We moved our built-in password brute-forcers to an external package on Cerbero Store called “Common Passwords”. Cerbero Suite Advanced (both commercial and non-commercial) and Cerbero Engine have access to the package.

You can read more about the topic in our dedicated post.

Silicon Spreadsheet Documentation

We have fully documented our Excel macro emulator and spreadsheet visualization module.

Improved ITSF (CHM) Format Support

We have improved our support for Microsoft’s ITSF (also known as CHM) format and we have exposed the format to our Python SDK.

You can read more about the topic in our dedicated post.

Improved Hex Editor

We made it very easy to select contiguous ASCII, Hex and Base64 strings in the hex editor. This comes very handy when loading embedded files or decoding data.

We have also made other minor improvements and fixed a few bugs.

Common Passwords Package

We moved our built-in password brute-forcers to an external package on Cerbero Store called “Common Passwords”. The upcoming version 5.4 Cerbero Suite Advanced (both commercial and non-commercial) and the version 2.4 of Cerbero Engine will have access to the package.

There are two reasons why we created a standalone package:

1) We wanted to provide the same functionality to Cerbero Engine.

2) We intend to expand on the functionality of this package in the future, so making it easy to update was essential.

To obtain the package just open Cerbero Store and install it from there.

Only the default passwords key provider is enabled by default. Other key providers must be enabled manually.

This is a very practical package if you want to avoid typing usual passwords like “password” or “infected”. These are considered default passwords and just installing the package will have you covered.

Suite 5.3 and Engine 2.3 are out!

We’re happy to announce the release of Cerbero Suite 5.3 and Cerbero Engine 2.3!

The main addition to this release is the introduction of our latest milestone: Cerbero Store.

We have covered Cerbero Store in depth in our previous post.

TL;DR: Cerbero Store modularizes our setup process, so that updates can be blazingly fast and experimental features can be introduced on a rolling basis. The only thing you need to access Cerbero Store is a current license for either Cerbero Suite or Cerbero Engine. Updating packages from Cerbero Store is equally comfortable.

We also moved our native UI for Ghidra plugin and our Windows memory analysis to packages on Cerbero Store.

In the next months we’ll be releasing new features not only in Cerbero Suite and Cerbero Engine, but also as packages on Cerbero Store, so make sure to follow us on our blog, Twitter or LinkedIn to stay up to date with the latest news!

Introducing Cerbero Store

We’re proud to present Cerbero Store which will be released with the upcoming 5.3 version of Cerbero Suite and 2.3 version of Cerbero Engine.

A few months ago we released our package technology to comfortably install plugins in Cerbero Suite and Cerbero Engine. Cerbero Store is what we had planned from the beginning when we started working on packages.

But how comfortable is it really to install a package from Cerbero Store you might ask?

It is really that simple.

We had various reasons to create Cerbero Store. Chief among these reason was the necessity to release faster updates. It didn’t make sense to update the whole application just to update a limited part. Also, our software runs on multiple platforms, which means that each update requires us to create multiple software packages. This problem is solved by Cerbero Store, since all platforms share the same package code.

Another advantage of Cerbero Store is that some components which are used by a minority of users can now be decoupled from the main application. In fact, we moved our Windows memory analysis functionality to a package on Cerbero Store. That way all our software packages are sensibly lighter. For instance, our macOS DMG archive dropped from 72 MBs to 60 MBs just for this reason.

We’ve made the update of packages equally comfortable.

Yet another component we have moved to a package on Cerbero Store is our native UI for Ghidra.

The reason for this is that Ghidra sometimes changes its API between releases and breaks our plugin code. So it happened in the past that we had to update our whole application just to update the plugin for Ghidra. This issue has now been solved by having the plugin for Ghidra as a separate package.

Installing and updating packages in Cerbero Engine is done by using the ProManage.py script inside the local ‘python’ directory. E.g.:

./python.sh ProManage.py -store --install "Windows Memory Analysis"

or

./python.sh ProManage.py -store --update "Windows Memory Analysis"

or

./python.sh ProManage.py -store --update-all

The same command line options are also available in Cerbero Suite.

We took great care in making Cerbero Store not only easy and comfortable to use, but also secure. All our packages are digitally signed and if someone managed to tamper with our packages online, the installer would refuse to install them, because they would no longer feature a valid signature.

The only thing you need to access Cerbero Store is a current license for either Cerbero Suite or Cerbero Engine. Not all packages available to Cerbero Suite are also available to Cerbero Engine and vice-versa. Certain packages may only be available to the advanced edition of Cerbero Suite, while others may be reserved to commercial licenses.

In the next months we’ll be releasing new features not only in our applications, but also as packages on Cerbero Store, so make sure to follow us on our blog, Twitter or LinkedIn to stay up to date with the latest news!

Remote Containers

In our previous post we introduced multi-processing as implemented in the upcoming Cerbero Suite 5.2 and Cerbero Engine 2.2. In this post we’re going to talk about remote containers, which are an additional functionality of our multi-processing technology.

Containers (NTContainer) are a way to encapsulate any kind of raw data (e.g.: memory, files) and are used ubiquitously. There might be occasions in which a manager wants to share a container with a worker.

The API to accomplish this is very simple: all the manager has to do is to share the container using shareContainer() and the worker can access the container using getSharedContainer().

In the following example a 10 mega-bytes container is created with a signature appended at the end. A local and remote search is performed to find the signature.

from Pro.Core import NTContainer, MB_SIZE, NTTime
from Pro.MP import *
import time

remote_code = r"""
from Pro.Core import NTTime
from Pro.MP import *

def main():
    c = proWorkerObject().getSharedContainer('NAME')
    # remote search
    magic = b'\xAA\xBB\xCC\xDD'
    t = NTTime()
    t.start()
    match = c.findFirst(magic)
    print('remote search (ms): ' + str(t.elapsed()))

main()
"""

def main():
    magic = b"\xAA\xBB\xCC\xDD"
    buf = b"\xFF" * 10 * MB_SIZE + magic
    c = NTContainer()
    c.setData(buf)
    
    # local search
    t = NTTime()
    t.start()
    match = c.findFirst(magic)
    print("local search (ms):", t.elapsed())

    m = ProManager()
    m.setOptions(ProMPOpt_AtomicOutput)
    
    m.shareContainer("NAME", c)
    
    worker_id = m.startWorker()

    m.evalPythonCode(worker_id, remote_code)
    
    while m.isBusy():
        m.processMessages()
        time.sleep(0.1)
    
main()

The output is:

local search (ms): 17
remote search (ms): 351

The reason for the time difference is, of course, that accessing the remote data is comparatively slower. This factor needs to be taken into consideration when working with remote containers.

Yet another limitation regarding remote containers is that they are read-only. This is for security reasons, as it wouldn’t be safe to allow other processes to change the original container.

In the next example the code asks the user to choose a Windows executable (PE), opens it and shares the container. The import table of the PE is then parsed from the worker process.

from Pro.Core import *
from Pro.UI import *
from Pro.MP import *
import time

remote_code = r'''
from Pro.Core import *
from Pro.MP import *
from Pro.PE import *

def main():
    c = proWorkerObject().getSharedContainer("PE")
    # print imported modules
    obj = PEObject()
    if not obj.Load(c):
        print("error: couldn't load file")
        return
    imp = obj.ImportDirectory()
   
    it = CFFStructIt(imp)
    while it.hasNext():
        cur = it.next()
        name_rva = cur.Uns("Name")
        name_offs = obj.RvaToOffset(name_rva)
        if name_offs != INVALID_STREAM_OFFSET:
            name = obj.ReadUInt8String(name_offs, 1000)[0]
            name = name.decode("utf-8", errors="ignore")
            print("imported module: " + name)
            

main()
'''

def main():
    fname = proContext().getOpenFileName("Select Windows executable...", str(), "Executable files (*.exe)")
    if not fname:
        return

    c = createContainerFromFile(fname)
    if c.isNull():
        return

    m = ProManager()
    m.setOptions(ProMPOpt_AtomicOutput)
    
    m.shareContainer("PE", c)
    
    worker_id = m.startWorker()

    m.evalPythonCode(worker_id, remote_code)
    
    while m.isBusy():
        m.processMessages()
        time.sleep(0.1)
    
main()

An example of output is:

imported module: KERNEL32.dll
imported module: SHLWAPI.dll

In the following example the shared container is shown in a hex view from the worker process.

from Pro.Core import *
from Pro.UI import *
from Pro.MP import *
import time

remote_code = r'''
from Pro.Core import *
from Pro.UI import *
from Pro.MP import *

def main():
    c = proWorkerObject().getSharedContainer("DATA")
    ctx = proContext()
    hv = ctx.createView(ProView.Type_Hex, "Remote Container Data")
    hv.setData(c)
    dlg = ctx.createDialog(hv)
    dlg.show()

main()
'''

def main():
    fname = proContext().getOpenFileName("Select a file...")
    if not fname:
        return

    c = createContainerFromFile(fname)
    if c.isNull():
        return

    m = ProManager()
    m.setOptions(ProMPOpt_AtomicOutput)
    
    m.shareContainer("DATA", c)
    
    worker_id = m.startWorker()

    m.evalPythonCode(worker_id, remote_code)
    
    while m.isBusy():
        m.processMessages()
        time.sleep(0.1)
    
main()

This is a screenshot from running the last example.

Sharing containers with workers is a very inexpensive operation in terms of resources. Therefore, sharing many containers is not an issue.

PDF JavaScript Extraction Demo Package

We have already shown in the past how simple it is to leverage the capabilities of Cerbero SDK to extract JavaScript from PDF documents using a simple hook.

In this post we’ll use a package to deploy the demo code.

The advantage of using an installable package is that it minimizes the effort on the part of the user to test the code and the deployment method is compatible with both Cerbero Suite and Cerbero Engine.

We explained how packages work in a previous post in case you missed that.

The demo code is the following:

from Pro.Core import *

def printJSEntry(sp, xml, tnode):
    # data node
    dnode = xml.findChild(tnode, "d")
    if not dnode:
        return
    # we let Cerbero extract the JavaScript for us
    params = NTStringVariantHash()
    params.insert("op", "js")
    idnode = xml.findChild(dnode, "id")
    if idnode:
        params.insert("id", int(xml.value(idnode), 16))
    ridnode = xml.findChild(dnode, "rid")
    if idnode:
        params.insert("rid", int(xml.value(ridnode), 16))
    js = sp.customOperation(params)
    # print out the JavaScript
    print("JS CODE")
    print("-------")
    print(js)

def pdfExtractJS(sp, ud):
    xml = sp.getReportXML()
    # object node
    onode = xml.findChild(None, "o")
    if onode:
        # scan node
        snode = xml.findChild(onode, "s")
        if snode:
            # enumerate scan entries
            tchild = xml.firstChild(snode)
            while tchild:
                if xml.name(tchild) == "t":
                    # type attribute
                    tattr = xml.findAttribute(tchild, "t")
                    # check if it's a JavaScript entry
                    if tattr and int(xml.value(tattr)) == CT_JavaScript:
                        printJSEntry(sp, xml, tchild)
                tchild = xml.nextSibling(tchild)

And the configuration for the hook extension is the following:

[PDF JavaScript Extraction Demo]
file = pdf_js_extract_demo.py
scanned = pdfExtractJS
formats = PDF
enable = yes

Out of this two parts we created a package with an automatic setup which you can download from here.

The package can be installed with a few clicks. In fact, on Windows it can be installed directly from the shell context menu.

The setup dialog informs you that the package is verified as it was signed by Cerbero. Do not install the package if the signature couldn’t be verified!

The package once installed is visible in the list of installed packages. From there it can be uninstalled.

While the package is installed, it will print out the JavaScript code contained in PDF documents even if such documents are encrypted.

Packages are a not only a great way to deploy tools and plugins for Cerbero Suite and Cerbero Engine, but they also enable the secure deployment of demonstration snippets and other data.

Cerbero Suite 5.1 is out!

We’re happy to announce the release of Cerbero Suite 5.1 and Cerbero Engine 2.1!

This release comes packed with features and improvements. In this post we summarized the most important ones.

Installable Packages

While there are many interesting new features in this release, we consider the most important one to be the introduction of installable packages.

Packages enable developers to create plugins that can be easily installed by the user with just a few clicks. Not only that, but the same package is compatible with both Cerbero Suite and Cerbero Engine.

Packages can be encrypted and signed. When a package is not signed or the signature cannot be trusted, it is shown by the installation dialog.

We wrote an in-depth article about packages if you’re interested in learning more.

Improved Decompiler

We have introduced some improvements in the decompiler output. The most interesting of these improvements is the support of indirect string literal references.

We wrote a post about this topic for more information.

Local Carbon Structures

Previously, imported structures were shared among Carbon disassemblies in the same project. In Cerbero Suite 5.1 every disassembly in a project can have its own local structures.

This is especially useful when importing data structures from PDB files.

Of course, shared structures are also supported.

Improved CFBF Format View

We have simplified the analysis of Microsoft Office legacy documents that contain text controls by previewing their name in the format view.

We have published a 150-seconds video analysis of an Emotet sample which as part of its obfuscation strategy makes use of text controls.

Improved XLSB Support

We have improved support for the Microsoft Excel XLSB format.

We’ll soon publish malware analysis to showcase these improvements.

Improved Silicon Excel Emulator

We have added support for the FORMULA.ARRAY macro, since this macro is often used by malicious Excel documents.

Hierarchy View Size Column

We received this feature request on Twitter: now the hierarchy view also shows the size of files.

This can be useful when prioritizing the analysis of embedded files.

Improved File Dialogs

We disabled the preview of actual file icons in all file dialogs. This makes opening folders with thousands of files blazingly fast and it’s also better for security.

This may seem like a minor problem, but the devil is in the details…

Grid Layouts in Custom Views

We have added a new type of layout in custom views: grid layouts. This new layout type is already documented in our latest official SDK documentation.

Additionally, this new version comes with minor speed optimizations and bug fixes.

Installable Packages

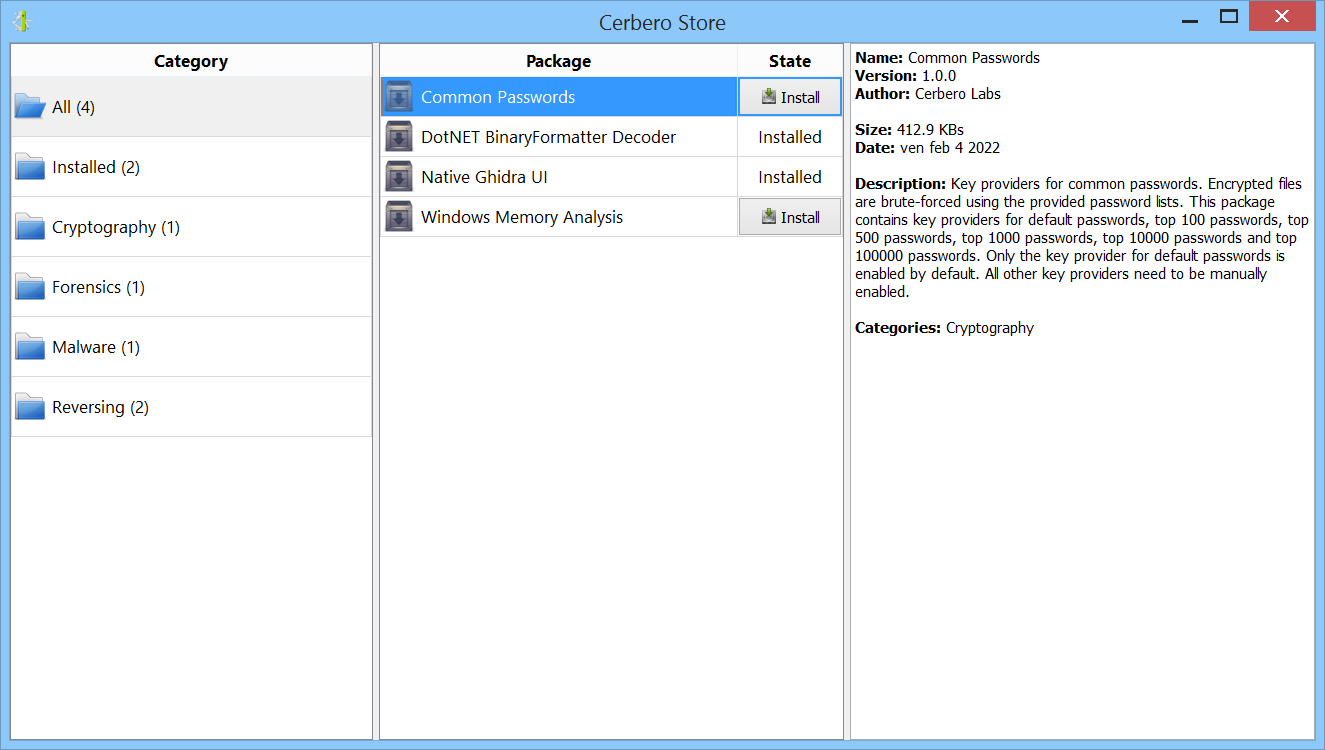
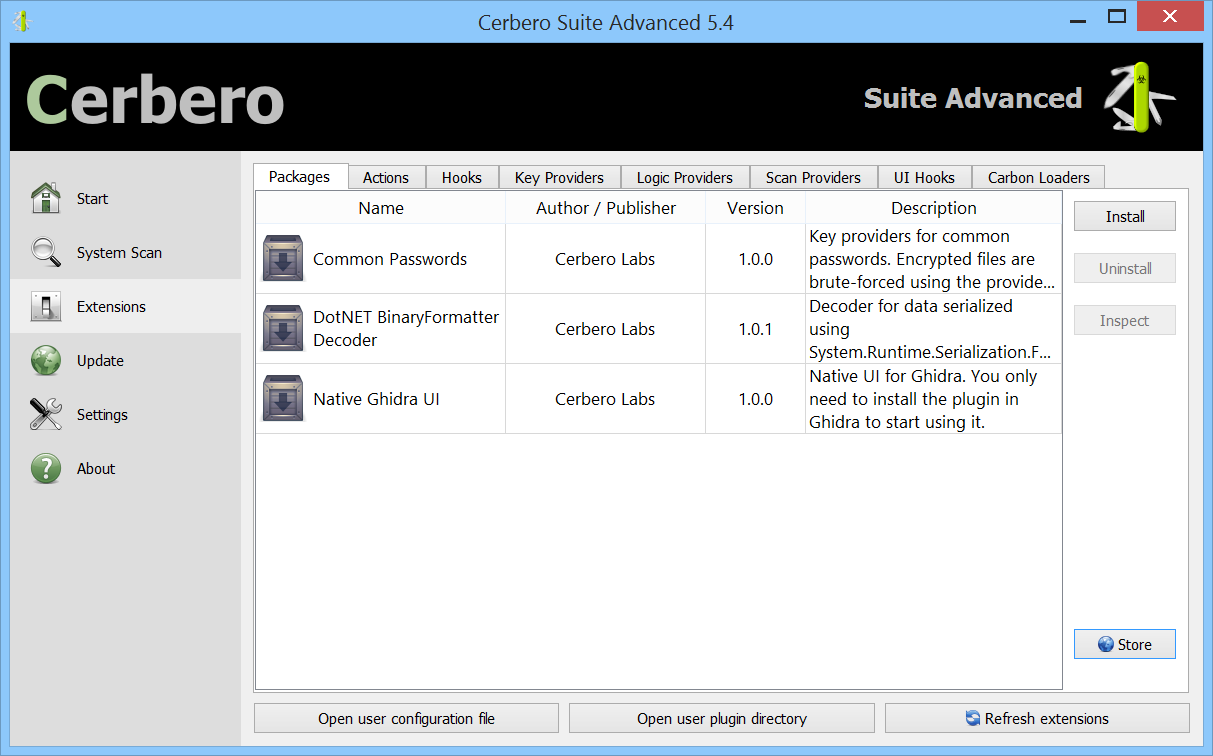
In the upcoming Cerbero Suite 5.1 and Cerbero Engine 2.1 we have introduced installable packages for extensions.

This means that from now on installing a plugin in Cerbero Suite or Cerbero Engine might require only a few clicks or a command in the terminal.

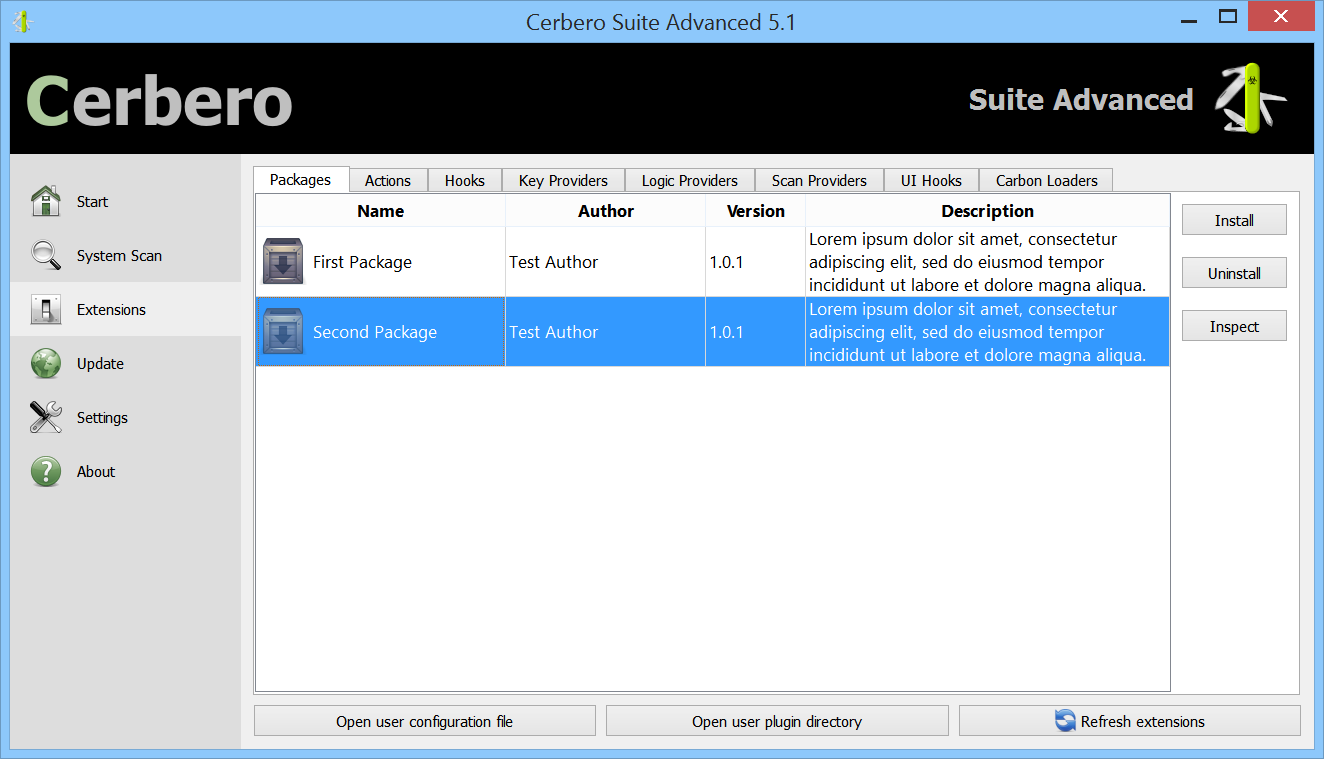
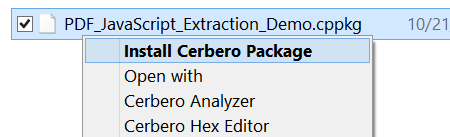
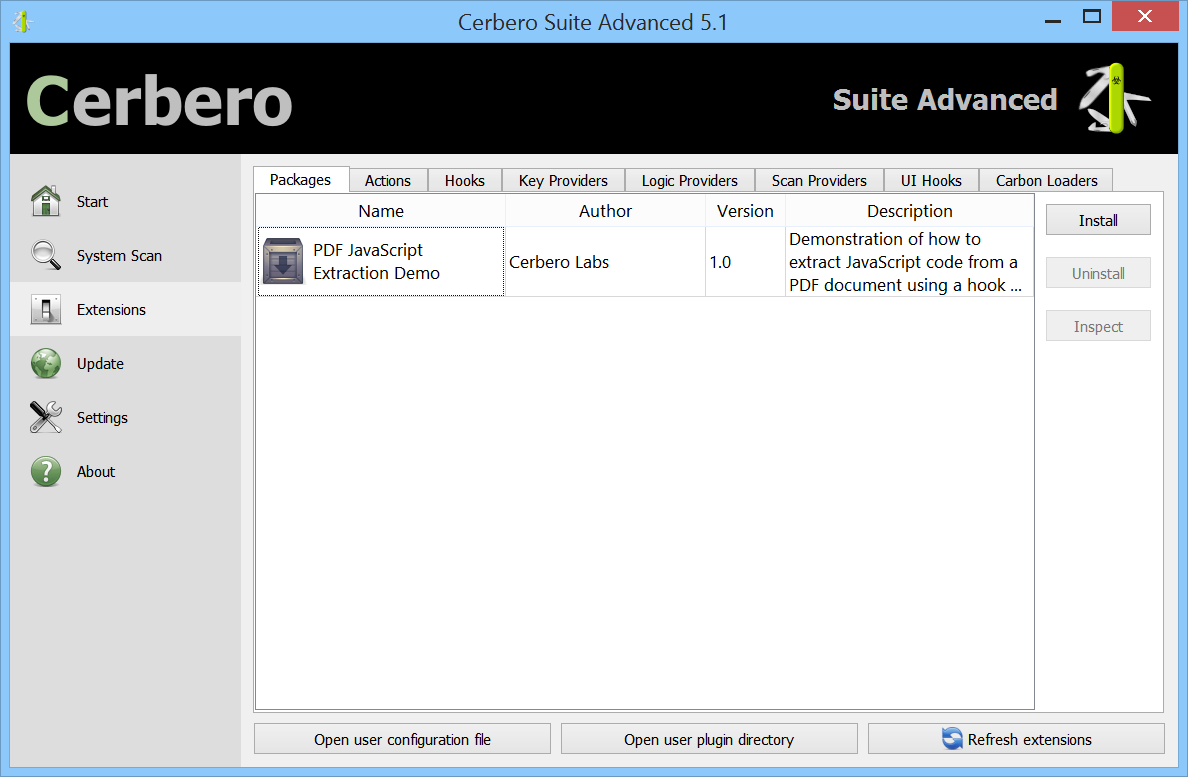
Packages can be managed in Cerbero Suite from the command line, using the Python SDK and of course from the UI. On Windows they can be installed from the shell context menu as well.

From the command line packages can be managed using the following syntax:

-pkg-create : Create Package
    Syntax: -pkg-create input.zip output.cppkg
    --name : The unique name of the package
    --author : The author of the package
    --version : The version of the package. E.g.: --version "1.0.1"
    --descr : A description of the package
    --sign : The key to sign the package. E.g.: --sign private_key.pem

-pkg-install : Install Package
    Syntax: -pkg-install package_to_install.cppkg
    --force : Silently installs unverified packages

-pkg-uninstall : Uninstall Package
    Syntax: -pkg-uninstall "Package Name"

-pkg-verify : Verify Package
    Syntax: -pkg-verify package_to_verify.cppkg

Similarly packages can be installed, uninstalled and verified from Cerbero Engine using the ProManage.py script inside the local ‘python’ directory. E.g.:

python ProManage.py -pkg-install /path/to/package.cppkg

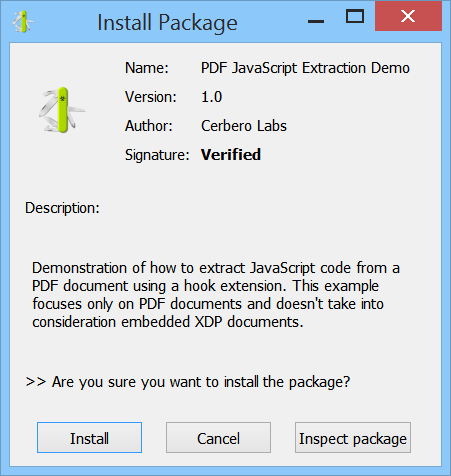
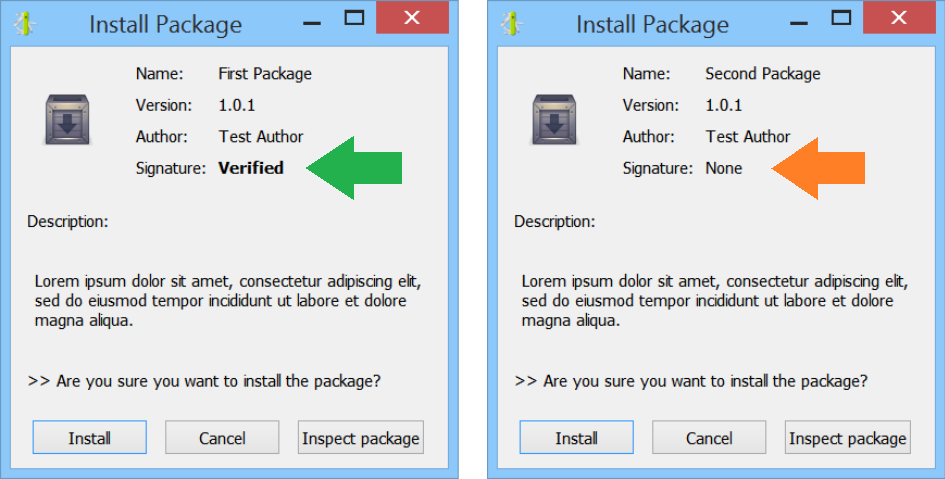
Packages can be signed. When a package is unsigned or the signature cannot be trusted, it is shown by the installation dialog.

A key pair for signing and verifying packages can be generated as follows:

# create the private key
openssl genrsa -out private.pem 4096

# extract the public key
openssl rsa -in private.pem -outform PEM -pubout -out public.pem

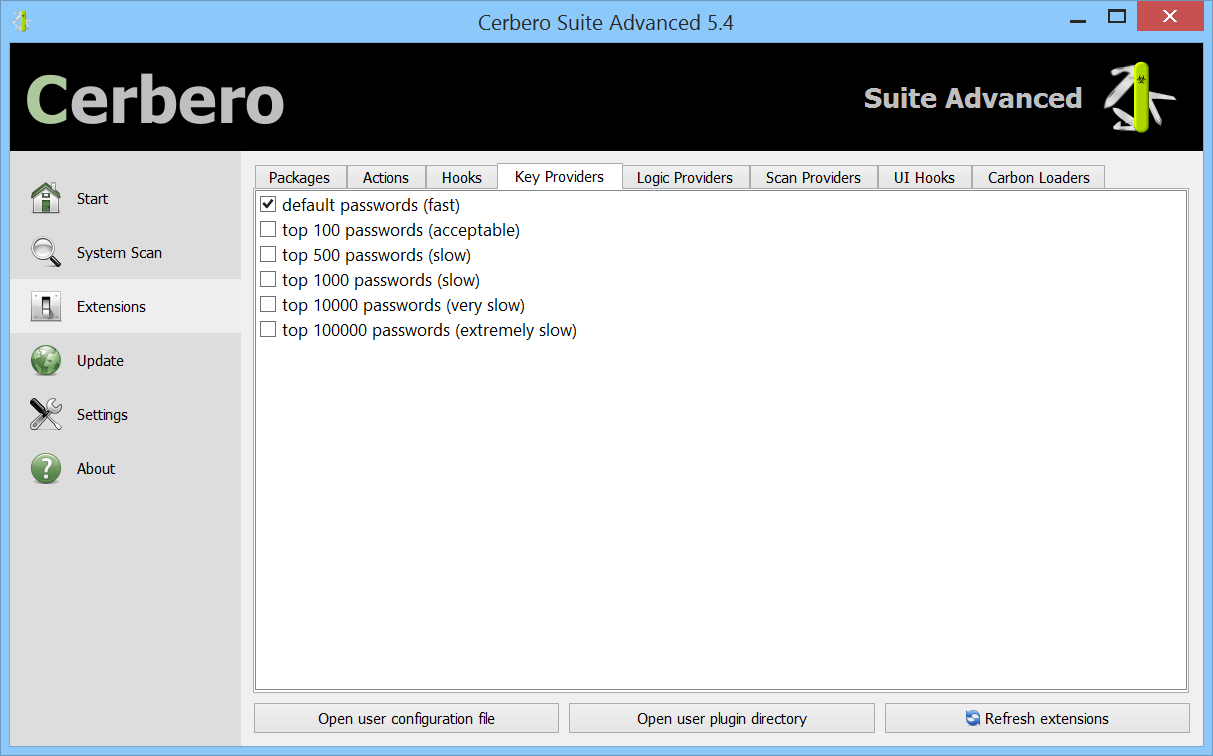
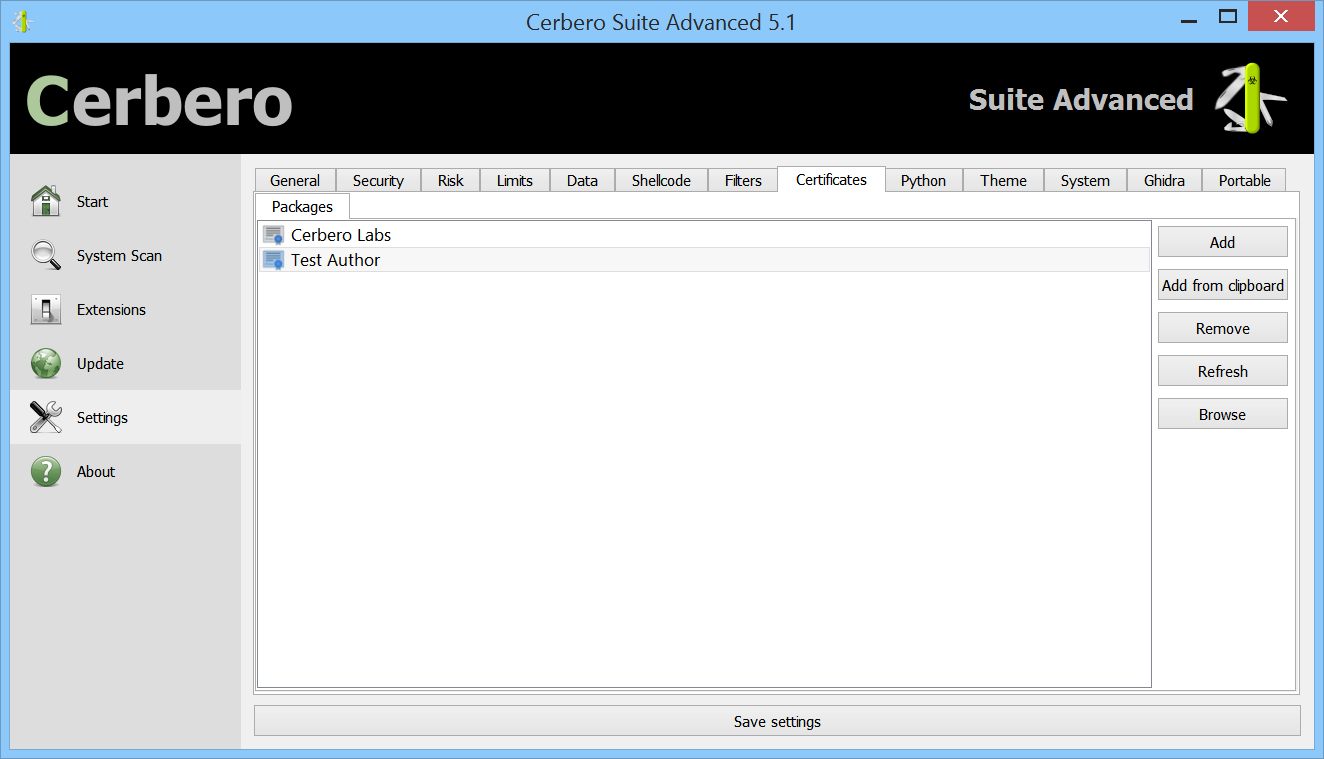
The public key must be added to the list of trusted signers. This can be done by placing the generated file with the name of the issuer in the ‘certs/pkg’ directory or by using the UI.

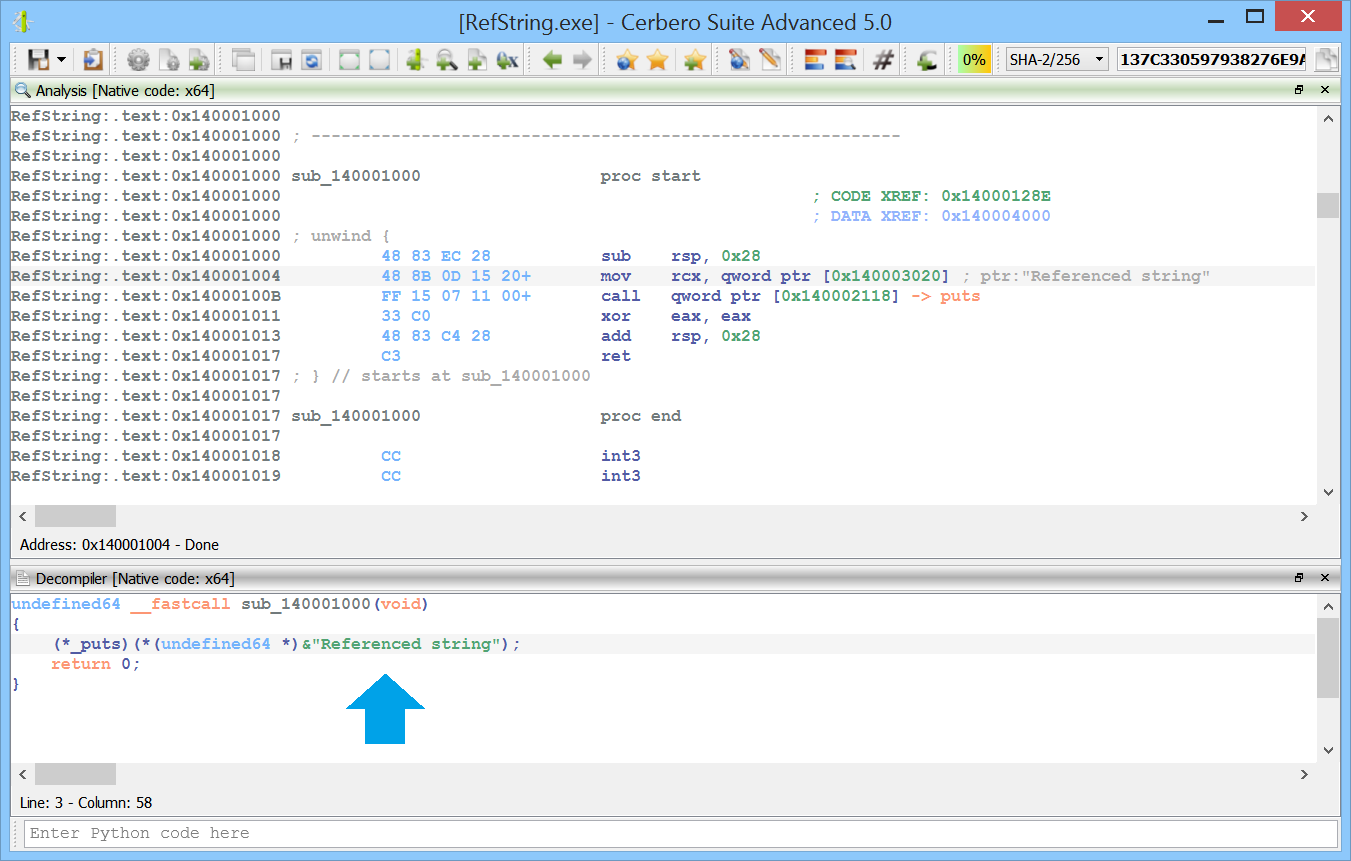
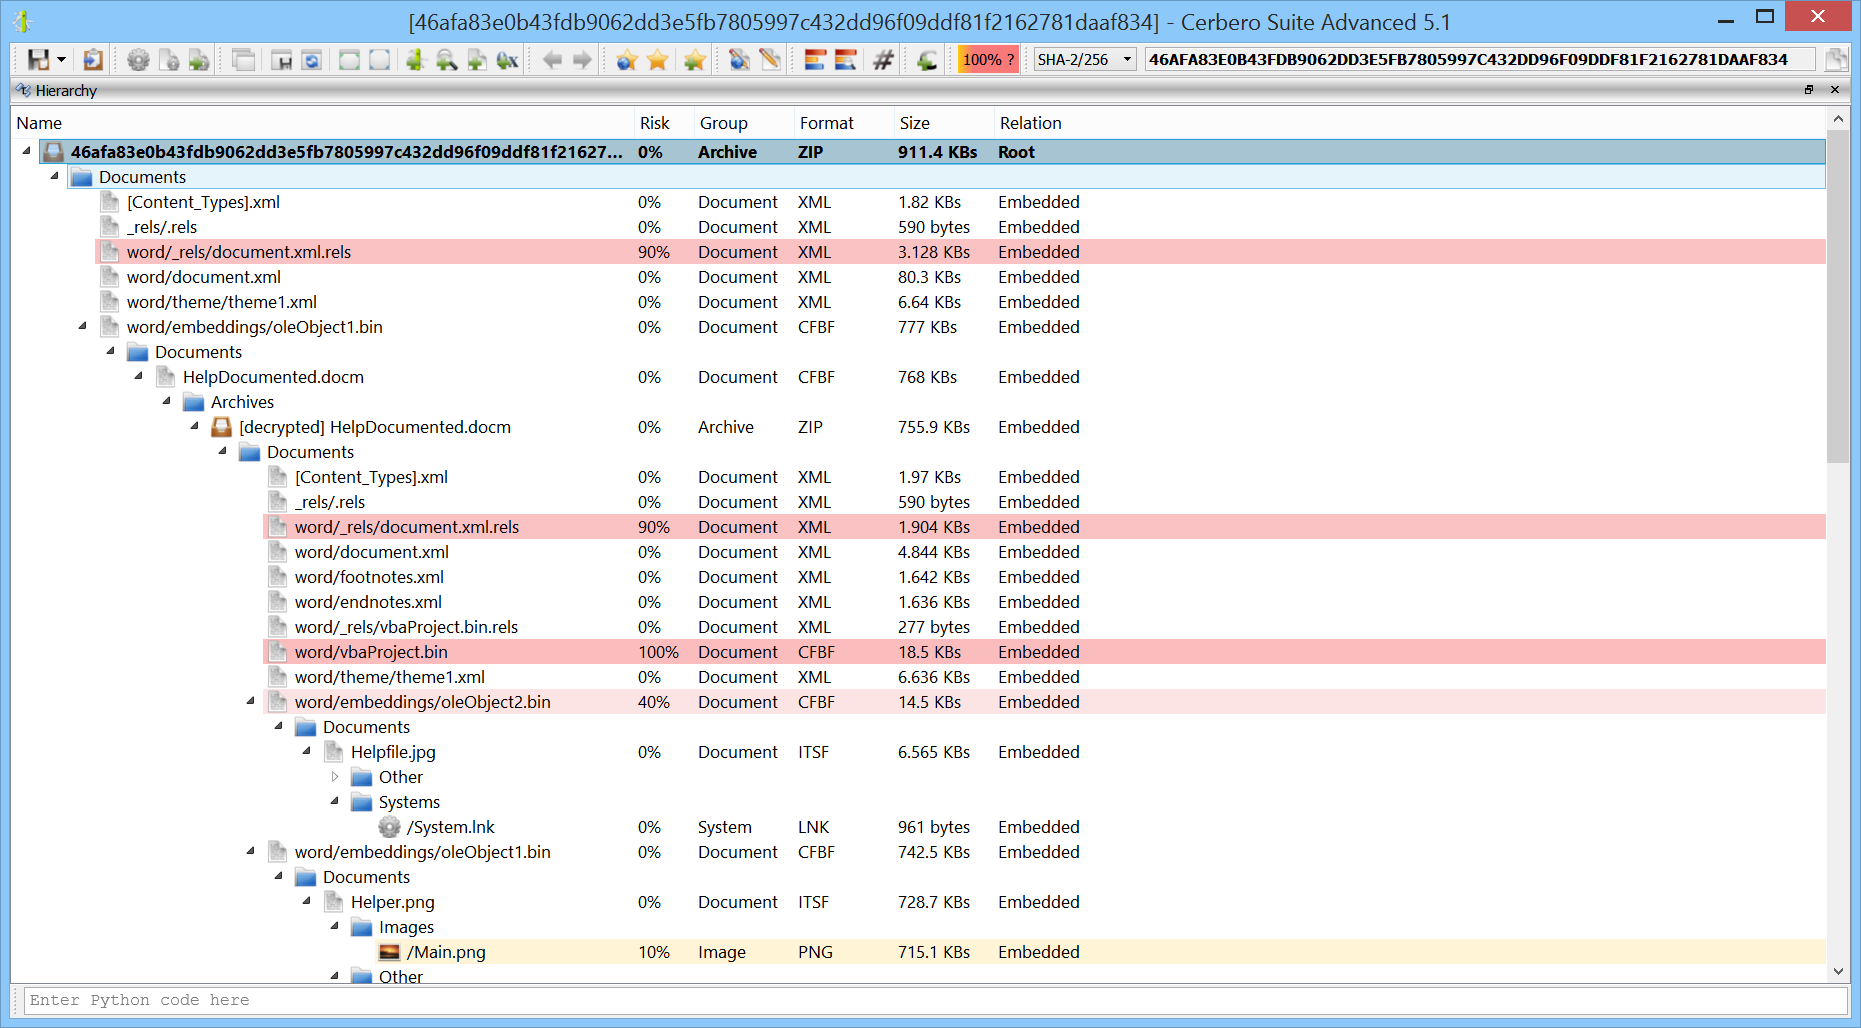
Since packages have their own format, they can be inspected using Cerbero Suite as any other supported file format.

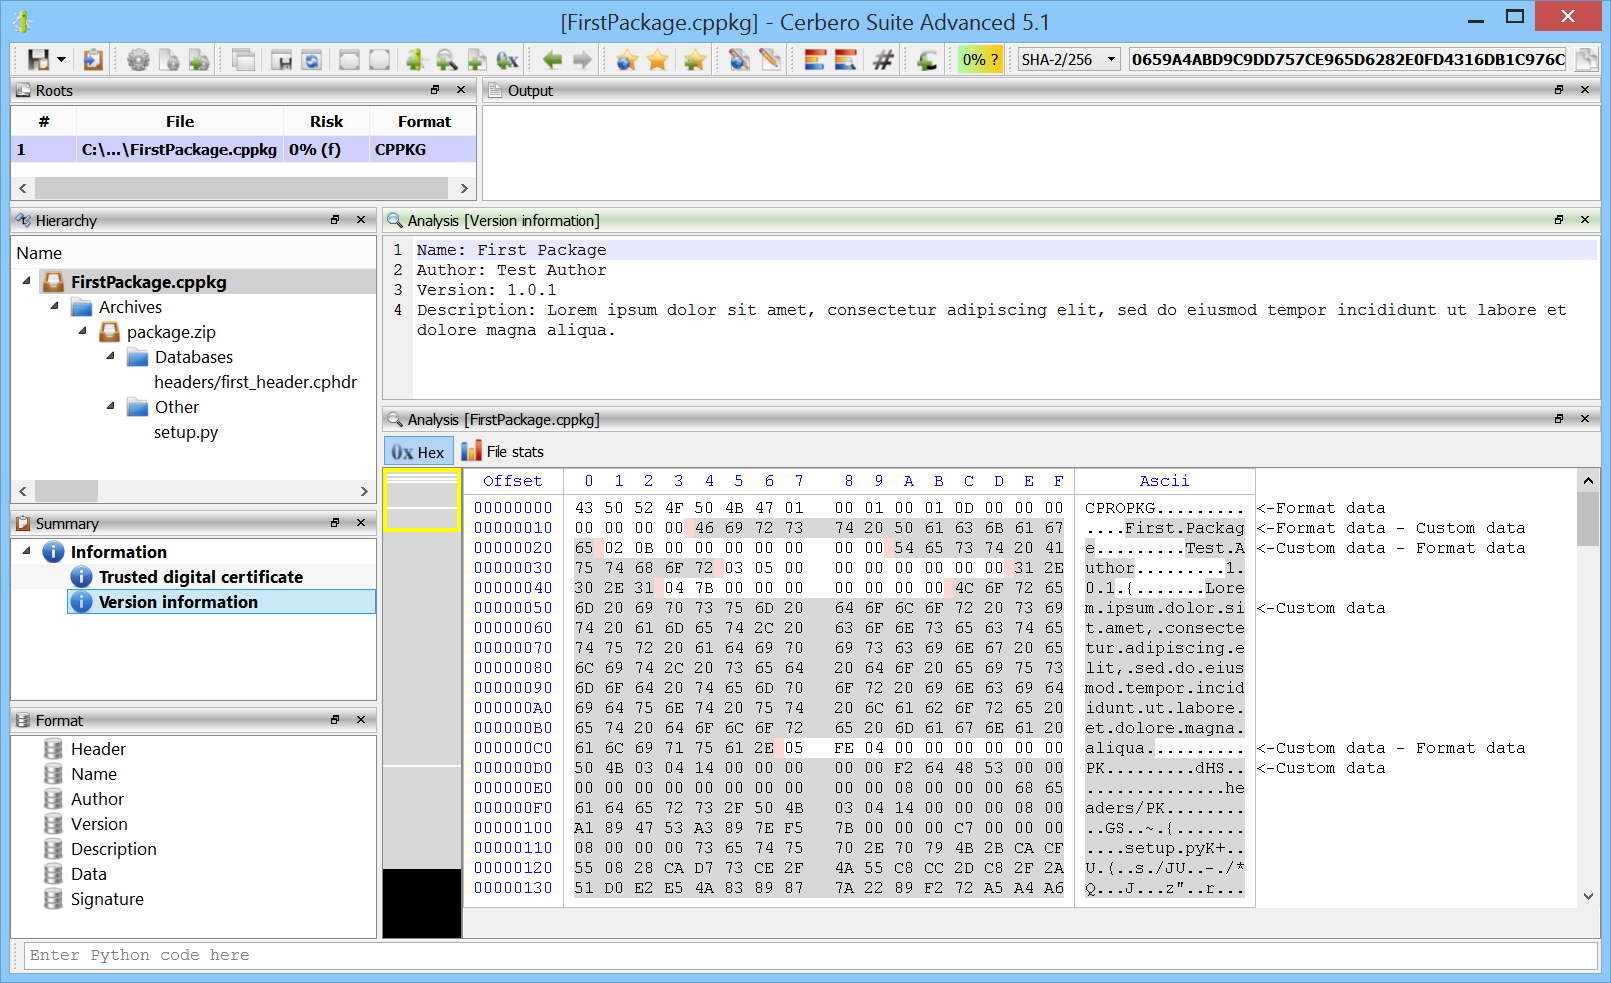
Like the rest of the functionality related to packages, the class to parse packages is located inside ‘Pro.Package’.

Packages must have a unique name, an author, a version number of maximum 4 parts and a description. Packages are created from Zip archives and they can operate in three different ways:

  1. Relying on the automatic setup, without a setup script.
  2. Relying on a setup script.
  3. Relying on both the automatic setup and a setup script.

Out of the three ways, the first one is certainly the most intuitive: all the files in the Zip archive are installed following the same directory structure as in the archive.

This means that if the archive contains a file called:

plugins/python/CustomFolder/Code.py

It will be installed in the same directory under the user folder of Cerbero Suite or Cerbero Engine.

This is true for all files, except files in the ‘config’ directory. Those files are treated specially and their contents will be appended or removed from the configuration files of the user.

So, for instance, if the following configuration for an action must be installed:

[TestAction]
category = Test
label = Text label
file = TestCode.py
context = hex

It must only be stored in the archive under config/actions.cfg and the automatic installation/uninstallation process takes care of the rest.

Sometimes, however, an automatic installation might not be enough to install an extension. In that case a setup script called ‘setup.py’ can be provided in the archive:

def install(sctx):
    # custom operations
    return True
    
def uninstall(sctx):
    # custom operations
    return True

However, installing everything manually might also not be ideal. In many cases the optimal solution would be an automatic installation with only a few custom operations:

def install(sctx):
    # custom operations
    return sctx.autoInstall()
    
def uninstall(sctx):
    # custom operations
    return sctx.autoUninstall()

To store files in the archive which should be ignored by the automatic setup, they must be placed under a folder called ‘setup’.

Alternatively, files can be individually installed and uninstalled relying on the automatic setup using the ‘installFile’ and ‘uninstallFile’ methods of the setup context, which is passed to the functions in the setup script.

Custom extraction operations can be performed using the ‘extract’ method of the setup context.

An important thing to consider is that if the package is called ‘Test Package’, it will not make any difference if files are placed in the archive at the top level or under a root directory called ‘Test Package’.

For instance:

config/actions.cfg
setup.py

And:

Test Package/config/actions.cfg
Test Package/setup.py

Is considered to be the same. This way when creating the Zip archive, it can be created directly from a directory with the same name of the package.

Having a verified signature is not only good for security purposes, but also allows the package to show a custom icon in the installation dialog. The icon must be called ‘pkgicon.png’ and regardless of its size, it will be resized to a 48×48 icon when shown to the user.

What follows is an easy-to-adapt Python script to create packages using the command line of Cerbero Suite. It uses the “-c” parameter, to avoid displaying message boxes.

import os, sys, shutil, subprocess

cerbero_app = r"[CERBERO_APP_PATH]"

private_key = r"[OPTIONAL_PRIVATE_KEY_PATH]"

pkg_dir = r"C:\MyPackage\TestPackage"
pkg_out = r"C:\MyPackage\TestPackage.cppkg"

pkg_name = "Test Package"
pkg_author = "Test Author"
pkg_version = "1.0.1"
pkg_descr = "Description."

shutil.make_archive(pkg_dir, "zip", pkg_dir)

args = [cerbero_app, "-c", "-pkg-create", pkg_dir + ".zip", pkg_out, "--name", pkg_name, "--author", pkg_author, "--version", pkg_version, "--descr", pkg_descr]
if private_key:
    args.append("--sign")
    args.append(private_key)

ret = subprocess.run(args).returncode
os.remove(pkg_dir + ".zip")

print("Package successfully created!" if ret == 0 else "Couldn't create package!")
sys.exit(ret)