Hex Editing of Processes on Linux

The upcoming 5.4 version of Cerbero Suite introduces the capability to open processes in the hex editor on Linux. Windows has already supported this feature since the introduction of our hex workspace.

Just like on Windows, it is not only possible to edit the entire address space, but also to edit individual modules.

If opening a process fails, most probably it is because root privileges are required to perform the operation. To avoid having the application create application files with different access rights, it is recommended to create a portable copy of Cerbero Suite and run that copy as root.

Creating a portable copy can be achieved from Settings -> Portable.

Improved ITSF (CHM) Format Support

The upcoming 5.4 version of Cerbero Suite and 2.4 of Cerbero Engine come with improved support for Microsoft’s ITSF (also known as CHM) format.

We also exposed the format to our Python SDK.

The following sample enumerates files in a CHM. The commented out line of code extracts the file data.

from Pro.Core import *
from Pro.ITSF import *

def parseCHM(chm_name):
    c = createContainerFromFile(chm_name)
    obj = ITSFObject()
    if not obj.Load(c):
        return
    if not obj.LoadHeaders() or not obj.DecompressSections():
        return
    n = obj.GetListingEntryCount()
    entry = ITSFDirectoryListingEntry()
    for i in range(n):
        if obj.GetDirectoryListingEntry(i, entry):
            print("name:", entry.name, "- size:", entry.size)
            #content = obj.GetFile(entry)

Suite 5.3 and Engine 2.3 are out!

We’re happy to announce the release of Cerbero Suite 5.3 and Cerbero Engine 2.3!

The main addition to this release is the introduction of our latest milestone: Cerbero Store.

We have covered Cerbero Store in depth in our previous post.

TL;DR: Cerbero Store modularizes our setup process, so that updates can be blazingly fast and experimental features can be introduced on a rolling basis. The only thing you need to access Cerbero Store is a current license for either Cerbero Suite or Cerbero Engine. Updating packages from Cerbero Store is equally comfortable.

We also moved our native UI for Ghidra plugin and our Windows memory analysis to packages on Cerbero Store.

In the next months we’ll be releasing new features not only in Cerbero Suite and Cerbero Engine, but also as packages on Cerbero Store, so make sure to follow us on our blog, Twitter or LinkedIn to stay up to date with the latest news!

Introducing Cerbero Store

We’re proud to present Cerbero Store which will be released with the upcoming 5.3 version of Cerbero Suite and 2.3 version of Cerbero Engine.

A few months ago we released our package technology to comfortably install plugins in Cerbero Suite and Cerbero Engine. Cerbero Store is what we had planned from the beginning when we started working on packages.

But how comfortable is it really to install a package from Cerbero Store you might ask?

It is really that simple.

We had various reasons to create Cerbero Store. Chief among these reason was the necessity to release faster updates. It didn’t make sense to update the whole application just to update a limited part. Also, our software runs on multiple platforms, which means that each update requires us to create multiple software packages. This problem is solved by Cerbero Store, since all platforms share the same package code.

Another advantage of Cerbero Store is that some components which are used by a minority of users can now be decoupled from the main application. In fact, we moved our Windows memory analysis functionality to a package on Cerbero Store. That way all our software packages are sensibly lighter. For instance, our macOS DMG archive dropped from 72 MBs to 60 MBs just for this reason.

We’ve made the update of packages equally comfortable.

Yet another component we have moved to a package on Cerbero Store is our native UI for Ghidra.

The reason for this is that Ghidra sometimes changes its API between releases and breaks our plugin code. So it happened in the past that we had to update our whole application just to update the plugin for Ghidra. This issue has now been solved by having the plugin for Ghidra as a separate package.

Installing and updating packages in Cerbero Engine is done by using the ProManage.py script inside the local ‘python’ directory. E.g.:

./python.sh ProManage.py -store --install "Windows Memory Analysis"

or

./python.sh ProManage.py -store --update "Windows Memory Analysis"

or

./python.sh ProManage.py -store --update-all

The same command line options are also available in Cerbero Suite.

We took great care in making Cerbero Store not only easy and comfortable to use, but also secure. All our packages are digitally signed and if someone managed to tamper with our packages online, the installer would refuse to install them, because they would no longer feature a valid signature.

The only thing you need to access Cerbero Store is a current license for either Cerbero Suite or Cerbero Engine. Not all packages available to Cerbero Suite are also available to Cerbero Engine and vice-versa. Certain packages may only be available to the advanced edition of Cerbero Suite, while others may be reserved to commercial licenses.

In the next months we’ll be releasing new features not only in our applications, but also as packages on Cerbero Store, so make sure to follow us on our blog, Twitter or LinkedIn to stay up to date with the latest news!

Cerbero Suite 5.2 is out!

We’re happy to announce the release of Cerbero Suite 5.2 and Cerbero Engine 2.2!

In this post we summarize the most important new features.

Multi-Processing

The main feature of this release is the introduction of our multi-processing technology.

Our products make use of parallel processing in terms of multi-threading whenever possible, but there are limitations to the capabilities of multi-threading.

Some of the advantages offered by multi-processing are:

  • Possible process isolation
  • Increased stability for 3rd party components
  • Overcoming the Global Interpreter Lock (GIL) in Python

We have already detailed our multi-processing technology in two previous posts (part 1, part 2), but with this release we also fully documented the API.

Sleigh Decompiler Parallelization

We used our new multi-processing technology to parallelize the Sleigh decompiler by running it in a different process. This guarantees complete stability in case Sleigh encounters an issue and makes every decompiling operation safe to cancel.

We didn’t notice slow-downs by running the decompiler in a different process, in fact it’s still blazingly fast.

By parallelizing the decompiler we were also able to initialize it during the loading of the file/database. Thus, when the decompiler is invoked for the first time there is no initial delay.

Although the decompiler doesn’t take much time to load, the preloading makes it extra-snappy.

It is also possible to choose to run the decompiler in the same process as before from the Carbon settings.

Carbon Documentation

We have fully documented the Carbon API to disassemble and decompile native binaries.

The documentation contains numerous code examples which cover the decryption of strings, disassembling of files, decompiling of functions and the creation of custom file loaders.

ZeroMQ Module

Our multi-processing technology relies on ZeroMQ. Therefore, we exposed ZeroMQ to our Python SDK.

Rather than using the provided Python wrappers, we exposed the C interface directly. We just added a few methods to convert from and to bytes objects in Python.

This is a basic client-server example using send/recv.

The client:

from Pro.zmq import *
import ctypes

context = zmq_ctx_new()

socket = zmq_socket(context, ZMQ_REQ)
zmq_connect(socket, "tcp://localhost:5555")

for i in range(1000):
    zmq_send_bytes(socket, b"Hello, world!", 0)
print("info: sent")

zmq_close(socket)
zmq_ctx_destroy(context)

The server:

from Pro.zmq import *

context = zmq_ctx_new()

socket = zmq_socket(context, ZMQ_REP)
rc = zmq_bind(socket, "tcp://127.0.0.1:5555")

if rc == 0:
    while True:
        b = zmq_recv_bytes(socket, 13, 0)
        print(b)
        break
else:
    print("error: couldn't bind to port")

zmq_close(socket)
zmq_ctx_destroy(context)

And this is a basic client-server example using messages.

The client:

from Pro.zmq import *
import ctypes

context = zmq_ctx_new()

socket = zmq_socket(context, ZMQ_REQ)
zmq_connect(socket, "tcp://localhost:5555")

msg = zmq_msg_t()
zmq_msg_init_bytes(msg, b"Hello, world!")
rc = zmq_msg_send(msg, socket, 0)
print(rc)
print("info: sent")

zmq_close(socket)
zmq_ctx_destroy(context)

The server:

from Pro.zmq import *

context = zmq_ctx_new()

socket = zmq_socket(context, ZMQ_REP)
rc = zmq_bind(socket, "tcp://127.0.0.1:5555")

if rc == 0:
    msg = zmq_msg_t()
    zmq_msg_init(msg)
    while True:
        # wait until a message is received
        rc = zmq_msg_recv(msg, socket, 0)
        if rc != -1:
            print(zmq_msg_bytes(msg))
        zmq_msg_close (msg)
        break
else:
    print("error: couldn't bind to port")

zmq_close(socket)
zmq_ctx_destroy(context)

Improved Logic Providers

We optimized logic provider extensions. In particular, it is now possible to specify the type option for standalone tools:

type = tool

When this option is specified, the init function of the logic provider must return False. This causes the logic provider to be treated as a standalone tool rather than a scan logic provider and avoids creating a scan report for it.

Improved Custom Views

We added the progress bar control and idle notifications to custom views. You can find both features documented on the SDK page of the UI module.

Finally, a thank you to Insid3Code Team for reporting three of the bugs we fixed in this release.

Remote Containers

In our previous post we introduced multi-processing as implemented in the upcoming Cerbero Suite 5.2 and Cerbero Engine 2.2. In this post we’re going to talk about remote containers, which are an additional functionality of our multi-processing technology.

Containers (NTContainer) are a way to encapsulate any kind of raw data (e.g.: memory, files) and are used ubiquitously. There might be occasions in which a manager wants to share a container with a worker.

The API to accomplish this is very simple: all the manager has to do is to share the container using shareContainer() and the worker can access the container using getSharedContainer().

In the following example a 10 mega-bytes container is created with a signature appended at the end. A local and remote search is performed to find the signature.

from Pro.Core import NTContainer, MB_SIZE, NTTime
from Pro.MP import *
import time

remote_code = r"""
from Pro.Core import NTTime
from Pro.MP import *

def main():
    c = proWorkerObject().getSharedContainer('NAME')
    # remote search
    magic = b'\xAA\xBB\xCC\xDD'
    t = NTTime()
    t.start()
    match = c.findFirst(magic)
    print('remote search (ms): ' + str(t.elapsed()))

main()
"""

def main():
    magic = b"\xAA\xBB\xCC\xDD"
    buf = b"\xFF" * 10 * MB_SIZE + magic
    c = NTContainer()
    c.setData(buf)
    
    # local search
    t = NTTime()
    t.start()
    match = c.findFirst(magic)
    print("local search (ms):", t.elapsed())

    m = ProManager()
    m.setOptions(ProMPOpt_AtomicOutput)
    
    m.shareContainer("NAME", c)
    
    worker_id = m.startWorker()

    m.evalPythonCode(worker_id, remote_code)
    
    while m.isBusy():
        m.processMessages()
        time.sleep(0.1)
    
main()

The output is:

local search (ms): 17
remote search (ms): 351

The reason for the time difference is, of course, that accessing the remote data is comparatively slower. This factor needs to be taken into consideration when working with remote containers.

Yet another limitation regarding remote containers is that they are read-only. This is for security reasons, as it wouldn’t be safe to allow other processes to change the original container.

In the next example the code asks the user to choose a Windows executable (PE), opens it and shares the container. The import table of the PE is then parsed from the worker process.

from Pro.Core import *
from Pro.UI import *
from Pro.MP import *
import time

remote_code = r'''
from Pro.Core import *
from Pro.MP import *
from Pro.PE import *

def main():
    c = proWorkerObject().getSharedContainer("PE")
    # print imported modules
    obj = PEObject()
    if not obj.Load(c):
        print("error: couldn't load file")
        return
    imp = obj.ImportDirectory()
   
    it = CFFStructIt(imp)
    while it.hasNext():
        cur = it.next()
        name_rva = cur.Uns("Name")
        name_offs = obj.RvaToOffset(name_rva)
        if name_offs != INVALID_STREAM_OFFSET:
            name = obj.ReadUInt8String(name_offs, 1000)[0]
            name = name.decode("utf-8", errors="ignore")
            print("imported module: " + name)
            

main()
'''

def main():
    fname = proContext().getOpenFileName("Select Windows executable...", str(), "Executable files (*.exe)")
    if not fname:
        return

    c = createContainerFromFile(fname)
    if c.isNull():
        return

    m = ProManager()
    m.setOptions(ProMPOpt_AtomicOutput)
    
    m.shareContainer("PE", c)
    
    worker_id = m.startWorker()

    m.evalPythonCode(worker_id, remote_code)
    
    while m.isBusy():
        m.processMessages()
        time.sleep(0.1)
    
main()

An example of output is:

imported module: KERNEL32.dll
imported module: SHLWAPI.dll

In the following example the shared container is shown in a hex view from the worker process.

from Pro.Core import *
from Pro.UI import *
from Pro.MP import *
import time

remote_code = r'''
from Pro.Core import *
from Pro.UI import *
from Pro.MP import *

def main():
    c = proWorkerObject().getSharedContainer("DATA")
    ctx = proContext()
    hv = ctx.createView(ProView.Type_Hex, "Remote Container Data")
    hv.setData(c)
    dlg = ctx.createDialog(hv)
    dlg.show()

main()
'''

def main():
    fname = proContext().getOpenFileName("Select a file...")
    if not fname:
        return

    c = createContainerFromFile(fname)
    if c.isNull():
        return

    m = ProManager()
    m.setOptions(ProMPOpt_AtomicOutput)
    
    m.shareContainer("DATA", c)
    
    worker_id = m.startWorker()

    m.evalPythonCode(worker_id, remote_code)
    
    while m.isBusy():
        m.processMessages()
        time.sleep(0.1)
    
main()

This is a screenshot from running the last example.

Sharing containers with workers is a very inexpensive operation in terms of resources. Therefore, sharing many containers is not an issue.

Introducing Multi-Processing

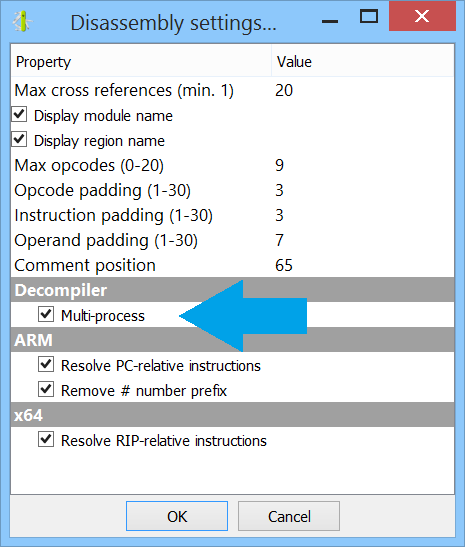
We’re proud to announce the introduction of multi-processing in the upcoming Cerbero Suite 5.2 and Cerbero Engine 2.2.

Our products make use of parallel processing in terms of multi-threading whenever possible, but there are limitations to the capabilities of multi-threading.

Some of the advantages offered by multi-processing are:

  • Possible process isolation
  • Increased stability for 3rd party components
  • Overcoming the Global Interpreter Lock (GIL) in Python

When designing our multi-processing technology, we briefly took into consideration Python’s multiprocessing library, but we discarded the idea, because it wasn’t flexible enough for our intended purposes and we wanted to have an API not limited to Python.

We wanted our API not only to be flexible but also easy to use: when dealing with multi-processing there are challenges which we wanted to solve upfront, so that our users wouldn’t have to worry about them when using our API.

Additionally, since we wanted our multi-processing technology to also be fast and stable, we built it on top of ZeroMQ, an established ultra-fast messaging library which can be used for clustered solutions.
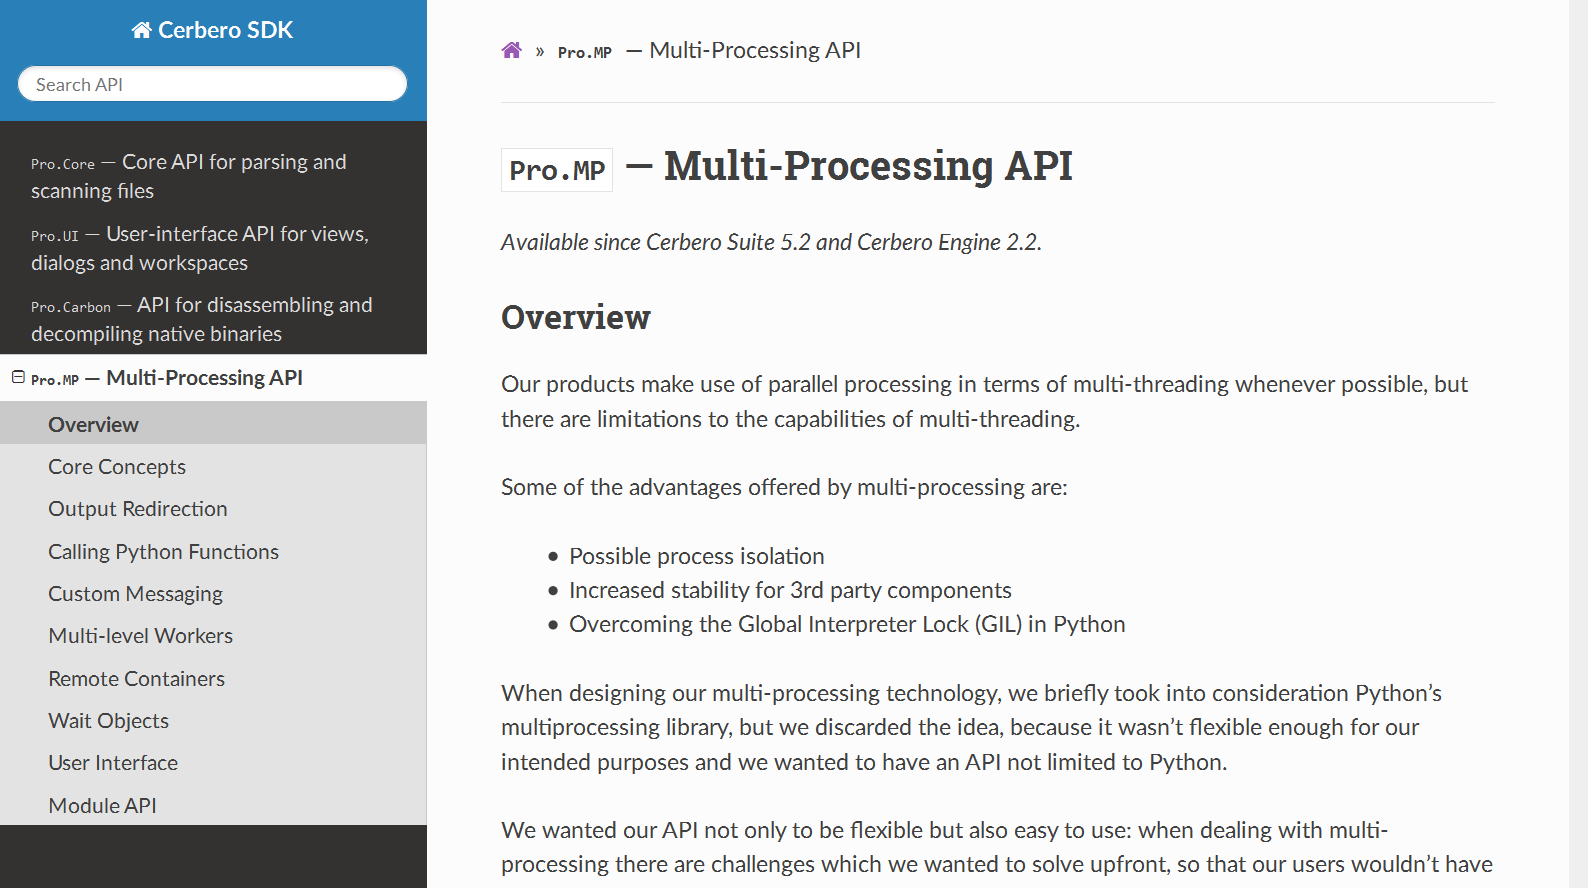
Introduction

In our API there are managers and workers. The manager (ProManager) is the object assigning tasks to workers (ProWorker). A worker is a separate process launched in the background which awaits instructions from the manager.

We can create as many managers as we want from our process and a manager can have as many workers as permitted by the resources of the system.

The manager can be created from within any thread, but must be accessed from within a single thread. Periodically the processMessages method of ProManager should be called to process internal messages.

The worker processes messages from a dedicated thread and every task assigned to it is guaranteed to be executed in the main thread. That’s very important, because it allows workers to access the user-interface API if needed.

The manager and worker maintain a regular communication. When a worker exits, the manager is informed about it. When the manager stops responding to a worker, the worker exits. This behavior guarantees that workers don’t become zombie processes.

The following is a basic code example.

from Pro.MP import *
import time

def main():
    m = ProManager()
    m.startWorker()
    
    for i in range(3):
        m.processMessages()
        time.sleep(1)
    
    print("finished!")
    
main()

This code creates a manager, starts a worker and processes messages for three seconds. It doesn’t do anything apart keeping the worker alive.

We can build upon the previous code by launching a test message box.

from Pro.MP import *
import time

def main():
    m = ProManager()
    
    worker_id = m.startWorker()
    m.testMessageBox(worker_id)
    
    while m.isBusy():
        m.processMessages()
        time.sleep(0.5)
    
    print("finished!")
    
main()

The main code finishes as soon as the message box is closed.

It is also possible to create multiple workers which all do the same task by using the special id ProWorker_All.

from Pro.MP import *
import time

def main():
    m = ProManager()
    
    for i in range(3):
        m.startWorker()
        
    m.testMessageBox(ProWorker_All)

    while m.isBusy():
        m.processMessages()
        time.sleep(0.5)
    
    print("finished!")
    
main()

This time the main code finishes when all three message boxes are closed.

Output Redirection

Let’s now print something out from one of the workers.

from Pro.MP import *
import time

def main():
    m = ProManager()
    # we must specify this option in order to obtain the output from the workers
    m.setOptions(ProMPOpt_RedirectOutput)
    
    m.testMessage(m.startWorker())
    
    for i in range(3):
        m.processMessages()
        time.sleep(1)
        
    print("finished!")
    
main()

The output is of the code is:

Test message.
finished!

As explained in the code, the ProMPOpt_RedirectOutput option must be set to obtain the output from the workers.

This option automatically simplifies one of the challenges when using multi-processing.

Let’s now launch multiple workers with a snippet of Python code to evaluate.

from Pro.MP import *
import time

def main():
    m = ProManager()
    m.setOptions(ProMPOpt_RedirectOutput)
    
    for i in range(5):
        m.startWorker()
    
    m.evalPythonCode(ProWorker_All, "print('remote script')")
    
    while m.isBusy():
        m.processMessages()
        time.sleep(0.5)
    
    print("finished!")
    
main()

The output is a bit confusing:

remote scriptremote script

remote scriptremote scriptremote script


finished!

The reason for this is that the print function of Python internally writes the string and the new-line separately. Since in our case the execution is parallel, the strings and new-lines get mixed up.

To remedy this problem we can set the ProMPOpt_AtomicOutput option. This option does nothing else than to discard writes of standalone new-lines and append a new-line to every incoming string if a new-line at the end is missing.

from Pro.MP import *
import time

def main():
    m = ProManager()
    m.setOptions(ProMPOpt_RedirectOutput | ProMPOpt_AtomicOutput)
    
    for i in range(5):
        m.startWorker()
    
    m.evalPythonCode(ProWorker_All, "print('remote script')")
    
    while m.isBusy():
        m.processMessages()
        time.sleep(0.5)
    
    print("finished!")
    
main()

Now the output is what would be expected:

remote script
remote script
remote script
remote script
remote script
finished!

ProMPOpt_AtomicOutput can be used in conjunction with ProMPOpt_RedirectOutput or by itself, since it makes ProMPOpt_RedirectOutput implicit.

We can also execute a Python script on disk:

from Pro.MP import *
import time

def main():
    m = ProManager()
    m.setOptions(ProMPOpt_AtomicOutput)
    
    for i in range(5):
        m.startWorker()
    
    m.executePythonScript(ProWorker_All, r"path/to/remote.py")
    
    while m.isBusy():
        m.processMessages()
        time.sleep(0.2)
    
    print("finished!")
    
main()

Calling Python Functions

If we need to call a function, we can use evalPythonFunction and executePythonFunction. These two methods are the counterparts of evalPythonCode and executePythonScript.

from Pro.Core import NTVariantList
from Pro.MP import *
import time

def main():
    m = ProManager()
    m.setOptions(ProMPOpt_AtomicOutput)
    
    m.startWorker()
        
    code = """
def sum(a, b):
    print(a + b)
"""
        
    args = NTVariantList()
    args.append(4)
    args.append(5)

    m.evalPythonFunction(ProWorker_All, code, "sum", args)

    for i in range(10):
        m.processMessages()
        time.sleep(0.2)
    
    print("finished!")
    
main()

The result of the call is outputted, but what if we want to retrieve the result from the remote call in our code?

In that case we can set the last argument of evalPythonFunction to True, which will cause the result of the call to be sent to the manager.

from Pro.Core import NTVariantList
from Pro.MP import *
import time

def main():
    m = ProManager()
    m.setOptions(ProMPOpt_AtomicOutput)

    worker_id = m.startWorker()

    code = """
def sum(a, b):
    return a + b
"""

    args = NTVariantList()
    args.append(4)
    args.append(5)

    m.evalPythonFunction(worker_id, code, "sum", args, True)
    
    while m.isBusy():
        m.processMessages()
        time.sleep(0.1)
        
    res = m.takeResult(worker_id)
    print("result:", res)
    
    print("finished!")
    
main()

Similarly, we can launch multiple workers and collect the results from all of them:

from Pro.Core import NTVariantList
from Pro.MP import *
import time

def main():
    m = ProManager()
    m.setOptions(ProMPOpt_AtomicOutput)

    for i in range(10):
        m.startWorker()

    code = """
import random

def genRandom():
    return random.randint(0, 1000)
"""

    m.evalPythonFunction(ProWorker_All, code, "genRandom", NTVariantList(), True)
    
    while m.isBusy():
        m.processMessages()
        time.sleep(0.1)
    
    while m.hasResults():
        res = m.takeResult(ProWorker_Any)
        print("result:", res)
    
    print("finished!")
    
main()

The random output:

result: 4
result: 619
result: 277
result: 141
result: 542
result: 670
result: 541
result: 506
result: 248
result: 803
finished!

Custom Messaging

Many times we would want to establish a custom communication between the manager and the worker. For this purpose, we can define our own messages and send them.

A ProMPMessage consists of an id and optional data. We can define our own message ids in the range of 0 – 0x7FFFFFFF (higher values are reserved for internal purposes).

The following snippet of code launches a worker with a snippet of Python code which waits for a request and sends a response. The manager sends a request and waits for a response. If the response is received, it prints out the content as a string.

from Pro.MP import *

def main():
    m = ProManager()
    m.setOptions(ProMPOpt_AtomicOutput)
    
    worker_id = m.startWorker()
    
    code = """
from Pro.MP import *

w = proWorkerObject()
if w.waitForMessage(1000):
    msg = w.getMessage()
    if msg.id == 1:
        resp = ProMPMessage(2)
        resp.data = b'remote message'
        w.sendMessage(resp)
"""
    m.evalPythonCode(worker_id, code)
    
    req = ProMPMessage(1)
    m.sendMessage(worker_id, req)
    
    if m.waitForMessage(worker_id, 1000):
        msg = m.getMessage(worker_id)
        if msg.id == 2:
            print(msg.data.decode("utf-8"))
        else:
            print("unknown message:", msg.id)
    else:
        print("no message")
    
    print("finished!")
    
main()

The output is:

remote message
finished!

Multi-level Processing

As already mentioned, a single process can create multiple managers. That’s true even for worker processes.

Let’s take into consideration the following snippet which must be launched from the command-line using the “-r” argument:

from Pro.MP import *
import time

if proWorkerProcessLevel() < 5:
    m = ProManager()
    m.setOptions(ProMPOpt_AtomicOutput)
    
    m.startWorker()
    m.executePythonScript(ProWorker_Any, __file__)
    
    while m.isBusy():
        m.processMessages()
        time.sleep(0.2)
        
    m = None
else:
    # last worker
    print("Hello, world!")

proWorkerProcessLevel returns the level of the worker process. The first process we launch has a level of 0, which means it’s the manager or, in this case, the root manager.

As long as proWorkerProcessLevel is less than 5, the code creates a manager, starts a worker and tells the worker to run itself. The last worker (level 5) prints out a message.

The output of the root process is:

Hello, world!

The reason is that the output is forwarded among each worker until it reaches the root manager.

Also important to notice is the following line in the script:

    m = None

Since the code is not in a function, we don’t want to leave a reference to the manager as otherwise the root process may not terminate and so won’t its workers.

Wait Objects

Managers and workers support wait objects. A wait object can be a wait dialog box or any other type of wait object.

Let’s take this basic code snippet which runs in a single process. The function doSomething performs a task until it finishes or until the user aborts the operation from the wait dialog.

from Pro.UI import *

def doSomething(wo):
    import time
    i = 1
    while not wo.wasAborted() and i < 101:
        time.sleep(0.05)
        wo.msg("Completed: " + str(i) + "%")
        wo.progress(i)
        wo.processEvents()
        i += 1

def main():
    wait = proContext().startWait("Doing something...")
    doSomething(wait)
    wait.stop()
    
main()

Let’s now write the same sample using multi-processing. This time doSomething is executed in a different process.

from Pro.Core import NTVariantList
from Pro.MP import *
from Pro.UI import *
import time

remote_code = """
def doSomething(wo):
    import time
    i = 1
    while not wo.wasAborted() and i < 101:
        time.sleep(0.05)
        wo.msg('Completed: ' + str(i) + '%')
        wo.progress(i)
        i += 1
        
def stub():
    from Pro.MP import proWorkerObject
    doSomething(proWorkerObject().waitObject())
"""

def main():
    m = ProManager()
    m.setOptions(ProMPOpt_AtomicOutput)
    
    worker_id = m.startWorker()
    
    ui_wait = proContext().startWait("Doing something...")
    wait = m.createWaitObject(worker_id, ui_wait)

    m.evalPythonFunction(worker_id, remote_code, "stub", NTVariantList())
    
    while m.isBusy():
        m.processMessages()
        time.sleep(0.02)
        wait.processEvents()

    wait.stop()
    
main()

The code of doSomething remained the same. We only removed the call to processEvents as we didn’t need to process UI events any longer, but we could have left it there as it wouldn’t have had any effect.

The important thing to remember is that both wait objects must remain referenced as long as we need them, since createWaitObject doesn’t add a reference to ui_wait.

User Interface

We can now further expand our use of managers and workers to the context of a user interface. Let’s say we want to keep an interface responsive while also performing some CPU-intensive operation.

An obvious solution is to launch a worker to do the heavy lifting for us and just wait for a response. The way we process messages in a UI context is to start idle processing using startIdleNotifications on a custom view. This will enable the custom view to receive pvnIdle notifications, which in turn can be used to call processMessages at fixed intervals.

The following code sample creates a custom view with a text control and inserts the text of every incoming message from the worker into the text control.

from Pro.UI import *
from Pro.MP import *

def MPViewCallback(cv, m, code, view, data):
    if code == pvnInit:
        cv.startIdleNotifications()
        return 1
    elif code == pvnIdle:
        m.processMessages()
        if m.hasMessage(ProWorker_Any):
            text_view = cv.getView(1)
            while True:
                msg = m.getMessage(ProWorker_Any)
                if msg.id == 1:
                    text_view.setSelectedText(msg.data.decode("utf-8"))
                if not m.hasMessage(ProWorker_Any):
                    break
    return 0

def main():
    ctx = proContext()
    v = ctx.createView(ProView.Type_Custom, "MP View")
    
    m = ProManager()
    m.setOptions(ProMPOpt_AtomicOutput)
    
    worker_id = m.startWorker()
    
    code = """
from Pro.MP import *
import time

w = proWorkerObject()
wo = w.waitObject()
msg = ProMPMessage(1)
i = 0
while not wo.wasAborted():
    msg.data = b'remote message ' + str(i).encode('utf-8') + b'\\n'
    w.sendMessage(msg)
    time.sleep(1)
    i += 1
"""
    m.evalPythonCode(worker_id, code)
    
    v.setup("<ui><hs><text id='1'/></hs></ui>", MPViewCallback, m)
    ctx.addView(v)

main()

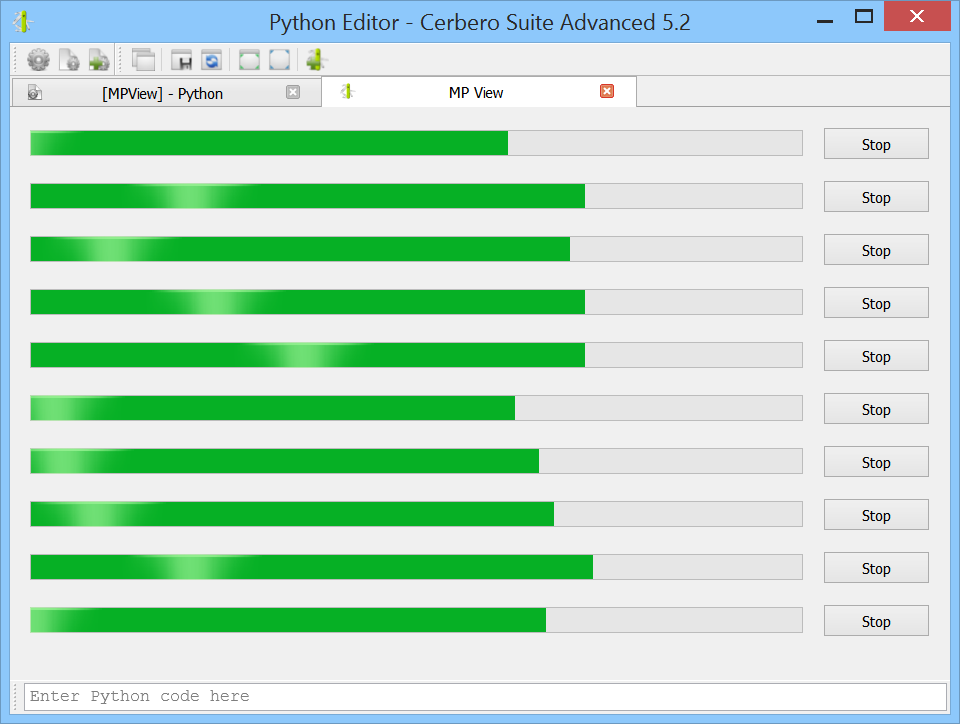
For the final code example we not only work with the UI, but also with wait objects.

We launch 10 workers. Each worker has a custom wait object which updates a progress bar in our view. The user can abort each worker by clicking on a ‘Cancel’ button next to the progress bar.

from Pro.Core import NTSimpleWait
from Pro.UI import *
from Pro.MP import *

remote_code = """
def doSomething(wo):
    import time
    i = 1
    while not wo.wasAborted() and i < 101:
        time.sleep(0.05)
        wo.progress(i)
        i += 1
        
from Pro.MP import proWorkerObject
doSomething(proWorkerObject().waitObject())
"""

class ProgressWait(NTSimpleWait):

    def __init__(self, ctrl):
        super(ProgressWait, self).__init__()
        self.ctrl = ctrl

    def progress(self, i):
        self.ctrl.setValue(i)
        
class MPView(object):

    def __init__(self):
        pass

    @staticmethod
    def callback(cv, self, code, view, data):
        if code == pvnInit:
            self.worker_ids = []
            # note: we must keep references to all wait objects
            self.ui_wait_objects = []
            self.mp_wait_object = []
            # create workers
            for i in range(self.worker_count):
                worker_id = self.manager.startWorker()
                self.worker_ids.append(worker_id)
                ui_wo = ProgressWait(self.view.getView(i))
                self.ui_wait_objects.append(ui_wo)
                mp_wo = self.manager.createWaitObject(worker_id, ui_wo)
                self.mp_wait_object.append(mp_wo)
                self.manager.evalPythonCode(worker_id, remote_code)
            cv.startIdleNotifications()
            return 1
        elif code == pvnIdle:
            # process messages
            self.manager.processMessages()
        elif code == pvnButtonClicked:
            view.setEnabled(False)
            worker_id = self.worker_ids[view.id() - 1000]
            self.manager.abortOperation(worker_id, 1000)
        return 0

    @staticmethod
    def create():
        ctx = proContext()
        self = MPView()
        self.worker_count = 10
        
        # create manager
        self.manager = ProManager()
        self.manager.setOptions(ProMPOpt_AtomicOutput)
        
        # create view
        self.view = ctx.createView(ProView.Type_Custom, "MP View")
        ui = "<ui><gl margin='20' spacing='20' align='top'>"
        for i in range(self.worker_count):
            ui += "<progbar id='%d'/><btn id='%d' text='Stop'/><nl/>" % (i, i + 1000)
        ui += "</gl></ui>"
        self.view.setup(ui, MPView.callback, self)
        ctx.addView(self.view)
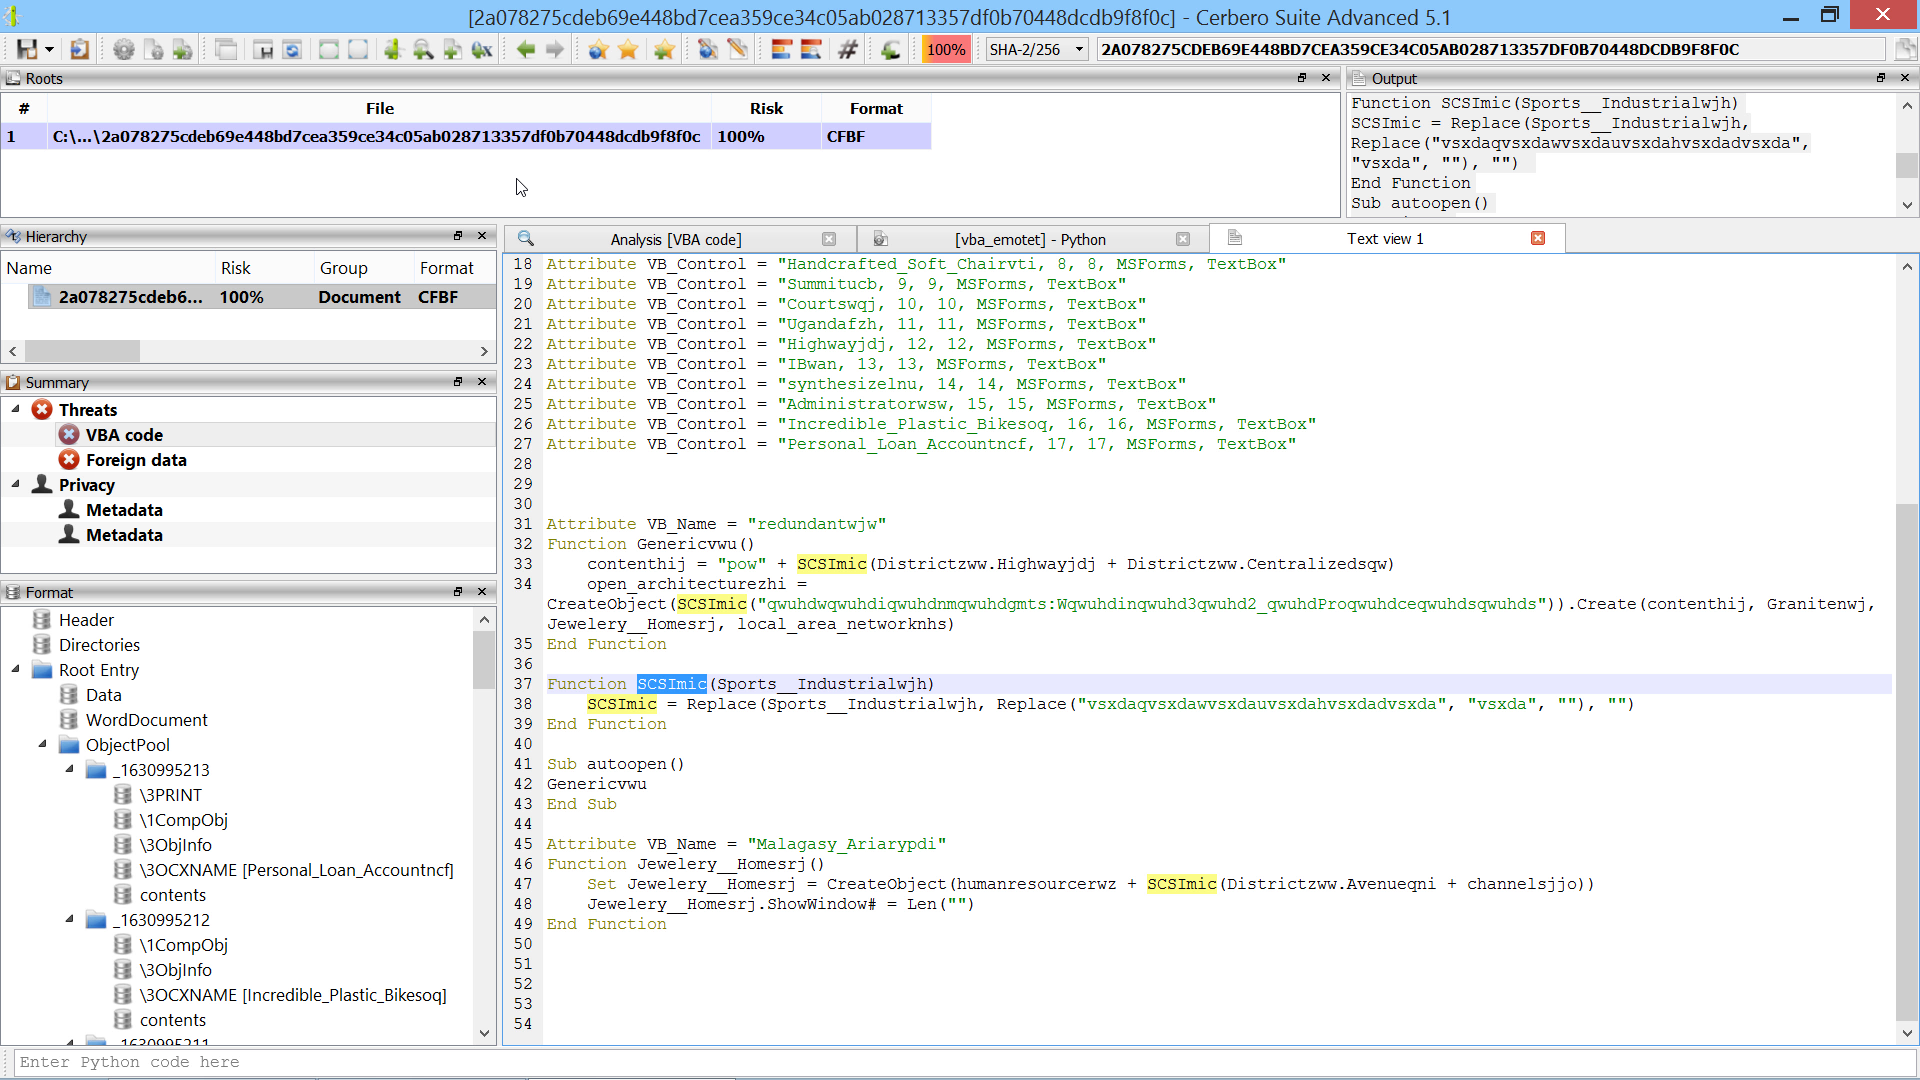
MPView.create()

An image in this case is worth a thousand words.

We’ll soon publish the official documentation for our multi-processing module.

PDF JavaScript Extraction Demo Package

We have already shown in the past how simple it is to leverage the capabilities of Cerbero SDK to extract JavaScript from PDF documents using a simple hook.

In this post we’ll use a package to deploy the demo code.

The advantage of using an installable package is that it minimizes the effort on the part of the user to test the code and the deployment method is compatible with both Cerbero Suite and Cerbero Engine.

We explained how packages work in a previous post in case you missed that.

The demo code is the following:

from Pro.Core import *

def printJSEntry(sp, xml, tnode):
    # data node
    dnode = xml.findChild(tnode, "d")
    if not dnode:
        return
    # we let Cerbero extract the JavaScript for us
    params = NTStringVariantHash()
    params.insert("op", "js")
    idnode = xml.findChild(dnode, "id")
    if idnode:
        params.insert("id", int(xml.value(idnode), 16))
    ridnode = xml.findChild(dnode, "rid")
    if idnode:
        params.insert("rid", int(xml.value(ridnode), 16))
    js = sp.customOperation(params)
    # print out the JavaScript
    print("JS CODE")
    print("-------")
    print(js)

def pdfExtractJS(sp, ud):
    xml = sp.getReportXML()
    # object node
    onode = xml.findChild(None, "o")
    if onode:
        # scan node
        snode = xml.findChild(onode, "s")
        if snode:
            # enumerate scan entries
            tchild = xml.firstChild(snode)
            while tchild:
                if xml.name(tchild) == "t":
                    # type attribute
                    tattr = xml.findAttribute(tchild, "t")
                    # check if it's a JavaScript entry
                    if tattr and int(xml.value(tattr)) == CT_JavaScript:
                        printJSEntry(sp, xml, tchild)
                tchild = xml.nextSibling(tchild)

And the configuration for the hook extension is the following:

[PDF JavaScript Extraction Demo]
file = pdf_js_extract_demo.py
scanned = pdfExtractJS
formats = PDF
enable = yes

Out of this two parts we created a package with an automatic setup which you can download from here.

The package can be installed with a few clicks. In fact, on Windows it can be installed directly from the shell context menu.

The setup dialog informs you that the package is verified as it was signed by Cerbero. Do not install the package if the signature couldn’t be verified!

The package once installed is visible in the list of installed packages. From there it can be uninstalled.

While the package is installed, it will print out the JavaScript code contained in PDF documents even if such documents are encrypted.

Packages are a not only a great way to deploy tools and plugins for Cerbero Suite and Cerbero Engine, but they also enable the secure deployment of demonstration snippets and other data.

Cerbero Suite 5.1 is out!

We’re happy to announce the release of Cerbero Suite 5.1 and Cerbero Engine 2.1!

This release comes packed with features and improvements. In this post we summarized the most important ones.

Installable Packages

While there are many interesting new features in this release, we consider the most important one to be the introduction of installable packages.

Packages enable developers to create plugins that can be easily installed by the user with just a few clicks. Not only that, but the same package is compatible with both Cerbero Suite and Cerbero Engine.

Packages can be encrypted and signed. When a package is not signed or the signature cannot be trusted, it is shown by the installation dialog.

We wrote an in-depth article about packages if you’re interested in learning more.

Improved Decompiler

We have introduced some improvements in the decompiler output. The most interesting of these improvements is the support of indirect string literal references.

We wrote a post about this topic for more information.

Local Carbon Structures

Previously, imported structures were shared among Carbon disassemblies in the same project. In Cerbero Suite 5.1 every disassembly in a project can have its own local structures.

This is especially useful when importing data structures from PDB files.

Of course, shared structures are also supported.

Improved CFBF Format View

We have simplified the analysis of Microsoft Office legacy documents that contain text controls by previewing their name in the format view.

We have published a 150-seconds video analysis of an Emotet sample which as part of its obfuscation strategy makes use of text controls.

Improved XLSB Support

We have improved support for the Microsoft Excel XLSB format.

We’ll soon publish malware analysis to showcase these improvements.

Improved Silicon Excel Emulator

We have added support for the FORMULA.ARRAY macro, since this macro is often used by malicious Excel documents.

Hierarchy View Size Column

We received this feature request on Twitter: now the hierarchy view also shows the size of files.

This can be useful when prioritizing the analysis of embedded files.

Improved File Dialogs

We disabled the preview of actual file icons in all file dialogs. This makes opening folders with thousands of files blazingly fast and it’s also better for security.

This may seem like a minor problem, but the devil is in the details…

Grid Layouts in Custom Views

We have added a new type of layout in custom views: grid layouts. This new layout type is already documented in our latest official SDK documentation.

Additionally, this new version comes with minor speed optimizations and bug fixes.

Installable Packages

In the upcoming Cerbero Suite 5.1 and Cerbero Engine 2.1 we have introduced installable packages for extensions.

This means that from now on installing a plugin in Cerbero Suite or Cerbero Engine might require only a few clicks or a command in the terminal.

Packages can be managed in Cerbero Suite from the command line, using the Python SDK and of course from the UI. On Windows they can be installed from the shell context menu as well.

From the command line packages can be managed using the following syntax:

-pkg-create : Create Package
    Syntax: -pkg-create input.zip output.cppkg
    --name : The unique name of the package
    --author : The author of the package
    --version : The version of the package. E.g.: --version "1.0.1"
    --descr : A description of the package
    --sign : The key to sign the package. E.g.: --sign private_key.pem

-pkg-install : Install Package
    Syntax: -pkg-install package_to_install.cppkg
    --force : Silently installs unverified packages

-pkg-uninstall : Uninstall Package
    Syntax: -pkg-uninstall "Package Name"

-pkg-verify : Verify Package
    Syntax: -pkg-verify package_to_verify.cppkg

Similarly packages can be installed, uninstalled and verified from Cerbero Engine using the ProManage.py script inside the local ‘python’ directory. E.g.:

python ProManage.py -pkg-install /path/to/package.cppkg

Packages can be signed. When a package is unsigned or the signature cannot be trusted, it is shown by the installation dialog.

A key pair for signing and verifying packages can be generated as follows:

# create the private key
openssl genrsa -out private.pem 4096

# extract the public key
openssl rsa -in private.pem -outform PEM -pubout -out public.pem

The public key must be added to the list of trusted signers. This can be done by placing the generated file with the name of the issuer in the ‘certs/pkg’ directory or by using the UI.

Since packages have their own format, they can be inspected using Cerbero Suite as any other supported file format.

Like the rest of the functionality related to packages, the class to parse packages is located inside ‘Pro.Package’.

Packages must have a unique name, an author, a version number of maximum 4 parts and a description. Packages are created from Zip archives and they can operate in three different ways:

  1. Relying on the automatic setup, without a setup script.
  2. Relying on a setup script.
  3. Relying on both the automatic setup and a setup script.

Out of the three ways, the first one is certainly the most intuitive: all the files in the Zip archive are installed following the same directory structure as in the archive.

This means that if the archive contains a file called:

plugins/python/CustomFolder/Code.py

It will be installed in the same directory under the user folder of Cerbero Suite or Cerbero Engine.

This is true for all files, except files in the ‘config’ directory. Those files are treated specially and their contents will be appended or removed from the configuration files of the user.

So, for instance, if the following configuration for an action must be installed:

[TestAction]
category = Test
label = Text label
file = TestCode.py
context = hex

It must only be stored in the archive under config/actions.cfg and the automatic installation/uninstallation process takes care of the rest.

Sometimes, however, an automatic installation might not be enough to install an extension. In that case a setup script called ‘setup.py’ can be provided in the archive:

def install(sctx):
    # custom operations
    return True
    
def uninstall(sctx):
    # custom operations
    return True

However, installing everything manually might also not be ideal. In many cases the optimal solution would be an automatic installation with only a few custom operations:

def install(sctx):
    # custom operations
    return sctx.autoInstall()
    
def uninstall(sctx):
    # custom operations
    return sctx.autoUninstall()

To store files in the archive which should be ignored by the automatic setup, they must be placed under a folder called ‘setup’.

Alternatively, files can be individually installed and uninstalled relying on the automatic setup using the ‘installFile’ and ‘uninstallFile’ methods of the setup context, which is passed to the functions in the setup script.

Custom extraction operations can be performed using the ‘extract’ method of the setup context.

An important thing to consider is that if the package is called ‘Test Package’, it will not make any difference if files are placed in the archive at the top level or under a root directory called ‘Test Package’.

For instance:

config/actions.cfg
setup.py

And:

Test Package/config/actions.cfg
Test Package/setup.py

Is considered to be the same. This way when creating the Zip archive, it can be created directly from a directory with the same name of the package.

Having a verified signature is not only good for security purposes, but also allows the package to show a custom icon in the installation dialog. The icon must be called ‘pkgicon.png’ and regardless of its size, it will be resized to a 48×48 icon when shown to the user.

What follows is an easy-to-adapt Python script to create packages using the command line of Cerbero Suite. It uses the “-c” parameter, to avoid displaying message boxes.

import os, sys, shutil, subprocess

cerbero_app = r"[CERBERO_APP_PATH]"

private_key = r"[OPTIONAL_PRIVATE_KEY_PATH]"

pkg_dir = r"C:\MyPackage\TestPackage"
pkg_out = r"C:\MyPackage\TestPackage.cppkg"

pkg_name = "Test Package"
pkg_author = "Test Author"
pkg_version = "1.0.1"
pkg_descr = "Description."

shutil.make_archive(pkg_dir, "zip", pkg_dir)

args = [cerbero_app, "-c", "-pkg-create", pkg_dir + ".zip", pkg_out, "--name", pkg_name, "--author", pkg_author, "--version", pkg_version, "--descr", pkg_descr]
if private_key:
    args.append("--sign")
    args.append(private_key)

ret = subprocess.run(args).returncode
os.remove(pkg_dir + ".zip")

print("Package successfully created!" if ret == 0 else "Couldn't create package!")
sys.exit(ret)