Cerbero Suite 5.1 is out!

We’re happy to announce the release of Cerbero Suite 5.1 and Cerbero Engine 2.1!

This release comes packed with features and improvements. In this post we summarized the most important ones.

Installable Packages

While there are many interesting new features in this release, we consider the most important one to be the introduction of installable packages.

Packages enable developers to create plugins that can be easily installed by the user with just a few clicks. Not only that, but the same package is compatible with both Cerbero Suite and Cerbero Engine.

Packages can be encrypted and signed. When a package is not signed or the signature cannot be trusted, it is shown by the installation dialog.

We wrote an in-depth article about packages if you’re interested in learning more.

Improved Decompiler

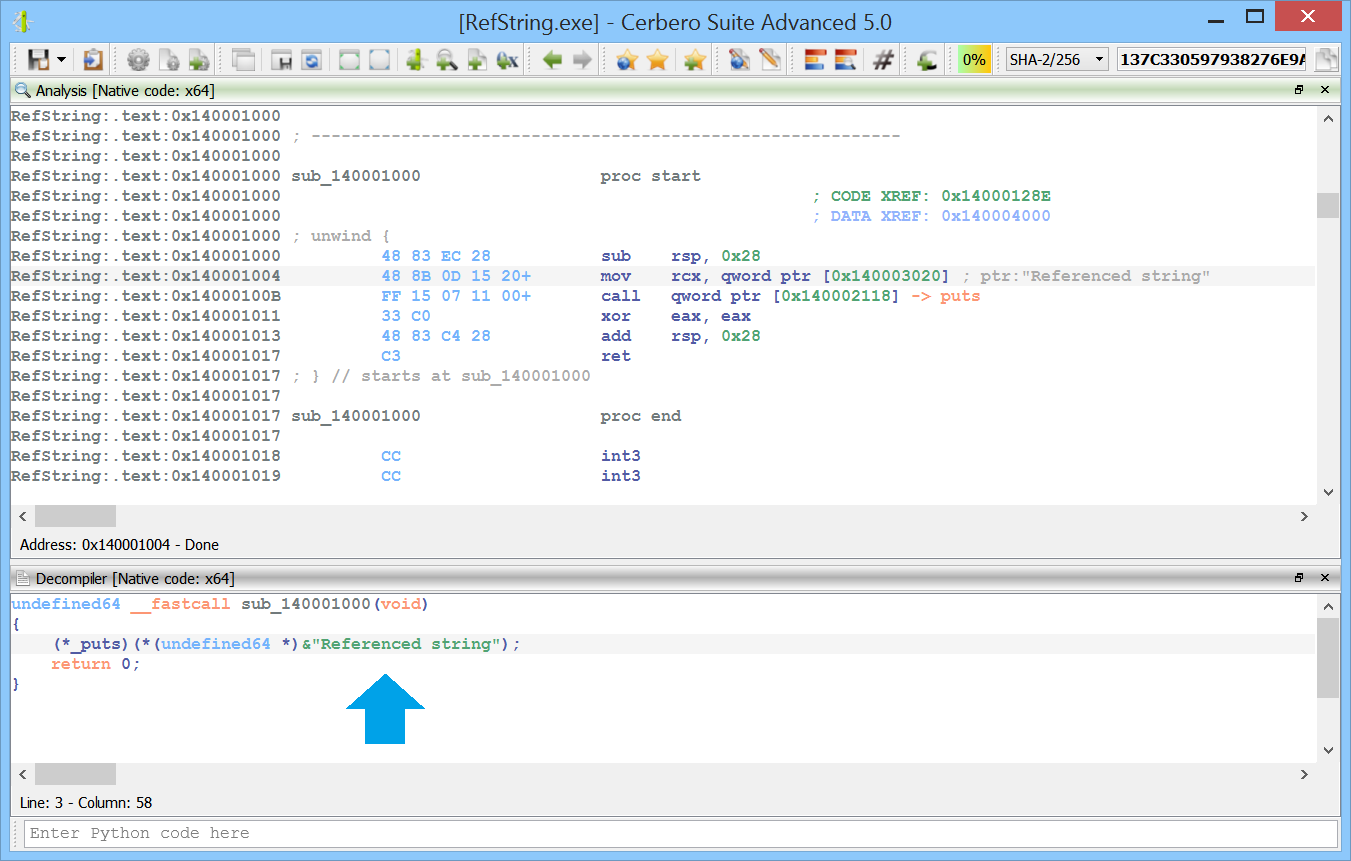
We have introduced some improvements in the decompiler output. The most interesting of these improvements is the support of indirect string literal references.

We wrote a post about this topic for more information.

Local Carbon Structures

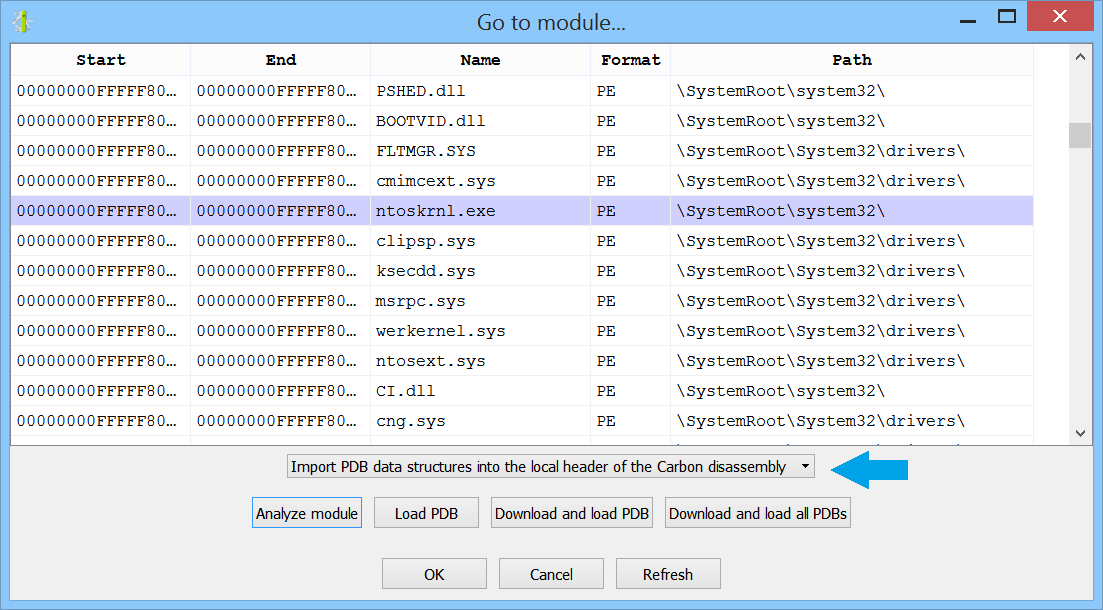
Previously, imported structures were shared among Carbon disassemblies in the same project. In Cerbero Suite 5.1 every disassembly in a project can have its own local structures.

This is especially useful when importing data structures from PDB files.

Of course, shared structures are also supported.

Improved CFBF Format View

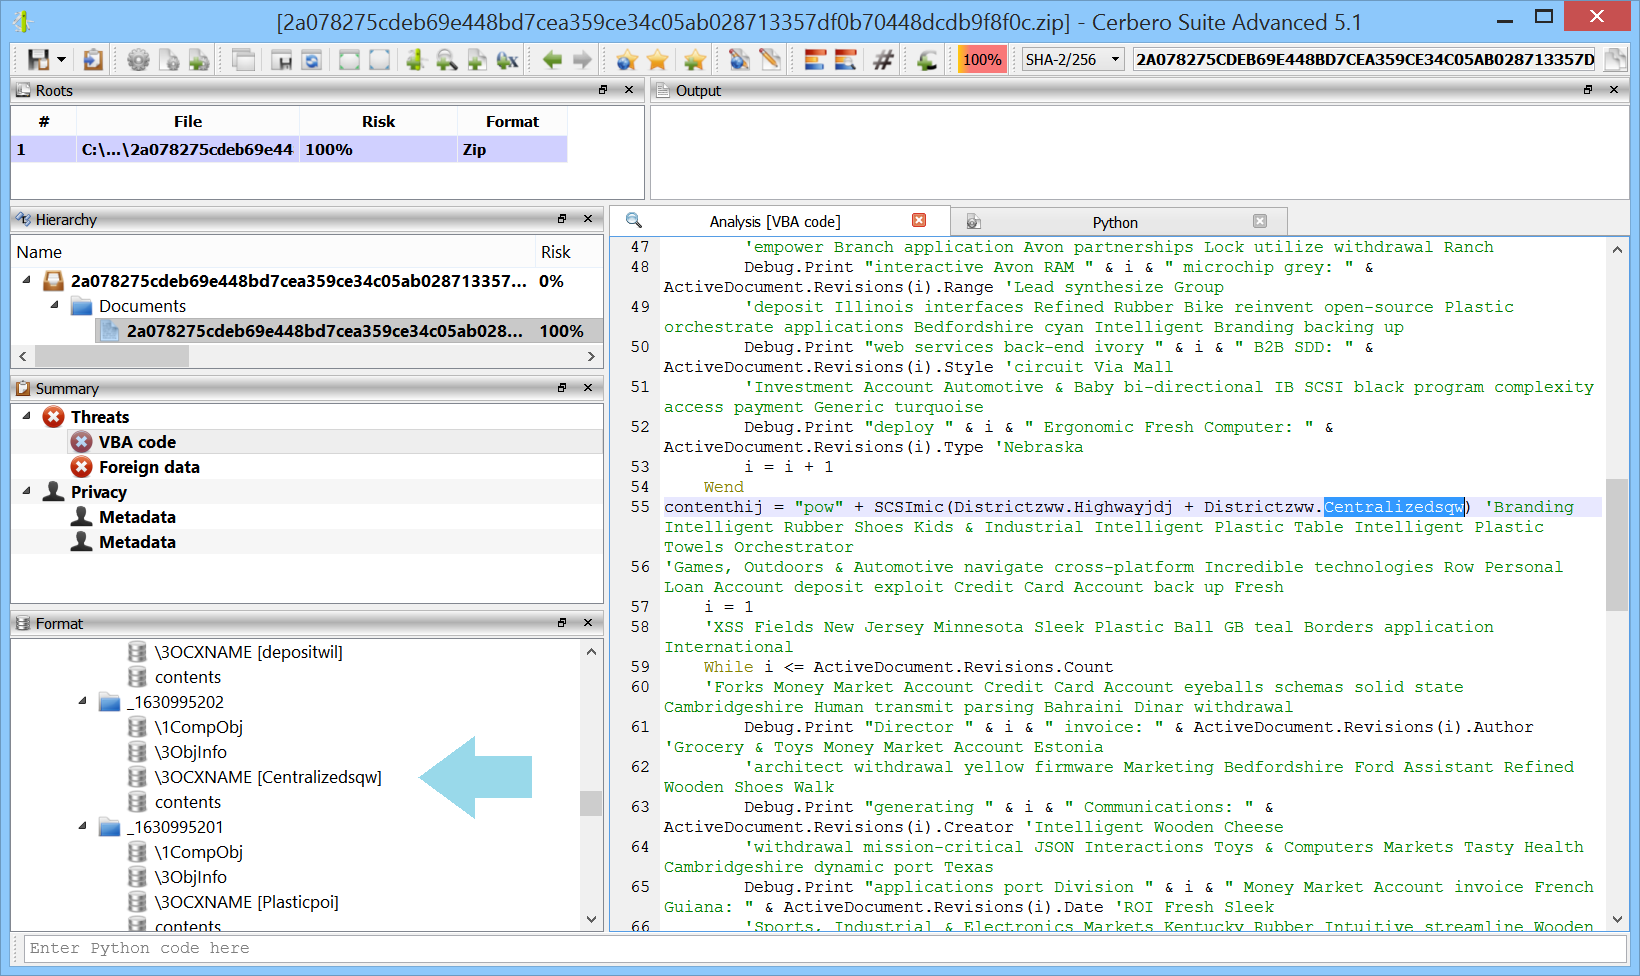
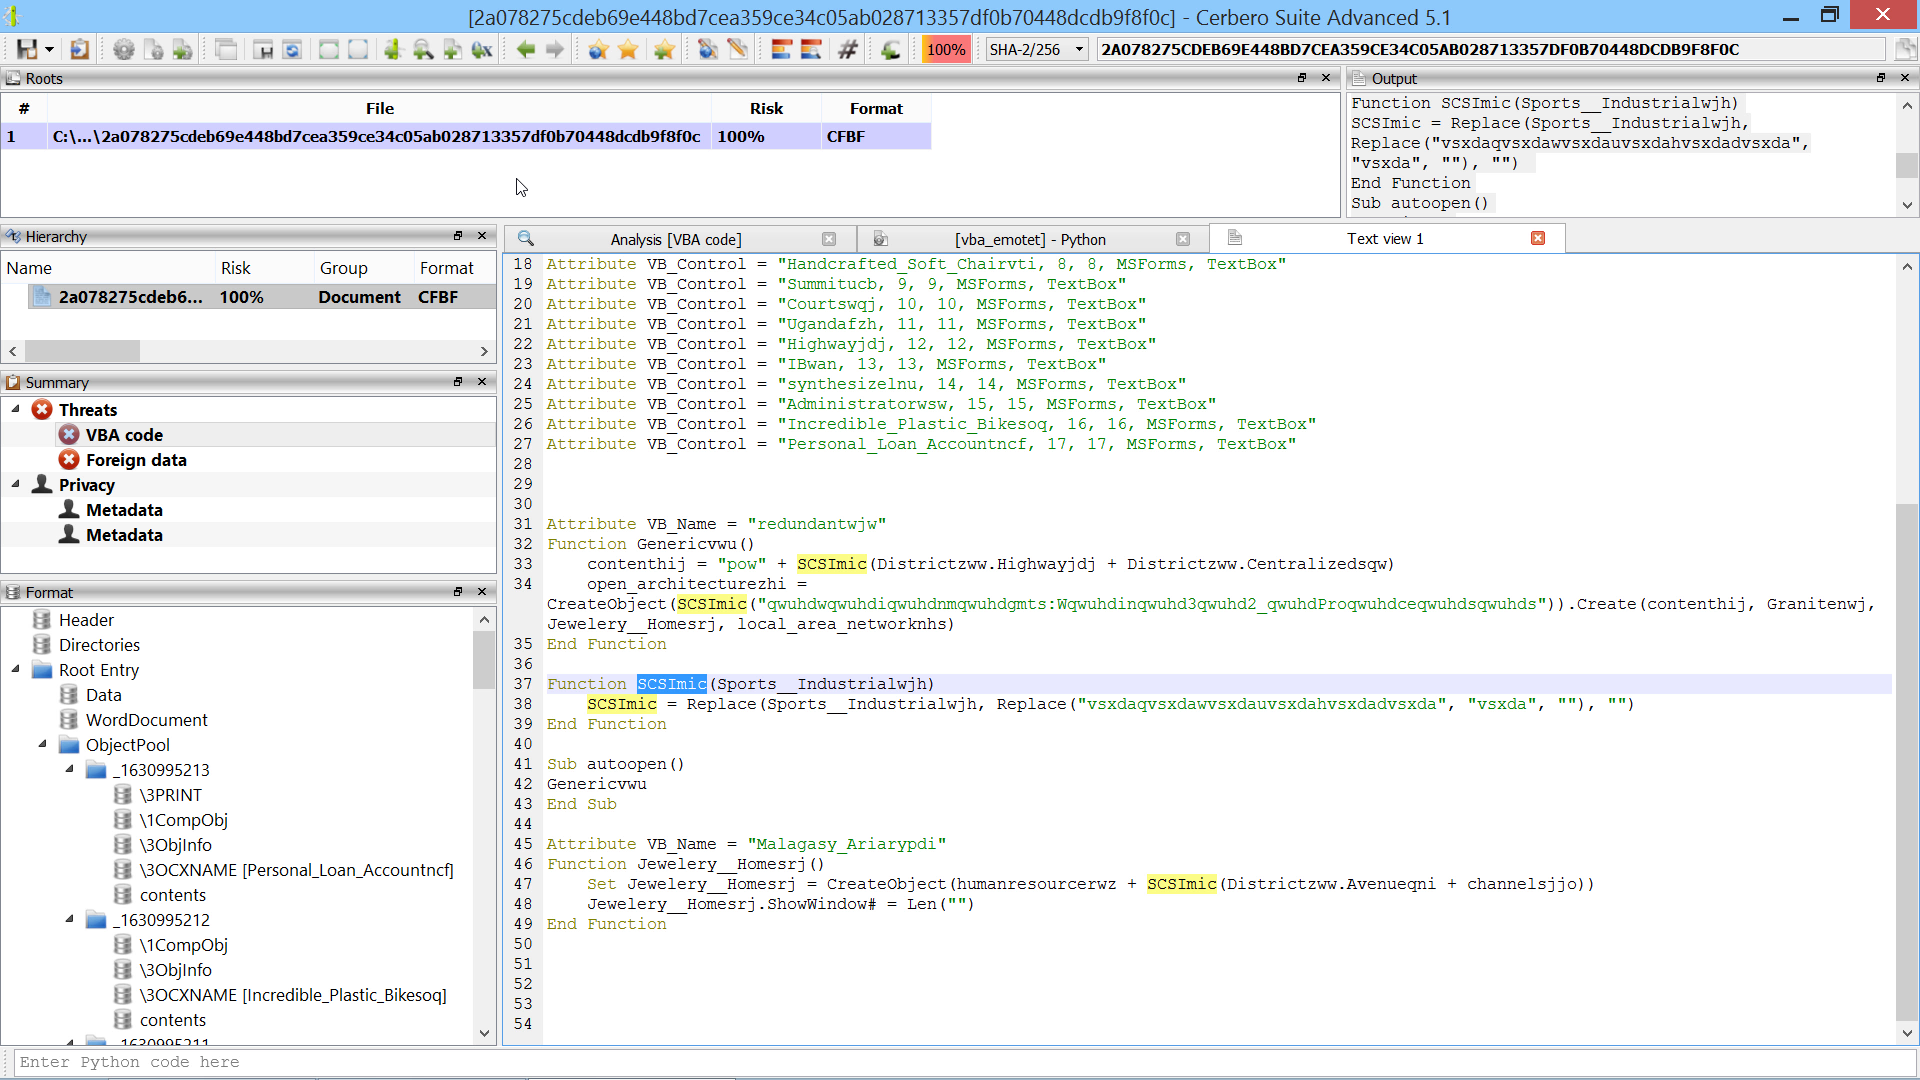
We have simplified the analysis of Microsoft Office legacy documents that contain text controls by previewing their name in the format view.

We have published a 150-seconds video analysis of an Emotet sample which as part of its obfuscation strategy makes use of text controls.

Improved XLSB Support

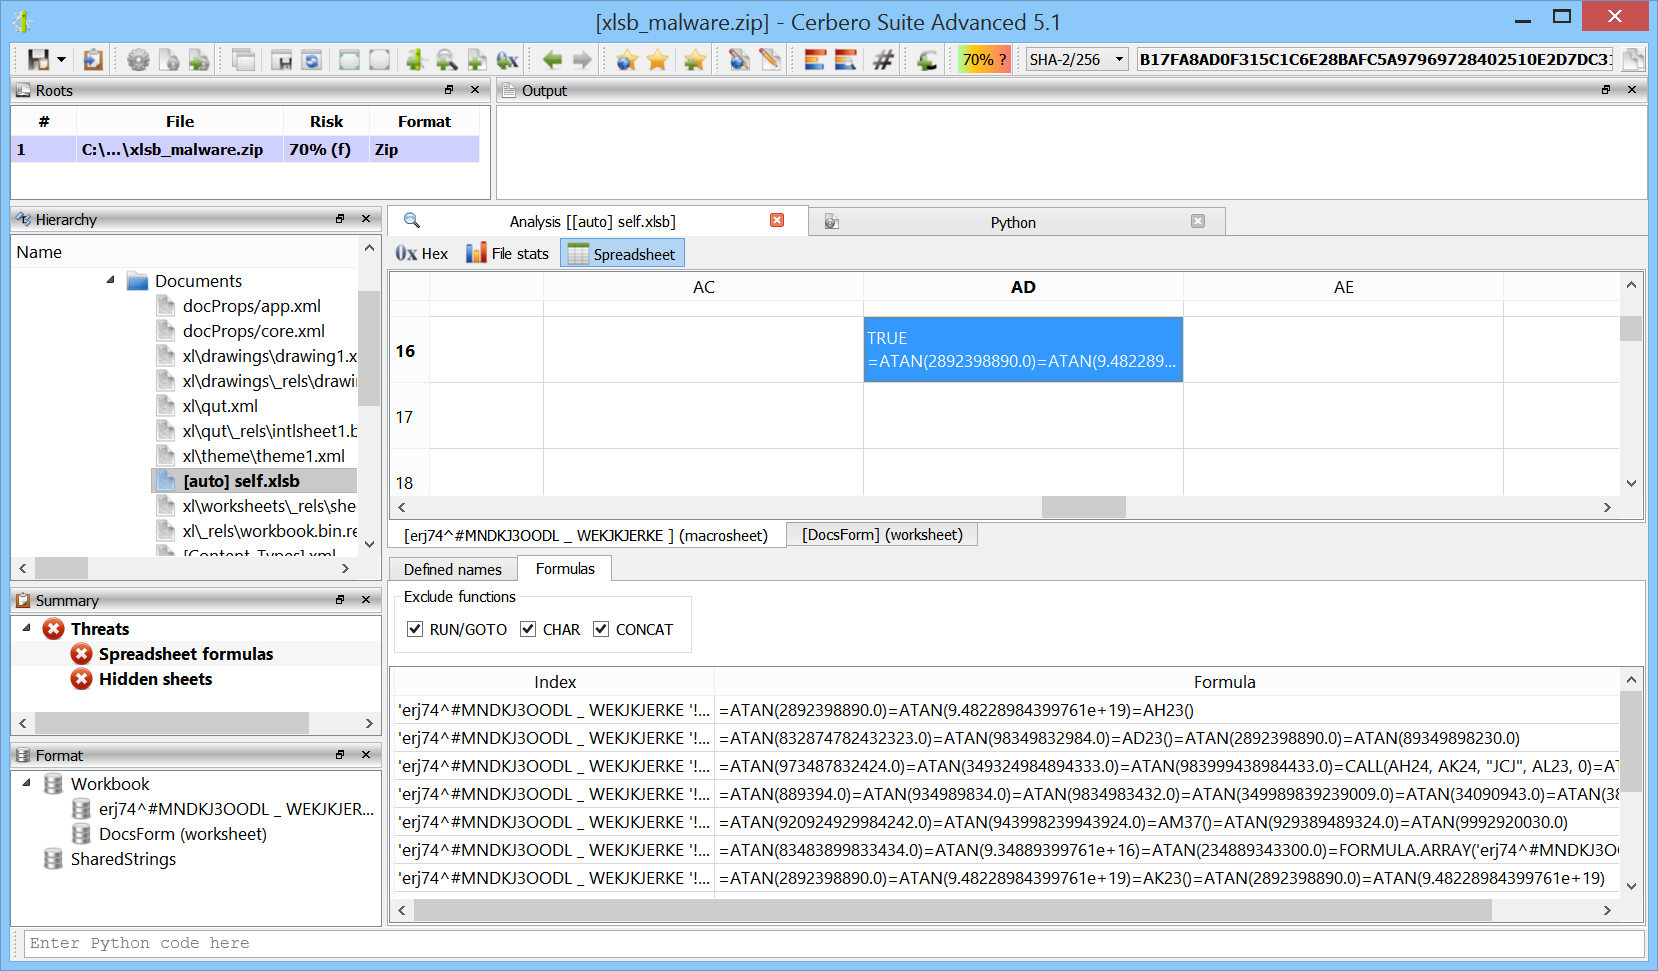
We have improved support for the Microsoft Excel XLSB format.

We’ll soon publish malware analysis to showcase these improvements.

Improved Silicon Excel Emulator

We have added support for the FORMULA.ARRAY macro, since this macro is often used by malicious Excel documents.

Hierarchy View Size Column

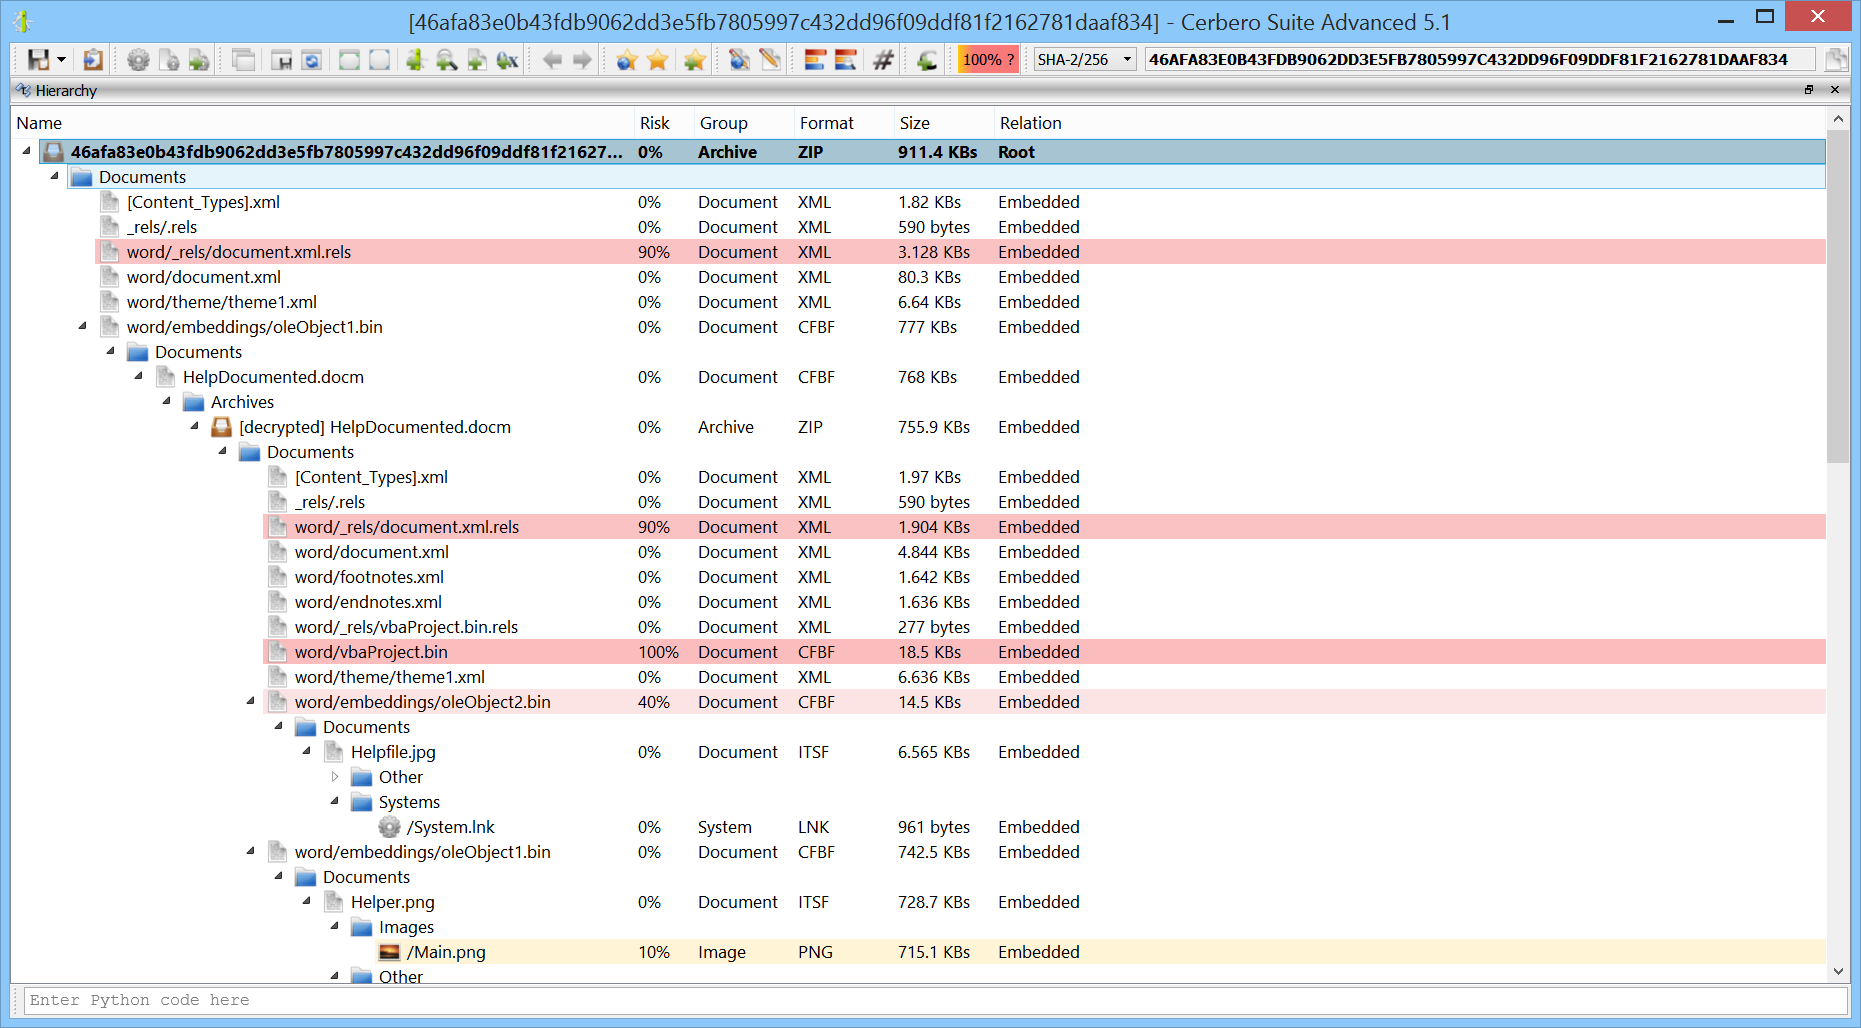
We received this feature request on Twitter: now the hierarchy view also shows the size of files.

This can be useful when prioritizing the analysis of embedded files.

Improved File Dialogs

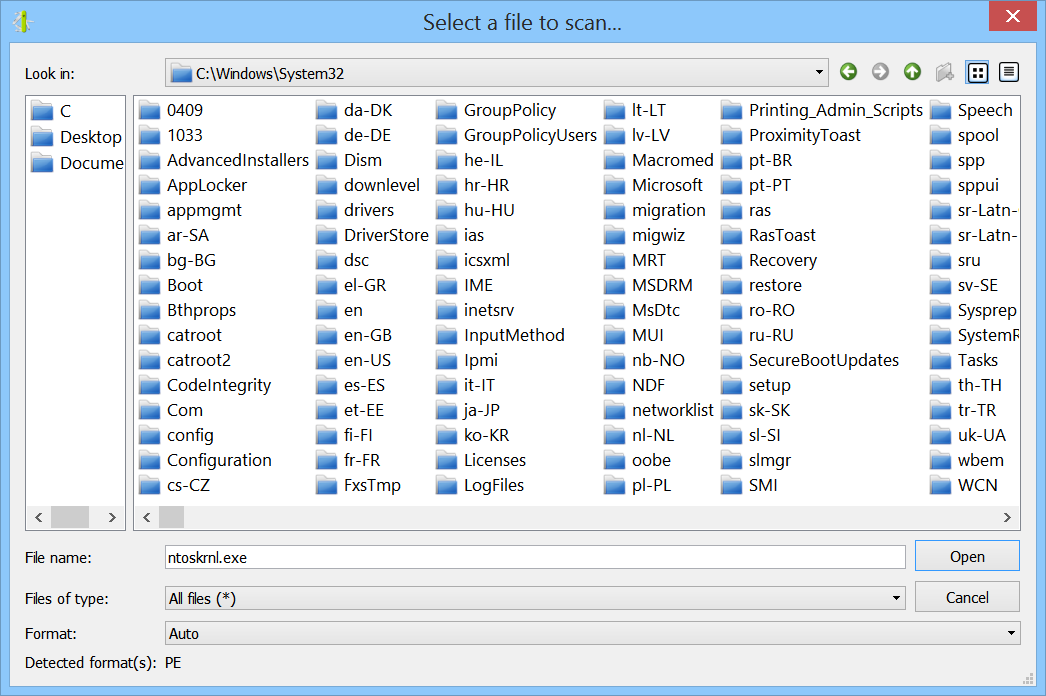
We disabled the preview of actual file icons in all file dialogs. This makes opening folders with thousands of files blazingly fast and it’s also better for security.

This may seem like a minor problem, but the devil is in the details…

Grid Layouts in Custom Views

We have added a new type of layout in custom views: grid layouts. This new layout type is already documented in our latest official SDK documentation.

Additionally, this new version comes with minor speed optimizations and bug fixes.

Installable Packages

In the upcoming Cerbero Suite 5.1 and Cerbero Engine 2.1 we have introduced installable packages for extensions.

This means that from now on installing a plugin in Cerbero Suite or Cerbero Engine might require only a few clicks or a command in the terminal.

Packages can be managed in Cerbero Suite from the command line, using the Python SDK and of course from the UI. On Windows they can be installed from the shell context menu as well.

From the command line packages can be managed using the following syntax:

-pkg-create : Create Package
    Syntax: -pkg-create input.zip output.cppkg
    --name : The unique name of the package
    --author : The author of the package
    --version : The version of the package. E.g.: --version "1.0.1"
    --descr : A description of the package
    --sign : The key to sign the package. E.g.: --sign private_key.pem

-pkg-install : Install Package
    Syntax: -pkg-install package_to_install.cppkg
    --force : Silently installs unverified packages

-pkg-uninstall : Uninstall Package
    Syntax: -pkg-uninstall "Package Name"

-pkg-verify : Verify Package
    Syntax: -pkg-verify package_to_verify.cppkg

Similarly packages can be installed, uninstalled and verified from Cerbero Engine using the ProManage.py script inside the local ‘python’ directory. E.g.:

python ProManage.py -pkg-install /path/to/package.cppkg

Packages can be signed. When a package is unsigned or the signature cannot be trusted, it is shown by the installation dialog.

A key pair for signing and verifying packages can be generated as follows:

# create the private key
openssl genrsa -out private.pem 4096

# extract the public key
openssl rsa -in private.pem -outform PEM -pubout -out public.pem

The public key must be added to the list of trusted signers. This can be done by placing the generated file with the name of the issuer in the ‘certs/pkg’ directory or by using the UI.

Since packages have their own format, they can be inspected using Cerbero Suite as any other supported file format.

Like the rest of the functionality related to packages, the class to parse packages is located inside ‘Pro.Package’.

Packages must have a unique name, an author, a version number of maximum 4 parts and a description. Packages are created from Zip archives and they can operate in three different ways:

  1. Relying on the automatic setup, without a setup script.
  2. Relying on a setup script.
  3. Relying on both the automatic setup and a setup script.

Out of the three ways, the first one is certainly the most intuitive: all the files in the Zip archive are installed following the same directory structure as in the archive.

This means that if the archive contains a file called:

plugins/python/CustomFolder/Code.py

It will be installed in the same directory under the user folder of Cerbero Suite or Cerbero Engine.

This is true for all files, except files in the ‘config’ directory. Those files are treated specially and their contents will be appended or removed from the configuration files of the user.

So, for instance, if the following configuration for an action must be installed:

[TestAction]
category = Test
label = Text label
file = TestCode.py
context = hex

It must only be stored in the archive under config/actions.cfg and the automatic installation/uninstallation process takes care of the rest.

Sometimes, however, an automatic installation might not be enough to install an extension. In that case a setup script called ‘setup.py’ can be provided in the archive:

def install(sctx):
    # custom operations
    return True
    
def uninstall(sctx):
    # custom operations
    return True

However, installing everything manually might also not be ideal. In many cases the optimal solution would be an automatic installation with only a few custom operations:

def install(sctx):
    # custom operations
    return sctx.autoInstall()
    
def uninstall(sctx):
    # custom operations
    return sctx.autoUninstall()

To store files in the archive which should be ignored by the automatic setup, they must be placed under a folder called ‘setup’.

Alternatively, files can be individually installed and uninstalled relying on the automatic setup using the ‘installFile’ and ‘uninstallFile’ methods of the setup context, which is passed to the functions in the setup script.

Custom extraction operations can be performed using the ‘extract’ method of the setup context.

An important thing to consider is that if the package is called ‘Test Package’, it will not make any difference if files are placed in the archive at the top level or under a root directory called ‘Test Package’.

For instance:

config/actions.cfg
setup.py

And:

Test Package/config/actions.cfg
Test Package/setup.py

Is considered to be the same. This way when creating the Zip archive, it can be created directly from a directory with the same name of the package.

Having a verified signature is not only good for security purposes, but also allows the package to show a custom icon in the installation dialog. The icon must be called ‘pkgicon.png’ and regardless of its size, it will be resized to a 48×48 icon when shown to the user.

What follows is an easy-to-adapt Python script to create packages using the command line of Cerbero Suite. It uses the “-c” parameter, to avoid displaying message boxes.

import os, sys, shutil, subprocess

cerbero_app = r"[CERBERO_APP_PATH]"

private_key = r"[OPTIONAL_PRIVATE_KEY_PATH]"

pkg_dir = r"C:\MyPackage\TestPackage"
pkg_out = r"C:\MyPackage\TestPackage.cppkg"

pkg_name = "Test Package"
pkg_author = "Test Author"
pkg_version = "1.0.1"
pkg_descr = "Description."

shutil.make_archive(pkg_dir, "zip", pkg_dir)

args = [cerbero_app, "-c", "-pkg-create", pkg_dir + ".zip", pkg_out, "--name", pkg_name, "--author", pkg_author, "--version", pkg_version, "--descr", pkg_descr]
if private_key:
    args.append("--sign")
    args.append(private_key)

ret = subprocess.run(args).returncode
os.remove(pkg_dir + ".zip")

print("Package successfully created!" if ret == 0 else "Couldn't create package!")
sys.exit(ret)

Go Binaries (part 2)

We’re currently working on making Go binaries easier to understand using our ultra-fast Carbon disassembler. In the upcoming weeks we’ll keep on posting progress updates.

In the previous part we focused on resolving function names. In this part we focus on resolving strings literals.

Let’s take the following decompiler output for a Go function:

void __stdcall sub_47D590(void)
{
    uint32_t *puVar1;
    int32_t in_FS_OFFSET;
    unk32_t uStack8;
    unk32_t uStack4;
    
    while (puVar1 = (uint32_t *)(**(int32_t **)(in_FS_OFFSET + 0x14) + 8),
          *(BADSPACEBASE **)0x10 < (unk8_t *)*puVar1 ||
          (unk8_t *)*(BADSPACEBASE **)0x10 == (unk8_t *)*puVar1) {
        uStack4 = 0x47D638;
        sub_446900();
    }
    sub_44B9D0("syntax error scanning complex numberuncaching span but s.allocCount == 0) is smaller than minimum pa", 0x24);
    *(unk32_t *)0x532DC8 = uStack8;
    if (*(int32_t *)0x542C70 == 0) {
        *(unk32_t *)0x532DCC = uStack4;
    }
    else {
        sub_448050();
    }
    sub_44B9D0("syntax error scanning booleantimeBegin/EndPeriod not foundtoo many open files in systemtraceback has", 0x1D);
    *(unk32_t *)0x532DC0 = uStack8;
    if (*(int32_t *)0x542C70 == 0) {
        *(unk32_t *)0x532DC4 = uStack4;
    }
    else {
        sub_448050();
    }
    return;
}

It lacks function names and although referenced strings are visible thanks to the heuristics implemented in our decompiler, the size of the strings is incorrect, as the strings are not null-terminated.

By correctly resolving the Go strings, we obtain an improved output:

void __stdcall fmt.init.ializers(void)
{
    uint32_t *puVar1;
    int32_t in_FS_OFFSET;
    unk32_t uStack8;
    unk8_t *puStack4;
    
    while (puVar1 = (uint32_t *)(**(int32_t **)(in_FS_OFFSET + 0x14) + 8),
          *(BADSPACEBASE **)0x10 < (unk8_t *)*puVar1 ||
          (unk8_t *)*(BADSPACEBASE **)0x10 == (unk8_t *)*puVar1) {
        puStack4 = &fmt.init.ializers;
        runtime.morestack_noctxt();
    }
    errors.New("syntax error scanning complex number", 0x24);
    *(unk32_t *)0x532DC8 = uStack8;
    if (*(int32_t *)0x542C70 == 0) {
        *(unk8_t **)0x532DCC = puStack4;
    }
    else {
        runtime.gcWriteBarrier();
    }
    errors.New("syntax error scanning boolean", 0x1D);
    *(unk32_t *)0x532DC0 = uStack8;
    if (*(int32_t *)0x542C70 == 0) {
        *(unk8_t **)0x532DC4 = puStack4;
    }
    else {
        runtime.gcWriteBarrier();
    }
    return;

The same is true for our initial hello world example:

package main

import "fmt"

func main() {
    fmt.Println("Hello, World!")
}

The original decompiler output would be:

void __stdcall sub_47D7B0(void)
{
    uint32_t *puVar1;
    int32_t in_FS_OFFSET;
    unk32_t uStack8;
    unk32_t uStack4;
    
    while (puVar1 = (uint32_t *)(**(int32_t **)(in_FS_OFFSET + 0x14) + 8),
          *(BADSPACEBASE **)0x10 < (unk8_t *)*puVar1 ||
          (unk8_t *)*(BADSPACEBASE **)0x10 == (unk8_t *)*puVar1) {
        uStack4 = 0x47D823;
        sub_446900();
    }
    uStack8 = 0x491320;
    uStack4 = &"Hello, World!MapViewOfFileMasaram_GondiMende_KikakuiOld_HungarianRegDeleteKeyWRegEnumKeyExWRegEnumVa";
    sub_478270(0x4BCEC0, *(unk32_t *)0x532A8C, &uStack8, 1, 1);
    return;
}

While the newly introduced feature of our decompiler already detects the indirect string literal reference, again the size of the string is wrong.

The improved decompiler output is:

void __stdcall main.main(void)
{
    uint32_t *puVar1;
    int32_t in_FS_OFFSET;
    unk32_t uStack8;
    unk8_t *puStack4;
    
    while (puVar1 = (uint32_t *)(**(int32_t **)(in_FS_OFFSET + 0x14) + 8),
          *(BADSPACEBASE **)0x10 < (unk8_t *)*puVar1 ||
          (unk8_t *)*(BADSPACEBASE **)0x10 == (unk8_t *)*puVar1) {
        puStack4 = &main.main;
        runtime.morestack_noctxt();
    }
    uStack8 = 0x491320;
    puStack4 = (unk8_t *)&"Hello, World!";
    fmt.Fprintln(0x4BCEC0, *(unk32_t *)0x532A8C, &uStack8, 1, 1);
    return;
}

While it’s still far from being easy to read, it’s definitely easier to read than before.

To be continued…

Decompiler: Indirect String References

The upcoming 5.1 version of Cerbero Suite Advanced introduces improvements in the output of the decompiler.

One of the improvements is the detection and display of indirect string literal references. These type of references are already correctly handled by our ultra-fast Carbon disassembler.

Let’s take for instance the following code example:

#include <stdio.h>

void foo(const char **ref)
{
    puts(*ref);
}

int main ()
{
    static const char *s = "Referenced string";
    foo(&s);
    return 0;
}

Our Carbon disassembler already detects the indirect reference:

RefString:.text:0x140001000 sub_140001000 proc start
RefString:.text:0x140001000                                 ; CODE XREF: 0x14000128E
RefString:.text:0x140001000                                 ; DATA XREF: 0x140004000
RefString:.text:0x140001000 ; unwind {
RefString:.text:0x140001000        sub    rsp, 0x28
RefString:.text:0x140001004        mov    rcx, qword ptr [0x140003020] ; ptr:"Referenced string"
RefString:.text:0x14000100B        call   qword ptr [0x140002118] -> puts
RefString:.text:0x140001011        xor    eax, eax
RefString:.text:0x140001013        add    rsp, 0x28
RefString:.text:0x140001017        ret
RefString:.text:0x140001017 ; } // starts at sub_140001000
RefString:.text:0x140001017
RefString:.text:0x140001017 sub_140001000 proc end

However, up until now the decompiler would produce the following output:

undefined64 __fastcall sub_140001000(void)
{
    (*_puts)(*(undefined64 *)0x140003020);
    return 0;
}

While, in the upcoming version the output is:

undefined64 __fastcall sub_140001000(void)
{
    (*_puts)(*(undefined64 *)&"Referenced string");
    return 0;
}

More decompiler improvements will be introduced in the upcoming version!

Go Binaries (part 1)

We’re currently working on making Go binaries easier to understand using our ultra-fast Carbon disassembler. In the upcoming weeks we’ll be posting progress updates.

Let’s start with a basic hello world example.

package main

import "fmt"

func main() {
    fmt.Println("Hello, World!")
}

Without additional logic, functions name are not available.

We can see the referenced string, although it is not null-terminated, so that we don’t know its length.

The ‘main.main’ function is not treated as a function and even if we define it as such by pressing ‘P’, the decompiled result is hardly intelligible.

void __stdcall sub_47D7B0(void)
{
    uint32_t *puVar1;
    int32_t in_FS_OFFSET;
    undefined32 uStack8;
    undefined32 uStack4;
    
    while (puVar1 = (uint32_t *)(**(int32_t **)(in_FS_OFFSET + 0x14) + 8),
          *(BADSPACEBASE **)0x10 < (undefined *)*puVar1 ||
          (undefined *)*(BADSPACEBASE **)0x10 == (undefined *)*puVar1) {
        uStack4 = 0x47D823;
        sub_446900();
    }
    uStack8 = 0x491320;
    uStack4 = 0x4BC178;
    sub_478270(0x4BCEC0, *(undefined32 *)0x532A8C, &uStack8, 1, 1);
    return;
}

So the first step is recognizing functions and retrieving their names.

void __stdcall main.main(void)
{
    uint32_t *puVar1;
    int32_t in_FS_OFFSET;
    undefined32 uStack8;
    undefined *puStack4;
    
    while (puVar1 = (uint32_t *)(**(int32_t **)(in_FS_OFFSET + 0x14) + 8),
          *(BADSPACEBASE **)0x10 < (undefined *)*puVar1 ||
          (undefined *)*(BADSPACEBASE **)0x10 == (undefined *)*puVar1) {
        puStack4 = &main.main;
        runtime.morestack_noctxt();
    }
    uStack8 = 0x491320;
    puStack4 = (undefined *)0x4BC178;
    fmt.Fprintln(0x4BCEC0, *(undefined32 *)0x532A8C, &uStack8, 1, 1);
    return;

While it's still not easy to read, we can grasp a bit more of its meaning.

To be continued...

Cerbero Suite 5 Commercial Discounts Month

To celebrate the launch of Cerbero Suite 5 we’ll be offering commercial discounts for the next 30 days!

By purchasing 3 commercial licenses, you pay only 2!

Or:

By purchasing 7 commercial licenses, you pay only 4!

Or:

By purchasing 10 commercial licenses, you pay only 6!

Or:

If you already have a commercial license, you can purchase new licenses at a 50% discount!

Or:

If you have a home/academic license and would like to upgrade to a commercial license, you get a 50% discount!

To receive a discount coupon or for any question, please contact us at: sales@cerbero.io.

Please notice that this is a limited time offer and it won’t be extended over the announced period of time!

Cerbero Suite 5 is out!

We’re proud to announce the release of Cerbero Suite 5 and Cerbero Enterprise Engine 2!

All of our customers can upgrade at a 50% discount their licenses for the next 3 months! We value our customers and everyone who has bought a license in August should have already received a free upgrade for Cerbero Suite 5! If you fall in that category and haven’t received a new license, please check your spam folder and in case contact us at sales@cerbero.io. Everyone who has acquired a license before August, but in the last 3 months, will get an additional discount.

Starting today we’ll be contacting all of our existing customers and provide them with a discount coupon. If you don’t get an email from us in the next two days, please contact us at sales@cerbero.io!

Speed

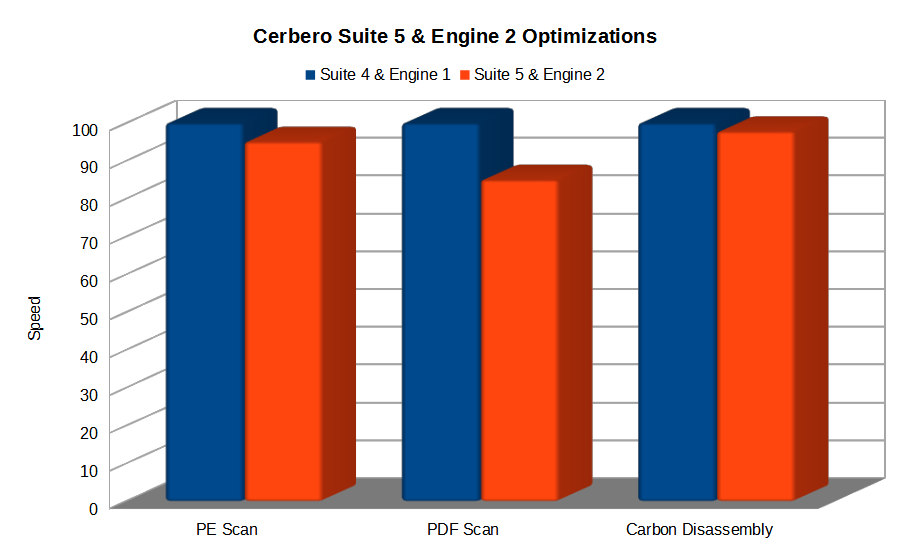
We introduced many core optimizations, while maintaining the same level of security.

Cerbero Suite has always been fast, so these changes may not be too apparent. They are, however, noticeable in our benchmarks!

The scanning of certain file formats like PE and the disassembly of binaries using Carbon show a decent performance boost. However, in the case of certain file formats like PDF the performance boost is massive!

Documentation

For this release we created beautiful documentation for our SDK, which can be found at: https://sdk.cerbero.io/latest/.

The documentation of each module comes with an introduction detailing essential concepts.

Other sections provide code examples with explanations.

The API documentation contains the prototype of each method and function and it comes with code examples.

Related constants, classes, methods and functions all contain references to each other.

The documentation contains notes and hints in case there are things to be aware of.

The documentation is searchable. Entering the name of a constant, class, method or function directly brings to its documentation.

The documentation of the UI module will enable you to create complex user interfaces.

It even explains how to create entire workspaces with dock views, menus and toolbars.

While there remain dozens of modules to document, the Core and UI module represent a great part of the functionality of Cerbero Suite and Cerbero Enterprise Engine. We will release the documentation of more modules and topics over the course of the 5.x series.

Python

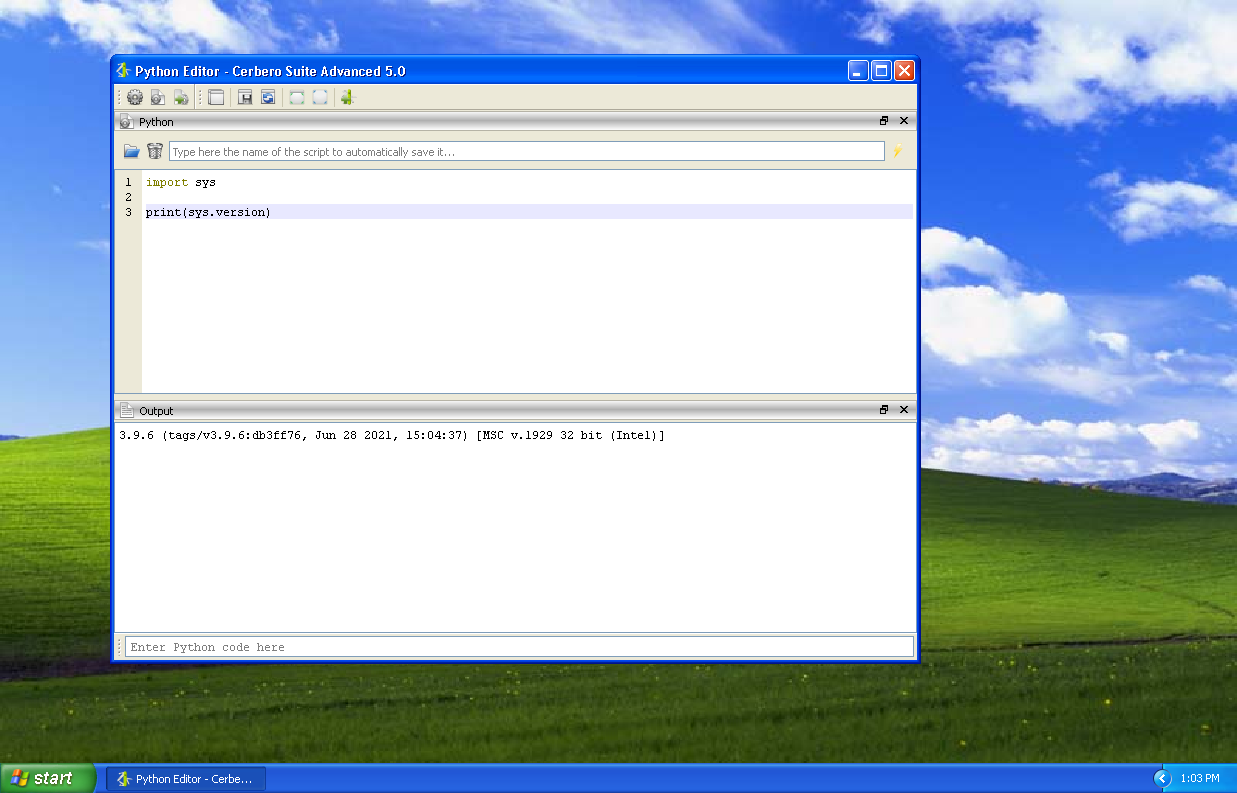
This release comes with the latest Python 3.9.6!

We update Python only between major versions and for the release of Cerbero Suite 4 we didn’t have the time to upgrade. So the previous series remained with Python 3.6.

This series not only comes with the very latest Python version, but we also managed to keep compatibility with all our older supported systems, including Windows XP!

Scan Data Hooks

We introduced a new type of hook extension: scan data hooks.

Using this type of hooks, it’s trivial to customize the scan results of existing scan providers.

For example, adding a custom entry during the scan of a PE file and then provide the view to display it in the workspace.

The following is small example.

Add these lines to your user ‘hooks.cfg’ file.

[ExtScanDataTest_1]
label = External scan data test
file = ext_data_test.py
scanning = scanning
scandata = scandata

Create the file ‘ext_data_test.py’ in your ‘plugins/python’ directory and paste the following code into it.

from Pro.Core import *

def scanning(sp, ud):
    e = ScanEntryData()
    e.category = SEC_Info
    e.type = CT_VersionInfo
    e.otarget = "This is a test"
    sp.addHookEntry("ExtScanDataTest_1", e)
    
def scandata(sp, xml, dnode, sdata):
    sdata.setViews(SCANVIEW_TEXT)
    sdata.data.setData("Hello, world!")
    return True

Activate the extension from Extensions -> Hooks.

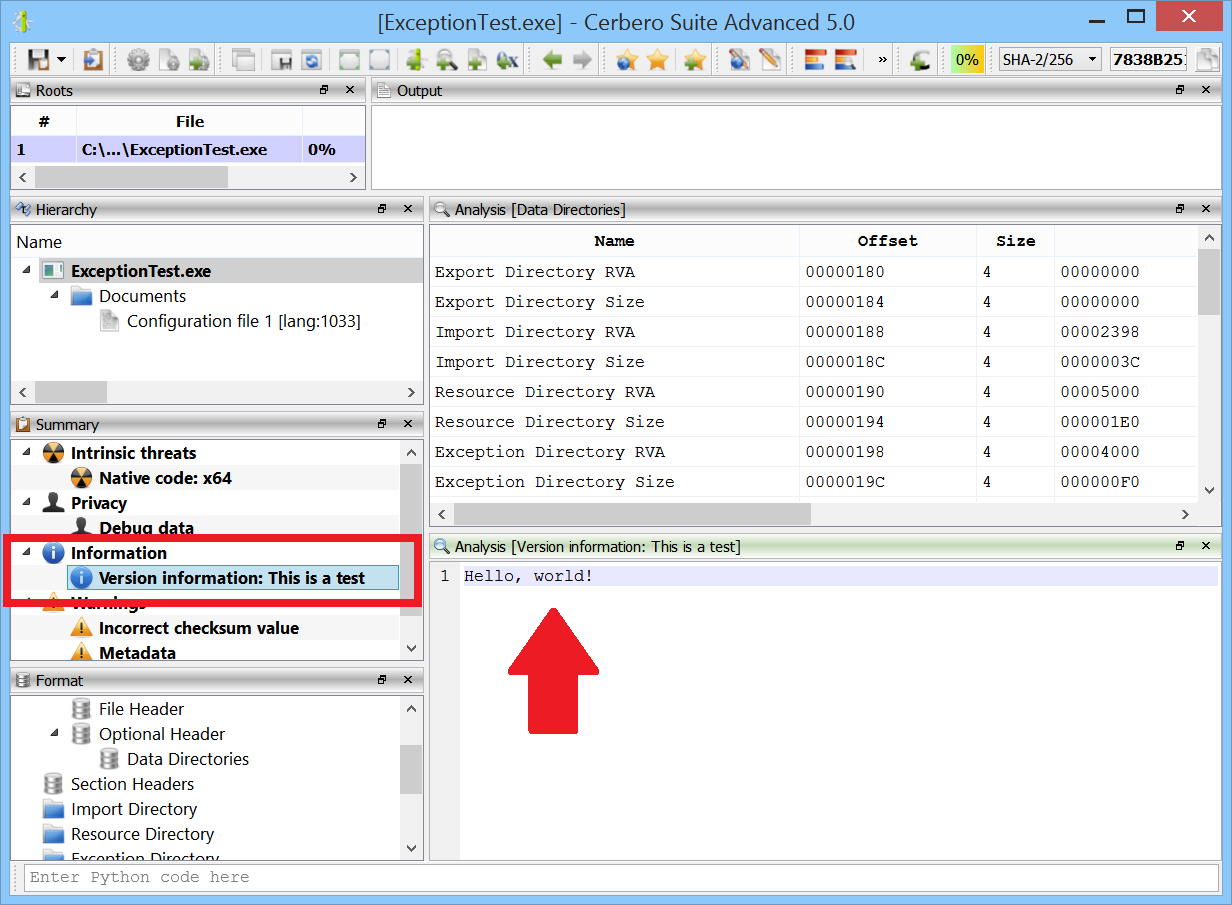
Now when scanning a file an additional entry will be shown in the report.

Clicking on the entry will display the data provided by the extension!

This type of extension is extremely powerful and we’ll show some real use cases soon.

What Next?

Among the many things we introduced over the course of the previous 4.x series there was:

  • ARM32/ARM64 disassembly and decompiling.
  • Decompiling and emulation of Excel macros.
  • Support for Microsoft Office document decryption.
  • Disassembly of Windows user address space.
  • Disassembly of Windows DMP files.
  • Support of XLSB and XLSM formats.
  • Support of CAB format.
  • Hex editing of processes, disk and drives on Windows.
  • Updated native UI for Ghidra 10.
  • Improved decompiler.
  • Improved macOS support.

So in the last series we spent a lot of time focusing on Microsoft technology.

In particular, Excel malware required supporting its decryption, the various file formats used to deliver it (XLS, XLSB, XLSM) and creating a decompiler and an emulator for its macros.

Also, in June we launched our Cerbero Enterprise Engine, which detracted some of our development resources, but it gave us the opportunity to clean up and improve our SDK.

This series will be focused mostly on non-Microsoft specific technology and hence will appeal to a broader audience.

We can’t wait to show you some of the things we have planned and we hope you enjoy this new release!

Happy hacking!

Cerbero Suite 4.8 is out!

This time it took a bit longer, because we were busy with the release of our Cerbero Engine.

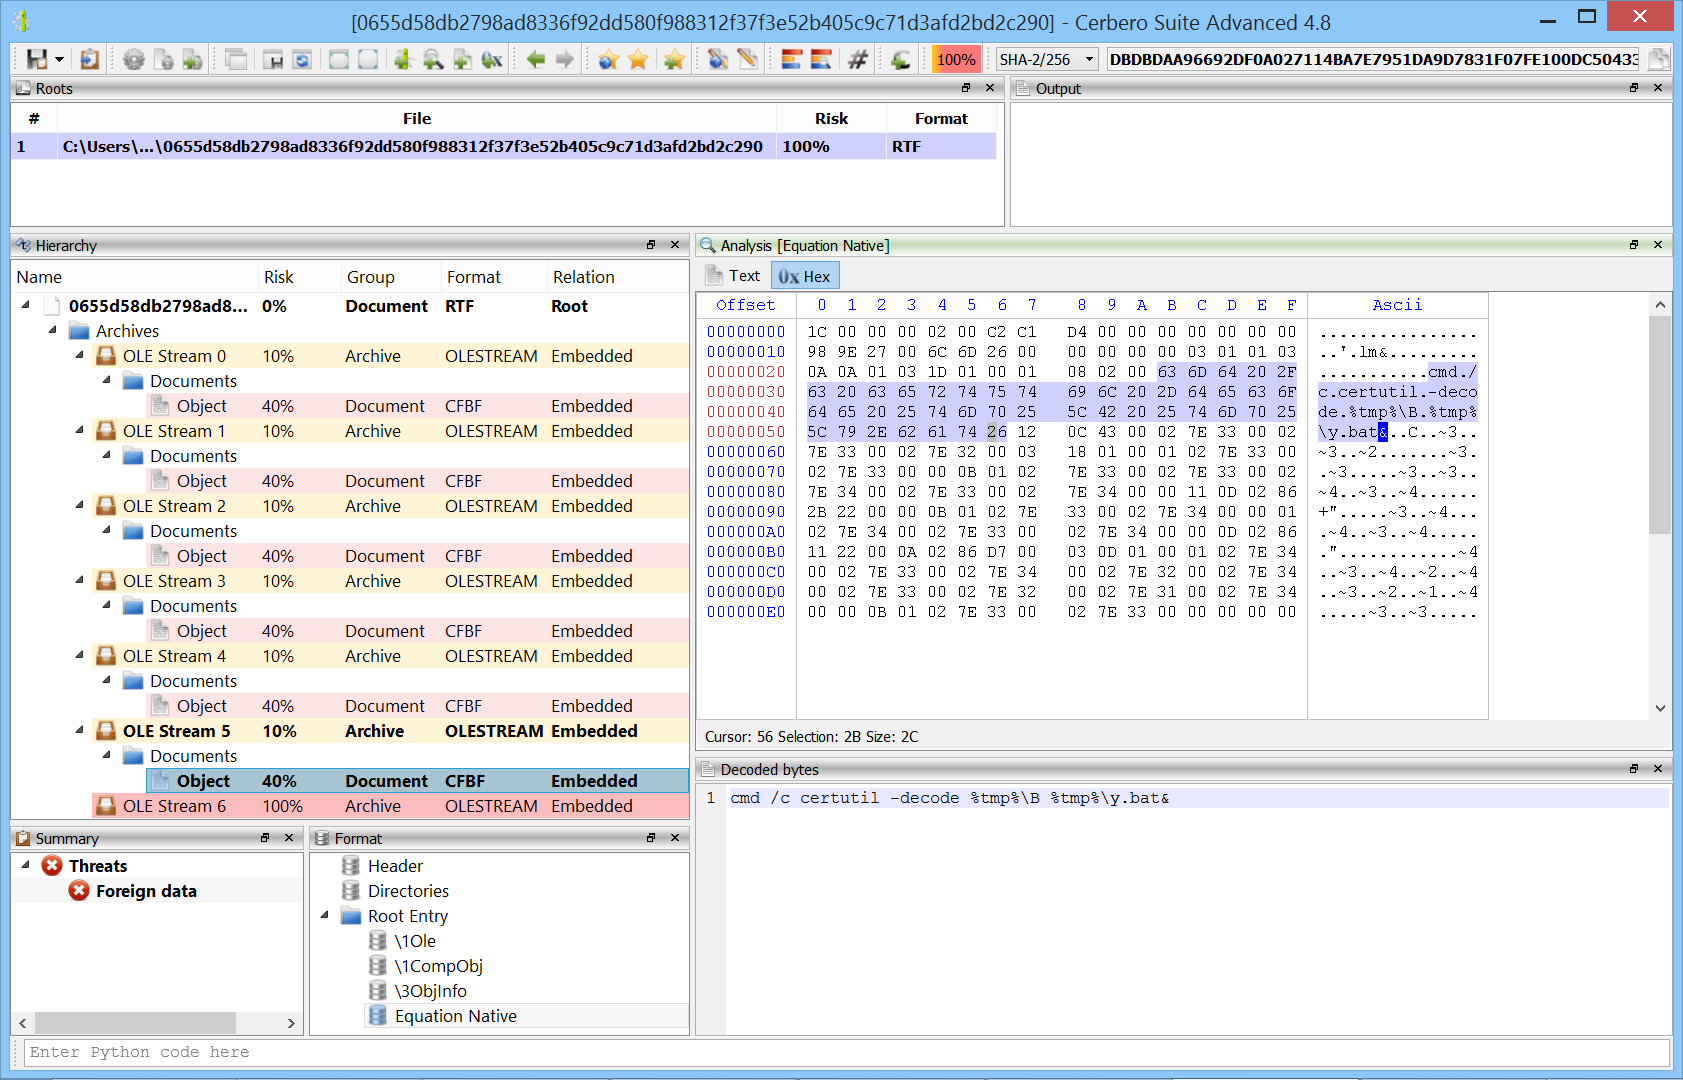
The main news of this release is that we rewrote our Rich-Text Format (RTF) parser to handle more anti-malware tricks and we exposed the entire parser to Python.

We have also updated the YARA engine to its latest version and fixed a bug in the ELF Carbon loader.

This is the complete list of news:

– improved RTF parsing
– improved JBIG2 decoding
– various improvements
– exposed RTF classes to Python
– updated YARA to 4.1.1
– fixed bug in Carbon ELF loader
– fixed some bugs

Happy hacking!

Cerbero Suite 4.7 is out!

This version of Cerbero Suite comes with a variety of improvements:

  • We have greatly improved macOS support and squashed all the bugs we could find.
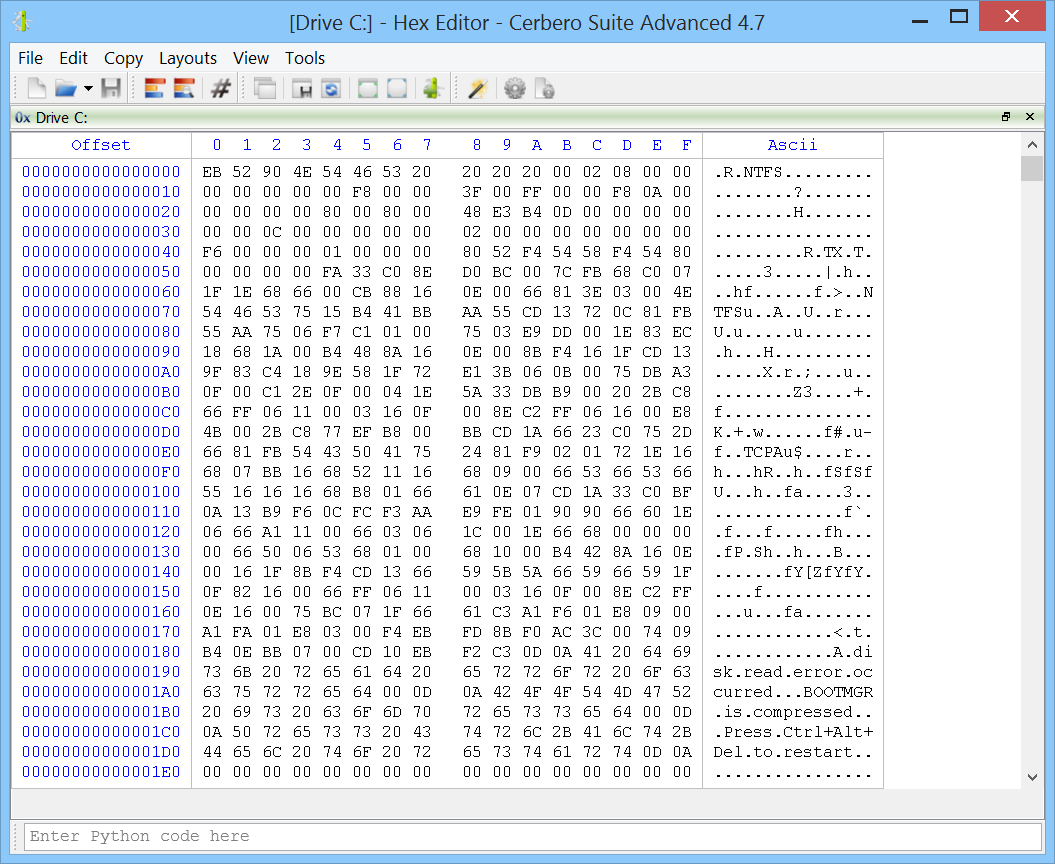
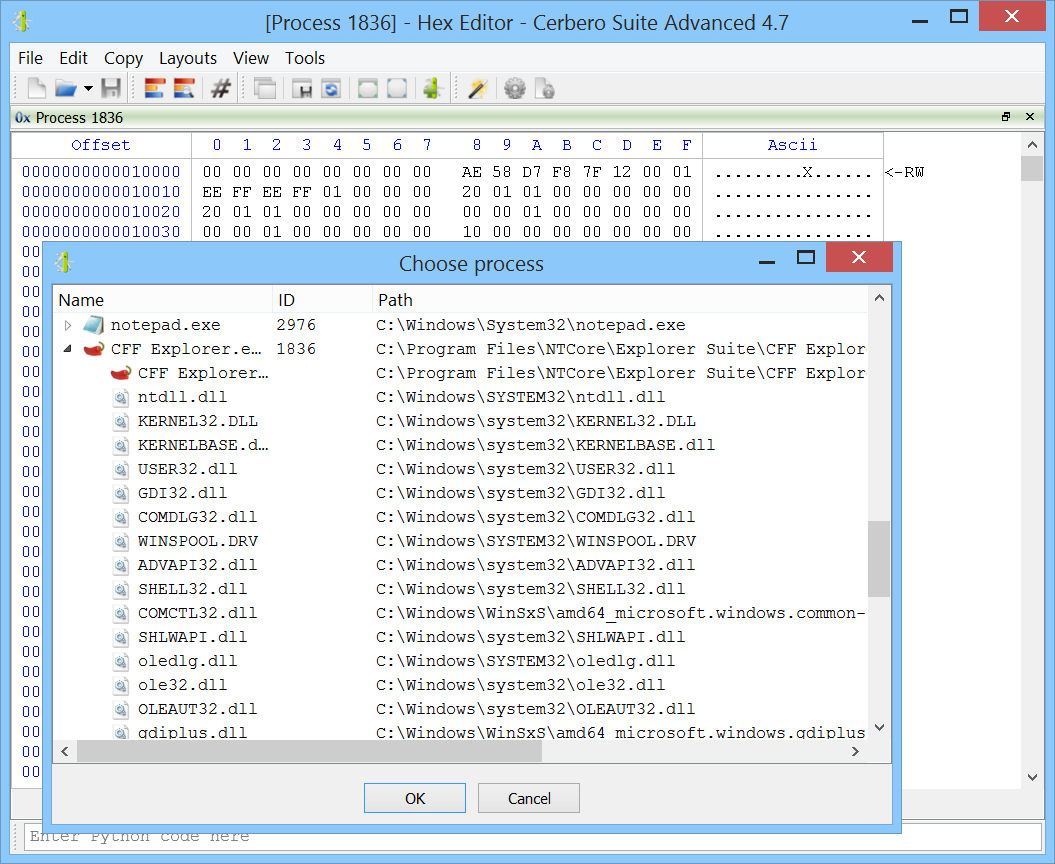
  • We have improved the hex editor: it can now open folders and on Windows it can edit logical drives, physical disks and the memory of processes.
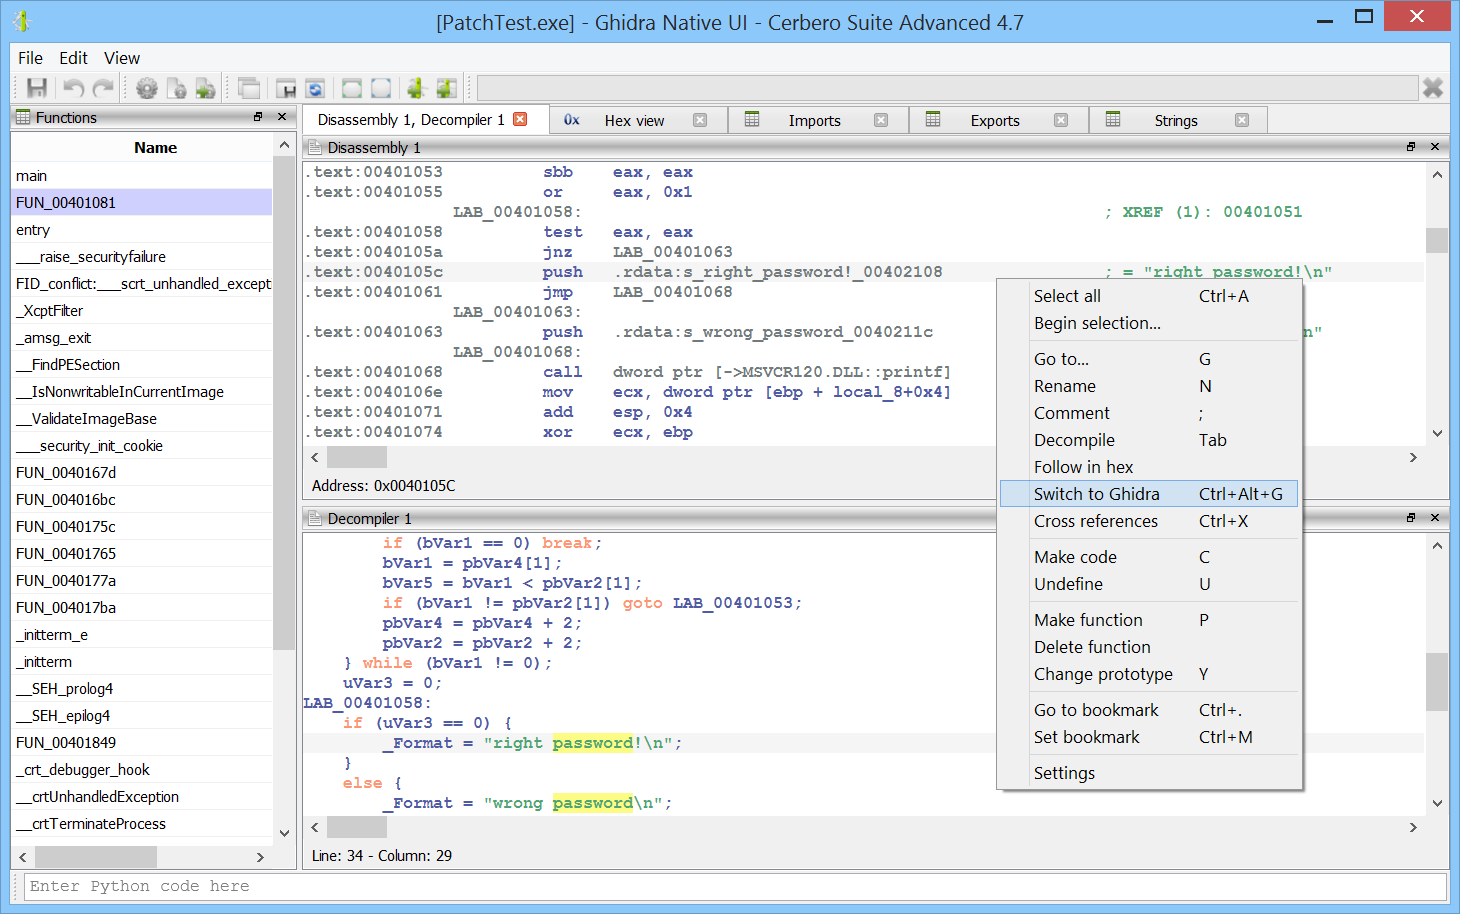
  • We have further improved the native UI for Ghidra.
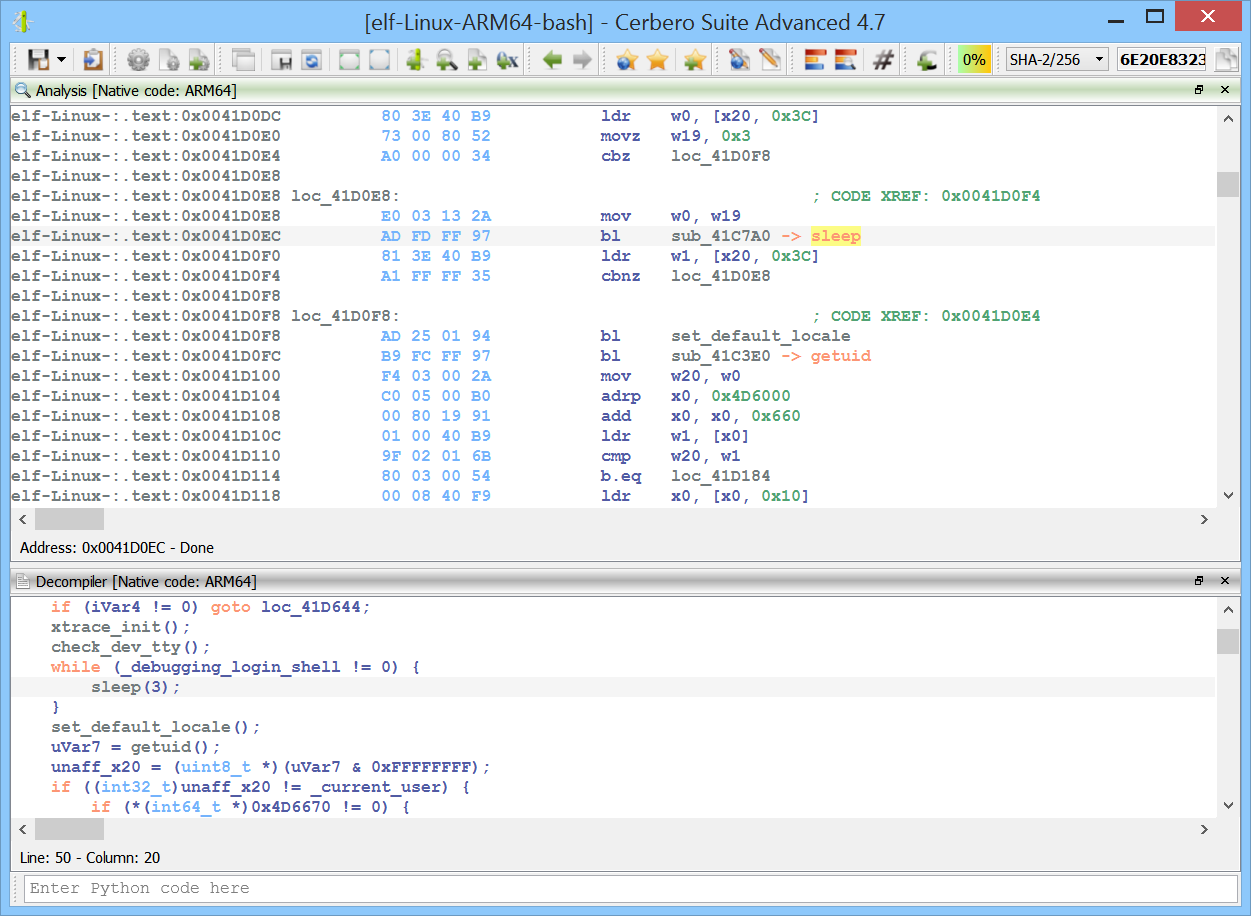
  • We have improved the ARM64 support in our Carbon disassembler.
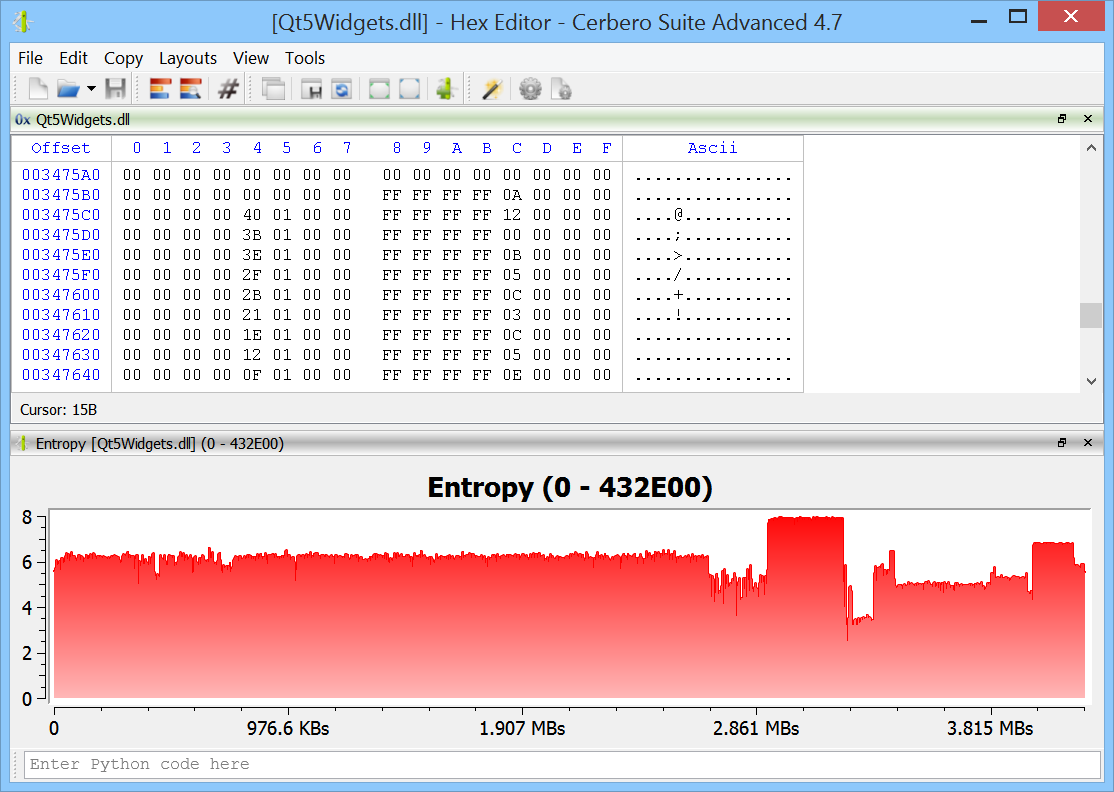
  • We have improved the entropy view.
  • We have improved system integration on Windows and macOS and theme support.

This is the full list of news for version 4.7:

added open folder to hex editor
added open drive/disk to hex editor on Windows
added open process to hex editor on Windows
added system settings
improved native Ghidra UI
improved ARM64 disassembly
improved entropy view
– small improvements to the GZ format support
improved theme support
fixed Ghidra Native UI execution on macOS
fixed UI glitches on macOS
– fixed some bugs

Hex Editor

It is now possible to open an entire folder in the hex editor, either by context menu, command line or UI.

Furthermore, on Windows it is also possible to edit logical drives, physical disks and the memory of processes.

Logical drives:

Physical disks:

Processes:

Improved native UI for Ghidra

Now, when launching the native UI for Ghidra, the Java UI is automatically minimized (configurable from the settings). You can create and delete functions, and we try to keep the function list view updated without having to do a manual refresh. You can switch back to the Java UI from the native UI and you can also launch an additional native UI directly from the native UI.

Improved Carbon ARM64 support

We have improved ARM64 support in our Carbon disassembler in order to recognize additional multi-instruction jump patterns.

Improved entropy view

We have improved our entropy view making it dependent from the parent view and enabling clicks on it. When you click somewhere on the plot it will bring you to the point in the hex editor of the entropy you want to inspect.

System Settings

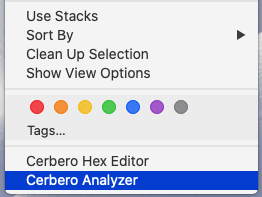
On both Windows and macOS it’s now possible to configure the integration of Cerbero Suite with the Explorer/Finder context menu.

Up until now, on Windows it was possible to configure the integration with Explorer only during the setup and not at a granular level.

Windows:

macOS:

You can now access the tools of Cerbero Suite directly from the context menu of Finder:

Improved theme support

Since on macOS the native system style may result in cluttered UIs, we have introduced an additional theme called “Fusion”. It comes with the same colors as the default theme, but with a different style for widgets.

Default theme on macOS:

Fusion theme:

If we see that our users prefer this theme, we might make it the default one on macOS.

Improved macOS support

Apart from adding system integration and improving theme support for macOS, we have also squashed all the macOS bugs we could find. We fixed some UI glitches and a bug which affected the launch of the native Ghidra UI on macOS. The UI experience on macOS should be a smooth one now!

Cerbero Suite 4.6 is out!

This is the complete list of news for version 4.6:

– added XLSX/XLSM format support
– added formula view to spreadsheet workspace
– added export table as text action
+ improved Silicon Excel Emulator
+ updated Sleigh decompiler

In order to demonstrate the use of the newly introduced formula view, here is a 50-seconds analysis of an obfuscated XLSX Excel malware:

Happy hacking!