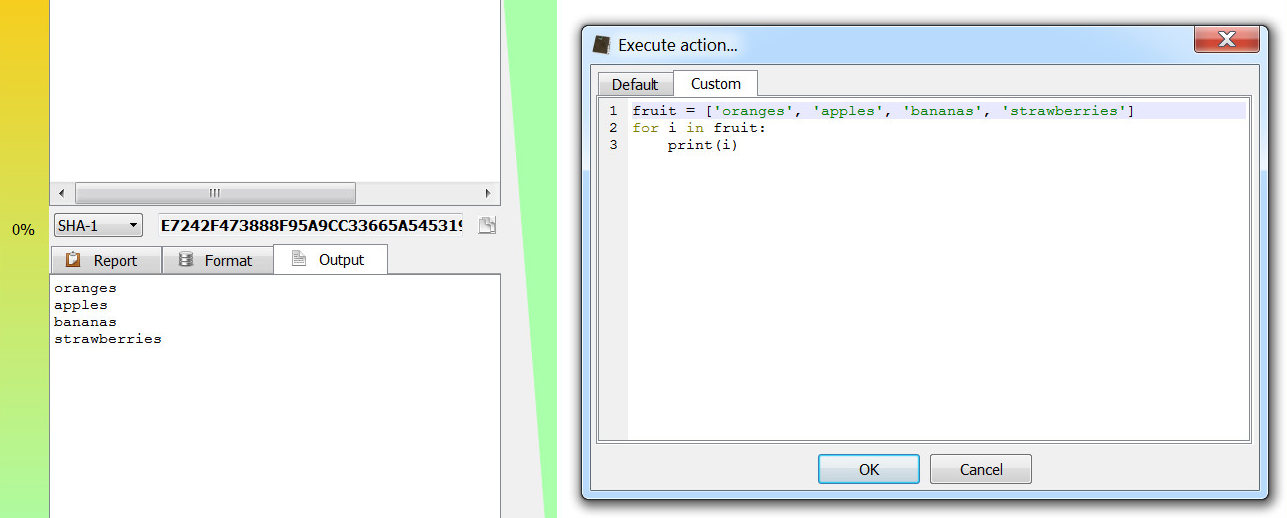
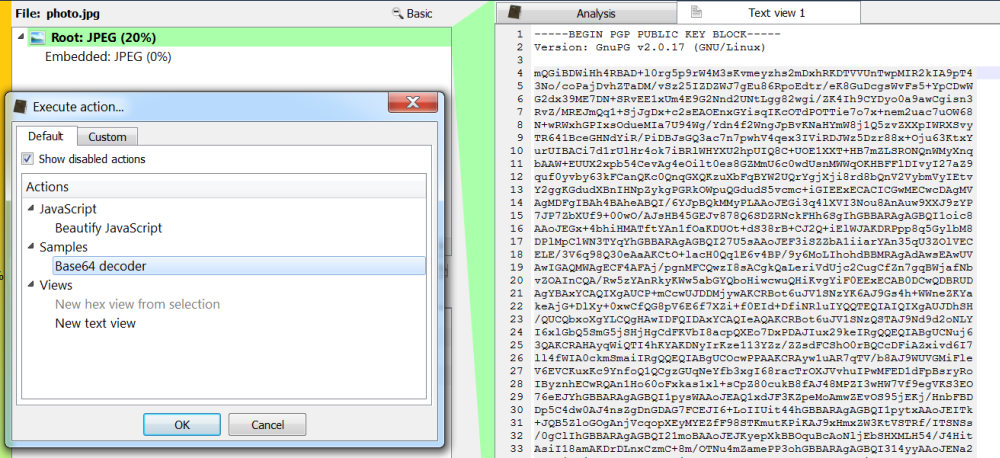
In the upcoming release of the Profiler (0.7.4) actions and scripts have a way to ask the user for parameters and settings: a new set of APIs featuring a property editor dialog.
Here’s the complete code of the sample followed by explanations.
import ProUI
xml = """
<section label="General">
<property id="0" label="Name" type="edit" value="object" />
<property id="1" label="Size" type="static" value="(0,0)">
<property id="2" label="Width" type="integer" value="0" signed="false" radix="10" align="0" maxbits="16" />
<property id="3" label="Height" type="integer" value="0" signed="false" radix="10" align="0" maxbits="16" />
</property>
</section>
<section label="Options">
<property id="4" label="Word wrap" type="check" value="false" />
<property id="5" label="Syntax" type="combo" value="1">
<list>
<i>JavaScript</i>
<i>C++</i>
<i>Pascal</i>
</list>
</property>
</section>
<section label="Files">
<property id="6" label="Open file" type="open-file" value="C:\\test.txt" />
<property id="7" label="Save file" type="save-file" value="C:\\test2.txt" />
<property id="8" label="Select directory" type="open-directory" value="C:\\temp" />
</section>
<section label="Content">
<property id="9" label="Text" type="text">
This \tis a\nsample text
</property>
</section>
<section id="20" label="Numbers">
<property id="10" label="Base address" type="integer" value="401000" signed="false" radix="16" align="8" />
<property id="11" label="Char" type="integer" value="127" signed="true" radix="10" align="0" maxbits="8" />
</section>
"""
def UpdateSize(pe):
sz = "(" + str(pe.getValue(2)) + "," + str(pe.getValue(3)) + ")"
pe.setValue(1, sz)
def ParamsCallback(pe, id, userdata):
print("changed: " + str(id) + " value: " + str(pe.getValue(id)))
if id == ProUI.ProPropertyEditor.Init:
UpdateSize(pe)
elif id == 2 or id == 3:
UpdateSize(pe)
pe.setValue(0, "test2")
pe.setValue(5, 2)
pe.setValue(10, 0x2000)
elif id == 4:
b = pe.isVisible(20) == False
pe.setVisible(20, b)
if b == False:
pe.setErrors([6, 7])
else:
pe.clearErrors()
return True
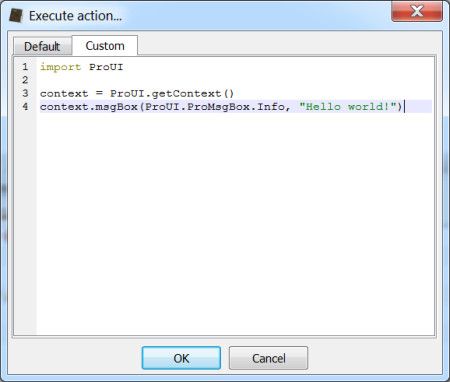
def TestAction():
context = ProUI.getContext()
params = context.askParams(xml, "Test", ParamsCallback, None)
print(params)
return 0
Let’s start with the action code.
def TestAction():
context = ProUI.getContext()
params = context.askParams(xml, "Test", ParamsCallback, None)
print(params)
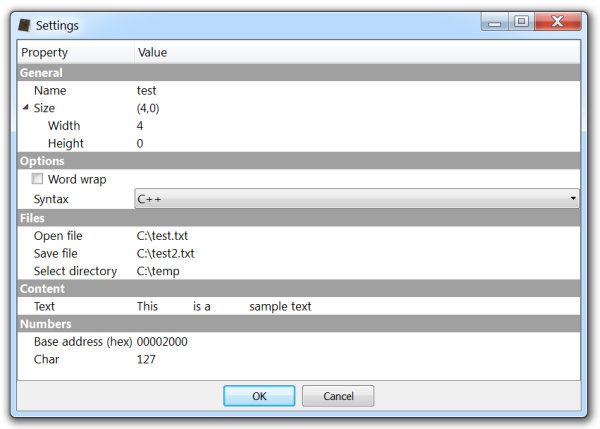
return 0 This code shows a property editor dialog specifying an XML string to create the dialog, a settings key (optional) and a callback (optional). The return value is a dictionary with the values of the properties with their id as key or None when the dialog is rejected.
{0: 'test', 1: '(4,0)', 2: 4, 3: 0, 4: False, 5: 1, 6: 'C:\\test.txt', 7: 'C:\\test2.txt', 8: 'C:\\temp', 9: 'This \tis a\nsample text', 10: 8192, 11: 127} I’ll talk later about what the settings key means. Let’s first understand the XML syntax.
The XML root tells the function to create a property editor with the (optional) title “Settings”.
<section label="General">
A section is created. Properties do not need a section as parent, but it might be visually more appealing to specify one. Child nodes of sections are properties. Properties can have other properties as child nodes, but not sections.
<property id="0" label="Name" type="edit" value="object" />
The first property being created is a single line edit field with the id of 0 and a value of “object”. id and type attributes are mandatory for properties. Sections may optionally specify an id as we’ll see later.
    <property id="1" label="Size" type="static" value="(0,0)">
        <property id="2" label="Width" type="integer" value="0" signed="false" radix="10" align="0" maxbits="16" />
        <property id="3" label="Height" type="integer" value="0" signed="false" radix="10" align="0" maxbits="16" />
    </property>
Here we have one static property with two integer child properties. A static property is a non-editable text which can only be set programmatically.
An integer property can specify various things, although the only mandatory attributes remain id and type. Most of the attributes are self-explanatory. align specifies the 0s which may prefix the number to obtain the desired alignment. For example, the number 1 with an alignment of 4 will be displayed as 0001. maxbits specifies the maximum number of bits the integer can measure (at the time it defaults to 10000).
  <section label="Options">
    <property id="4" label="Word wrap" type="check" value="false" />
Inside a new section a check property is specified.
    <property id="5" label="Syntax" type="combo" value="1">
      <list>
        <i>JavaScript</i>
        <i>C++</i>
        <i>Pascal</i>
      </list>
    </property>
Following there’s a combo property. The list of the combo is specified as the child node list and the default index is specified as the value attribute.
  <section label="Files">
    <property id="6" label="Open file" type="open-file" value="C:\test.txt" />
    <property id="7" label="Save file" type="save-file" value="C:\test2.txt" />
    <property id="8" label="Select directory" type="open-directory" value="C:\temp" />
  </section>
These three properties are related to file operations. When the user activates one, he will be able to open a file dialog to perform the requested operation.
  <section label="Content">
    <property id="9" label="Text" type="text">
        This \tis a\nsample text
    </property>
  </section>
The text property specifies a multi-line text field. When the user activates this property, a multi-line text input dialog is displayed in order to change the value.
  <section id="20" label="Numbers">
    <property id="10" label="Base address" type="integer" value="401000" signed="false" radix="16" align="8" />
    <property id="11" label="Char" type="integer" value="127" signed="true" radix="10" align="0" maxbits="8" />
  </section>
The properties in this section are not any different than those seen before, but it should be noted that in this case the section has an id attribute. Giving an id to a section makes it possible to set the visibility or the enabled/disabled state of the section and its children.
Let’s analyze the callback.
def UpdateSize(pe):
    sz = "(" + str(pe.getValue(2)) + "," + str(pe.getValue(3)) + ")"
    pe.setValue(1, sz)

def ParamsCallback(pe, id, userdata):
    print("changed: " + str(id) + " value: " + str(pe.getValue(id)))
    if id == ProUI.ProPropertyEditor.Init:
        UpdateSize(pe)
    elif id == 2 or id == 3:
        UpdateSize(pe)
        pe.setValue(0, "test2")
        pe.setValue(5, 2)
        pe.setValue(10, 0x2000)
    elif id == 4:
        b = pe.isVisible(20) == False
        pe.setVisible(20, b)
        if b == False:
            pe.setErrors([6, 7])
        else:
            pe.clearErrors()
    return True
ParamsCallback has three arguments. pe is the ProPropertyEditor class instance. id is the property being modified or the notification code (Init, Accept). userdata is the custom data specified in the askParams method, which in this case is None.
The UpdateSize function updates the value of the static property when one of its children has been changed. Other fields are changed for the purpose of demonstration.
pe.setVisible(20, b)
This line sets the visibility of the last section.
if b == False:
pe.setErrors([6, 7])
else:
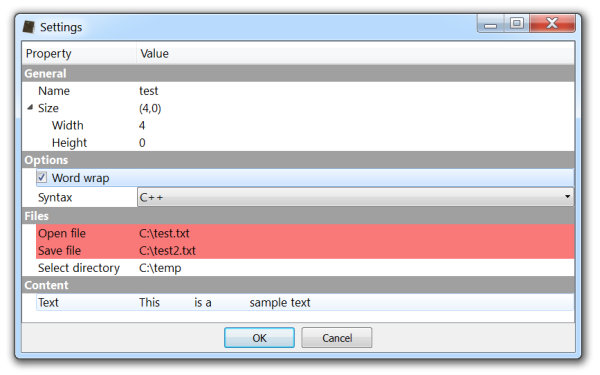
pe.clearErrors() The setErrors method allows to highlight properties in red. The idea is that a callback might perform some checks when being notified with the ProPropertyEditor.Accept code, highlight properties which are not accepted and return False to ask the user to enter correct values. Calling clearErrors or setErrors with an empty list will achieve the same result.
Here’s a screenshot with two highlighted properties and the last section hidden.
Let’s go back to askParams method. I haven’t yet explained the settings key (“Test”). This is an optional argument: it specifies if and where the values of the properties should be stored in case the dialog is accepted. The specified key name should be similar or equal to the name of the action to avoid conflicts. If the property dialog changes and the old settings must be discarded, it can be achieved by specifying a version at the end of the key name: “Test#1”. When the version number is omitted, it defaults to 0.
It should be noted that static and multi-line text properties are not saved automatically. The latter to avoid too large values being stored. However, it is still possible to save and restore these values through the Init and Accept notification codes by using the settings API.
# restore
ProUI.ProSettings.getValue("Test/mytext")
# save
ProUI.ProSettings.setValue("Test/mytext", text)
Key names starting with “_” are reserved and shouldn’t be used.
Finally, let’s see how actions can now optionally specify a configuration function.
[TestAction]
label = Test
file = testfile.py
context = any
config = TestConfig
config specifies the name of a function to be called inside of file.
This new set of APIs opens the door to many interesting customizations for actions, scripts and other components, and we will soon show you some of them. 🙂